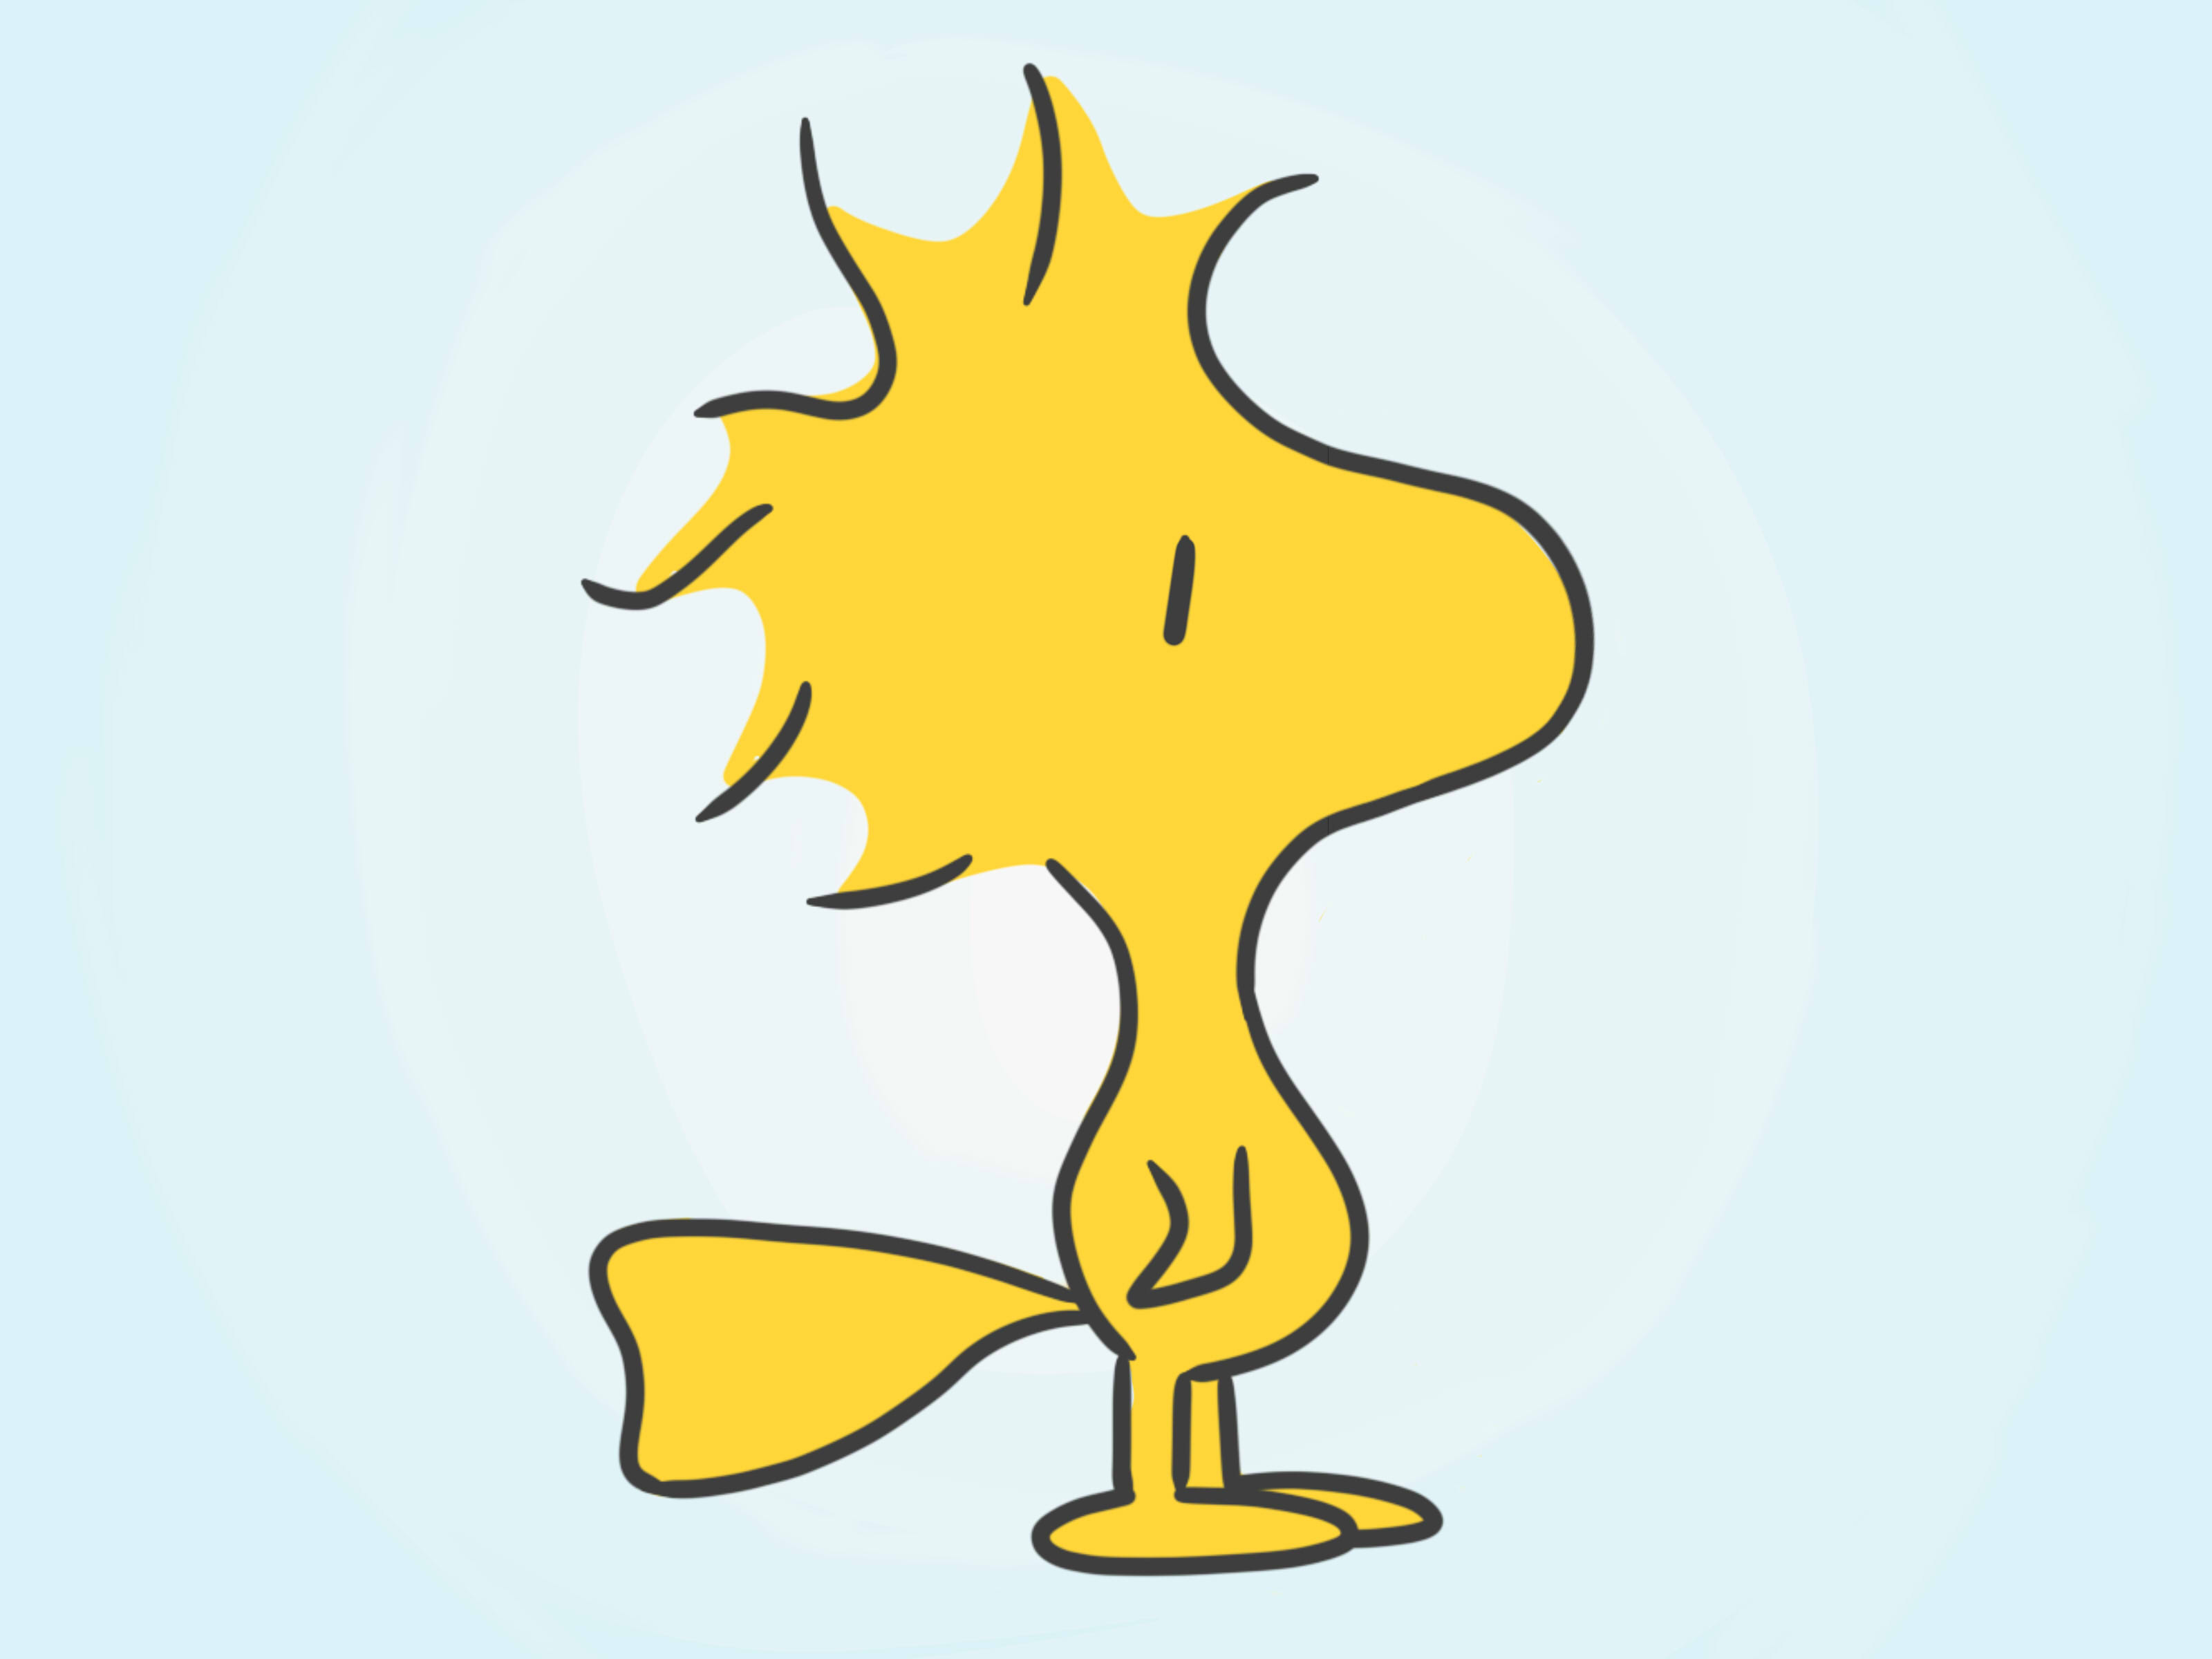

Woodstock may be one of the smallest characters in the Peanuts universe, but he carries enough personality to fill Snoopy’s entire doghouse. With his untidy crown of feathers, bean-shaped body, tiny wings, and feet that seem hilariously oversized for the job, he is also an excellent character for beginning cartoonists to practice.
In this step-by-step guide, you will learn how to draw Woodstock from Peanuts using five manageable stages. You do not need expensive art supplies, advanced anatomy knowledge, or the ability to communicate in Woodstock’s mysterious bird language. A pencil, some paper, and a willingness to draw a few gloriously imperfect curves will do nicely.
Why Woodstock Is a Great Character for Drawing Practice
Woodstock first appeared in the comic strip during the 1960s and received his familiar name in 1970, inspired by the famous 1969 music festival. Official Peanuts and Charles M. Schulz Museum materials describe him as Snoopy’s loyal feathered friend and emphasize how much character Schulz created with a remarkably small number of marks.
That economy of line is exactly what makes Woodstock useful for beginners. His design does not depend on realistic feathers, complicated shading, or perfect symmetry. Instead, it depends on a recognizable silhouette, expressive curves, and carefully placed details.
The simplicity is deceptive, however. A line that bends too sharply can make the beak look pinched. A body that is too wide can turn Woodstock into a yellow potato with eyebrows. Learning to notice those small differences helps develop observation, proportion, line control, and visual memoryall valuable skills for drawing other cartoon characters.
Peanuts remains culturally recognizable decades after Charles M. Schulz drew the final original strip, partly because its characters communicate complicated emotions through clean, economical artwork. Woodstock is an especially charming example: tiny in physical scale, enormous in comic presence.
Materials You Will Need
You can complete this easy Woodstock drawing with basic supplies:
- A sheet of plain drawing paper
- An HB or No. 2 pencil for the initial sketch
- A soft eraser
- A black fine-tip marker, felt-tip pen, or dark pencil
- A yellow colored pencil, crayon, or marker
- An official comic image or licensed character reference for observation
A regular pencil is often better than a mechanical pencil for the first attempt because it encourages softer, looser lines. Press lightly enough that your construction marks can be erased without leaving trenches in the paper. Woodstock is a bird, not an archaeological excavation.
Digital artists can follow the same process in a drawing application. Use one layer for the rough sketch, another for clean linework, and a third for color. Shape and smoothing tools can help, but avoid making every curve mechanically perfect. Woodstock’s handmade wobble is part of his appeal. Adobe and Autodesk drawing resources similarly recommend building illustrations from simple lines and shapes before refining the final marks.
Before You Begin: Study Woodstock’s Visual Language
Spend thirty seconds looking at the character before drawing. Do not count individual feathers as though you are preparing a scientific report. Instead, identify the major visual ideas:
- The head and beak form one long, rounded profile.
- The top feather flows naturally into the forehead and nose.
- The neck narrows before expanding into the belly.
- The back is a short opposing curve.
- The crown, rear feathers, wings, and tail create a lively silhouette.
- The two eyes are tiny, dark, vertical marks.
- The feet are flat, loose, and slightly exaggerated.
Cartoon drawing instruction commonly begins with a line of action and simple structural shapes rather than isolated details. Gesture exercises also encourage artists to capture movement quickly before polishing the drawing. That approach is especially helpful here because Woodstock should look energetic, not assembled from spare poultry parts.
How to Draw Woodstock from Peanuts in 5 Steps
Step 1: Draw the Flowing Head and Beak Line
Begin near the upper-middle area of your paper. Draw one loose, flowing line that starts with an upward feather, bends downward slightly, sweeps forward into Woodstock’s long rounded beak, and then curves back toward the neck.
Think of this line as a relaxed, decorative “S” rather than a geometric symbol. The top should feel light and feathery. The front should extend outward into a soft oval-like nose. The lower portion should curve inward to create the front of the neck.
Do not draw the head as a separate circle with a triangle attached. Woodstock’s profile works because the feather, forehead, and beak seem to belong to one continuous gesture. The Charles M. Schulz Museum’s instructional sheet begins with this sloping top feather and nose line for the same reason: it establishes both the character’s shape and attitude immediately.
Proportion check: The beak should project farther forward than the belly will project downward. When the nose is too short, the result may resemble a nervous chick rather than Woodstock.
Step 2: Add the Belly and Back
Continue the front neck line downward and let it expand into a small, rounded belly. Bring the curve inward near the bottom, leaving room for the legs.
Now return to the rear of the head. Draw a shorter curve that moves inward for the back of the neck, then outward slightly to form the back. Connect it toward the lower body without closing every space too tightly.
The body should be narrow and compact. Avoid drawing a large oval underneath the head. Woodstock’s design feels more like two opposing contour curves than a head placed on top of a standard bird torso.
Compare the negative space around the body. Is the front belly fuller than the back? Does the neck remain narrow? Does the body look small relative to the long head? Studying the empty space around a subject is often easier than staring directly at the line you are trying to correct.
Museum art resources describe contour as the outline that defines a shape, while line direction and curvature can communicate movement and energy. Those ideas explain why this stage matters so much: two simple curves determine whether Woodstock looks lively, stiff, balanced, or ready to fall into Snoopy’s water dish.
Step 3: Draw the Crown Feathers, Face, and Rear Plumage
Add two or three narrow curved feathers above the head. They should lean in slightly different directions rather than standing like identical fence posts. Variation creates the scruffy, spontaneous quality associated with Woodstock.
Behind the head, draw a small pointed arrangement based loosely on a “V.” Add several short feather marks extending from this central area. Keep the strokes uneven in length and direction. The silhouette should feel playful, not carefully groomed.
Place two tiny vertical ovals or thick dashes near the front half of the head. These are Woodstock’s eyes. Position them close together, with one sometimes slightly higher than the other. Their size is important: large round eyes may make the character look like a surprised owl.
You do not need to draw a detailed mouth. The beak shape, eye position, body lean, and surrounding motion marks do most of the emotional work. Small changes can create different moods:
- Eyes leaning forward suggest determination.
- A backward body tilt suggests confusion.
- A lowered feather crown can suggest irritation.
- An upright pose can make him appear proud or excited.
Art educators frequently use line, shape, and color to explore how simple visual choices communicate emotion. With Woodstock, expression comes from changing only a few marks, which makes him an excellent subject for that kind of experimentation.
Step 4: Add Wings, Tail, Legs, and Bird Feet
Draw Woodstock’s visible wing along the lower side of the body. Use two or three narrow feather loops or parallel curves. Keep the wing small enough that it reads as part of the torso rather than a second character clinging to him.
From the back of the body, extend a long, flat tail. It can resemble a narrow leaf or stretched teardrop. The tail generally points backward and slightly downward, balancing the long beak at the front.
Next, add two thin legs beneath the body. Keep them short and close together. Finish each leg with a flat bird foot made from a few loose horizontal strokes. The feet may overlap visually, and they do not need realistic toes.
Before continuing, check Woodstock’s balance. Imagine a vertical line dropping from the body to the ground. His feet should appear capable of supporting him, even if only under the highly flexible laws of cartoon physics.
For a walking pose, angle one leg forward and the other backward. For a surprised pose, widen the feet and lift the wings. For a flying Woodstock, remove the ground contact, extend the wings, and use curved motion lines. Quick gesture sketches are useful for testing these variations because they prioritize action over polished detail.
Step 5: Clean the Lines, Color Woodstock, and Add Personality
Once the proportions feel right, trace the final contours with a black pen or darker pencil. Do not trace every construction mark. Select only the lines that describe the finished character.
Vary the pressure slightly as you ink. A completely uniform outline may look sterile, while modest changes in thickness can make the character feel more animated. The National Gallery of Art notes that lines can be thick, thin, curved, diagonal, spiral, or zigzag and that these qualities can be expressive. Woodstock uses several of them in a very compact design.
Wait for the ink to dry before erasing the pencil. This is not an exciting instruction, but neither is discovering that your hand has transformed Woodstock into a gray weather system.
Color most of the body bright yellow. Leave the central “V” area among the rear head feathers uncolored when following the museum’s traditional example. Keep the eyes and outline black. Flat color generally suits the classic comic-strip appearance better than elaborate realistic shading.
Finish the scene with one optional detail:
- A speech balloon filled with Woodstock’s energetic bird marks
- A tiny backpack and hat for a Beagle Scout pose
- Snoopy’s doghouse beneath him
- A birdbath, nest, branch, or patch of grass
- Short action lines showing shaking, running, shouting, or flying
The official museum tutorial likewise suggests extending the drawing with a speech bubble or Beagle Scout accessories, turning a basic character study into a miniature story.
Common Woodstock Drawing Mistakes and How to Fix Them
The Head Looks Too Round
Woodstock’s head is not a simple circle. Redraw the top contour as a flowing line that continues directly into the long beak. Think “gesture first, shape second.”
The Character Looks Too Heavy
Shrink the body and narrow the neck. Woodstock should look light enough to be carried away by an enthusiastic sneeze.
The Feathers Look Mechanical
Change their lengths, spacing, and angles. Repeated identical marks create a comb rather than a feathered crown.
The Eyes Dominate the Face
Reduce them to tiny dark dashes. Their placement carries more expression than their size.
The Feet Look Anatomically Realistic
This is one of the rare occasions when additional anatomical accuracy can make the drawing less convincing. Simplify the toes into quick, flat strokes that match the comic style.
The Final Lines Look Stiff
Make several warm-up versions before inking. Cartoon instructors often recommend keeping preliminary work loose and saving polished details for the end. Your fifth attempt may have more life than a carefully labored first attempt.
Easy Ways to Practice After Finishing the Tutorial
Drawing Woodstock once teaches the construction. Drawing him in several moods teaches character design. Divide a page into six small boxes and create a different version in each one:
- Woodstock standing proudly
- Woodstock running late
- Woodstock arguing with Snoopy
- Woodstock asleep on the doghouse
- Woodstock wearing a winter hat
- Woodstock attempting to carry something absurdly large
Keep each sketch under two minutes. Fast repetition prevents perfectionism and helps you remember the essential silhouette. You can also draw the same pose at three sizes. A tiny thumbnail tests readability, a medium sketch tests proportion, and a large version exposes every uncertain curve with the subtlety of a marching band.
A Beginner’s Drawing Experience: What the Practice Session Usually Feels Like
The first attempt at drawing Woodstock often begins with unreasonable confidence. The character appears to contain only a few lines, so the pencil approaches the paper with the swagger of someone who has already mentally framed the finished masterpiece. Twenty seconds later, the page may contain something resembling a banana arguing with a feather duster.
That awkward first sketch is useful. It reveals that simple cartoon characters are not necessarily effortless; they are efficient. Every line has a job. The curve across the top establishes the feather, forehead, beak, and direction of the pose. The opposing curves of the torso establish body size and balance. The eyes occupy almost no space, yet moving them a few millimeters can change the expression completely.
A productive session usually improves when the artist stops trying to manufacture one perfect drawing. Instead, make three small versions. In the first, focus only on the long head contour. In the second, compare the head length with the tiny body. In the third, add the feathers, feet, and tail. This approach turns frustration into a sequence of specific observations.
One common experience is that the rough pencil sketch feels lively, but the inked version becomes stiff. This happens because the hand slows down and tries to correct every wobble. A better method is to trace the final drawing with a deliberate but continuous motion. Pause between major sections, not every few millimeters. Woodstock benefits from confident curves, even when they are not mathematically perfect.
Coloring produces another useful surprise. Yellow makes proportion problems easier to notice. A body that seemed acceptably narrow in pencil may suddenly look inflated after it is filled. Instead of treating this as failure, compare the colored silhouette with the reference and mark one adjustment for the next drawing. Perhaps the belly should be smaller, the nose longer, or the tail flatter.
The most enjoyable part of the practice session often arrives after the formal tutorial is finished. Once the basic construction becomes familiar, small experiments begin to work. Tilting the body creates nervousness. Raising the crown feathers creates alarm. Extending the wings creates an argument that requires no readable dialogue. A backpack instantly suggests a Beagle Scout adventure. A single leaf held above the head can become an umbrella with questionable engineering.
By the end of the session, the page may contain several Woodstocks rather than one pristine drawing. Some will look sleepy, some furious, and at least one may appear to have reconsidered the entire concept of flight. Together, however, they show real progress. The goal is not to reproduce a printed image with mechanical precision. The goal is to understand how economical lines create a recognizable personality and then use that understanding with increasing confidence.
That is the larger lesson hidden inside this tiny yellow bird: good cartooning depends less on adding information than on choosing the right information. When a handful of curves can communicate movement, mood, friendship, and comic timing, every mark mattersand every imperfect attempt teaches you where the next one should go.
Conclusion
Learning how to draw Woodstock from Peanuts becomes much easier when you treat him as a flowing silhouette rather than a collection of separate bird parts. Begin with the long head-and-beak curve, shape the compact body, add his unruly feathers, finish the wings and feet, and then apply clean black lines with flat yellow color.
Practice the five steps several times instead of overworking one sketch. Before long, you will be able to draw Woodstock standing, flying, complaining, camping, or holding an intense conversation that only Snoopy can translate.
Note: This independent, fan-made tutorial is intended for personal drawing practice and art education. Woodstock, Snoopy, Peanuts, and related characters are trademarks and copyrighted properties of their respective owners.