
Decorative candles are the craft-world equivalent of a tiny black dress: simple, useful, and surprisingly easy to dress up. A plain jar of wax can become a cozy centerpiece, a handmade gift, a seasonal decoration, or the reason your bathroom suddenly looks like it belongs in a boutique hotel. The best part? You do not need a factory, a chemistry degree, or a mysterious “artisan aura” to make one. You need the right wax, the right wick, safe materials, and a little patience while everything cools.
This guide walks you through how to make decorative candles in 13 practical steps, from choosing wax and containers to adding color, scent, layers, labels, and finishing touches. The focus is not only on making candles that look lovely on a shelf, but also on making candles that burn properly and safely. Because yes, glittery chaos may be pretty, but it should not turn into a tiny living-room bonfire.
What Are Decorative Candles?
Decorative candles are candles designed with extra visual appeal. They may include colored wax, layered designs, shaped molds, textured tops, embedded wax shapes, pressed designs on the outside of the container, or carefully chosen jars that match a room’s style. Some are meant to be burned, while others are mainly display pieces. The key difference is intention: decorative candles are both functional and beautiful.
Popular styles include soy container candles, beeswax tapers, molded pillar candles, marbled candles, ombré candles, floral-inspired candles, wax melts, and candles poured into vintage teacups, tins, ceramic vessels, or modern glass jars. For beginners, container candles are the easiest and safest place to start because the jar supports the wax and keeps the project tidy.
Before You Start: Candle-Making Safety Basics
Candle making is a cozy craft, but melted wax is hot, fragrance oils are concentrated, and finished candles involve open flames. Work on a stable, heat-safe surface and keep children and pets away from your workspace. Use a double boiler or a wax melter instead of placing wax directly over high heat. Keep paper towels, dried flowers, packaging, and curtains far away from hot wax and lit test candles.
When choosing decorative elements, be careful. Dried botanicals, cinnamon sticks, coffee beans, paper, loose glitter, and plastic pieces can become fire hazards if they are placed close to the wick. If you love the botanical look, decorate the outside of the container, use a candle topper only when the candle is not lit, or keep pressed elements sealed safely against the glass and far from the flame path. Beauty is great; flammable confetti is less great.
Supplies You Need to Make Decorative Candles
Gather everything before melting wax. Candle making moves slowly at first, then suddenly you are holding a pitcher of hot wax and wondering where your wick stickers went. Avoid the panic ballet by preparing ahead.
Basic Supplies
- Candle wax, such as soy wax, beeswax, coconut-soy blend, or paraffin blend
- Pre-tabbed candle wicks sized for your container diameter
- Heat-safe candle containers or candle molds
- Wick stickers, hot glue, or wick-setting tabs
- Wick centering tool, chopsticks, pencils, or clothespins
- Digital kitchen scale
- Thermometer
- Double boiler or wax melting pitcher
- Fragrance oil made for candles
- Candle dye chips, liquid dye, mica for surface decoration, or color blocks
- Stirring spoon or silicone spatula
- Labels, ribbons, tags, or other exterior decorations
Best Wax for Decorative Candles
Soy wax is beginner-friendly and popular for container candles because it is easy to melt, accepts fragrance well, and has a clean, creamy look. Beeswax has a naturally golden color and light honey scent, making it ideal for elegant, natural-style candles. Paraffin and paraffin blends can hold vivid colors and strong fragrance, which makes them useful for bold decorative candles. Coconut-soy blends are often used for smooth tops and luxury-style container candles.
The best wax depends on your goal. For smooth jar candles, choose soy or coconut-soy wax. For freestanding shapes, choose pillar wax or a wax blend designed for molds. For rustic, natural candles, beeswax is beautiful. Do not use random household wax unless you know how it behaves when burned.
How to Make Decorative Candles: 13 Steps
Step 1: Choose Your Candle Style
Start by deciding what kind of decorative candle you want to make. A beginner-friendly project might be a scented soy candle in a glass jar with a colored wax layer and a custom label. A more advanced project could be a molded pillar candle, a twisted taper, or a marbled candle with multiple colors.
If this is your first candle, choose a container candle. It is easier to control, easier to decorate, and less likely to make your kitchen look like a wax volcano rehearsal.
Step 2: Pick a Heat-Safe Container or Mold
Use containers designed for candle making or thick, heat-safe vessels that can handle temperature changes. Glass jars, metal tins, ceramic cups, and candle-safe tumblers are common choices. Avoid thin glass, cracked containers, plastic, or anything with a narrow opening that may trap heat.
For decorative candles, the container is part of the design. Amber jars create a warm, vintage look. Clear glass shows off layers, pressed designs, and colored wax. Matte ceramic containers feel modern and gift-worthy. A beautiful vessel can make even a simple cream-colored candle look expensive.
Step 3: Select the Correct Wick
The wick controls how the candle burns. A wick that is too small can cause tunneling, where only the center melts. A wick that is too large can create a high flame, excess soot, or an overheated container. Wick choice depends on the container diameter, wax type, fragrance load, dye, and candle shape.
Use a wick guide from your wick supplier as a starting point, then test. If your jar is wide, you may need a larger wick or two smaller wicks. For most beginner container candles, a cotton or paper-core wick designed for soy wax is a reliable option.
Step 4: Measure Your Wax
Weigh your wax with a digital scale. A common estimate is to use the container’s fluid ounce capacity as a rough guide, but weighing is more accurate. Wax weighs less than water, so an 8-ounce jar usually does not need 8 ounces of wax by weight. Many candle makers multiply the container’s fluid ounces by about 0.80 to estimate wax weight.
For example, if your container holds 10 fluid ounces, you may need around 8 ounces of wax. Make a small test batch first and write down your results. Candle making rewards note-takers. It mildly punishes “I’ll remember this later” people.
Step 5: Prepare and Center the Wick
Attach the wick tab to the bottom center of the container using a wick sticker or a small dot of hot glue. Press firmly so it does not move when you pour the wax. Then use a wick centering bar, pencil, chopstick, or clothespin to keep the wick straight.
A centered wick is not just about appearance. It helps the candle burn evenly and keeps the flame away from the container wall. If the wick drifts to the side, the candle may melt unevenly or heat the glass too much in one area.
Step 6: Melt the Wax Slowly
Melt the wax using a double boiler or wax melting pitcher. Heat it slowly and stir occasionally. Most soy waxes are melted and prepared around 170°F to 185°F, but always check the wax manufacturer’s instructions. Beeswax usually needs a higher melting temperature than soy, while some blends have their own recommended ranges.
Do not leave melting wax unattended. Wax can overheat, discolor, or become dangerous if handled carelessly. Gentle heat gives you more control and a better finished candle.
Step 7: Add Candle Dye
Once the wax is fully melted, add candle dye a little at a time. Use dye chips, blocks, or liquid dye made for candles. Food coloring does not work well because it is water-based and will not blend properly with wax. Crayons are also not ideal because they can clog the wick and affect burning.
For decorative candles, start light. Wax often looks darker when melted and lighter when solid. Test a drop of colored wax on a white plate or piece of parchment and let it cool to preview the final shade. For a soft spa look, use pale green, cream, blush, or beige. For holiday candles, try deep red, forest green, gold, navy, or snow-white layers.
Step 8: Add Fragrance Oil
Use fragrance oil formulated for candle making, and measure it by weight. A common beginner fragrance load is about 6% of the wax weight, though many waxes can hold 6% to 10%. Too much fragrance can cause sweating, poor burning, or separation, so more is not always better.
Many soy wax recipes add fragrance around 175°F to 185°F, then stir gently for about two minutes to help the fragrance bind with the wax. Follow the recommendations for your specific wax and fragrance. Essential oils can be used only if they are candle-safe and tested for heat performance.
Step 9: Pour the First Layer
Let the wax cool to the recommended pouring temperature for your wax. For many soy container candles, this may be around 130°F to 145°F, though some blends require higher or lower temperatures. Pour slowly into the prepared container, keeping the wick centered.
If you are making a single-color candle, fill the container to the desired level and leave room at the top. If you are making layered decorative candles, pour only the first layer. Let it cool until it is firm and opaque before adding the next layer.
Step 10: Create Decorative Layers, Swirls, or Designs
Layered candles are one of the easiest ways to make a homemade candle look polished. Pour one color, let it set, then pour another color on top. For an ombré effect, use the same dye color in different strengths. For a beach-inspired candle, use sandy beige, ocean blue, and creamy white.
For a marbled effect, pour mostly plain wax, then swirl in a tiny amount of colored wax with a skewer. Do not overmix or the marble will disappear into one muddy color. If you want decorative wax shapes, make them separately in silicone molds and place them on top only if they are made of candle wax and positioned safely away from the wick.
Step 11: Add Safe Decorative Touches
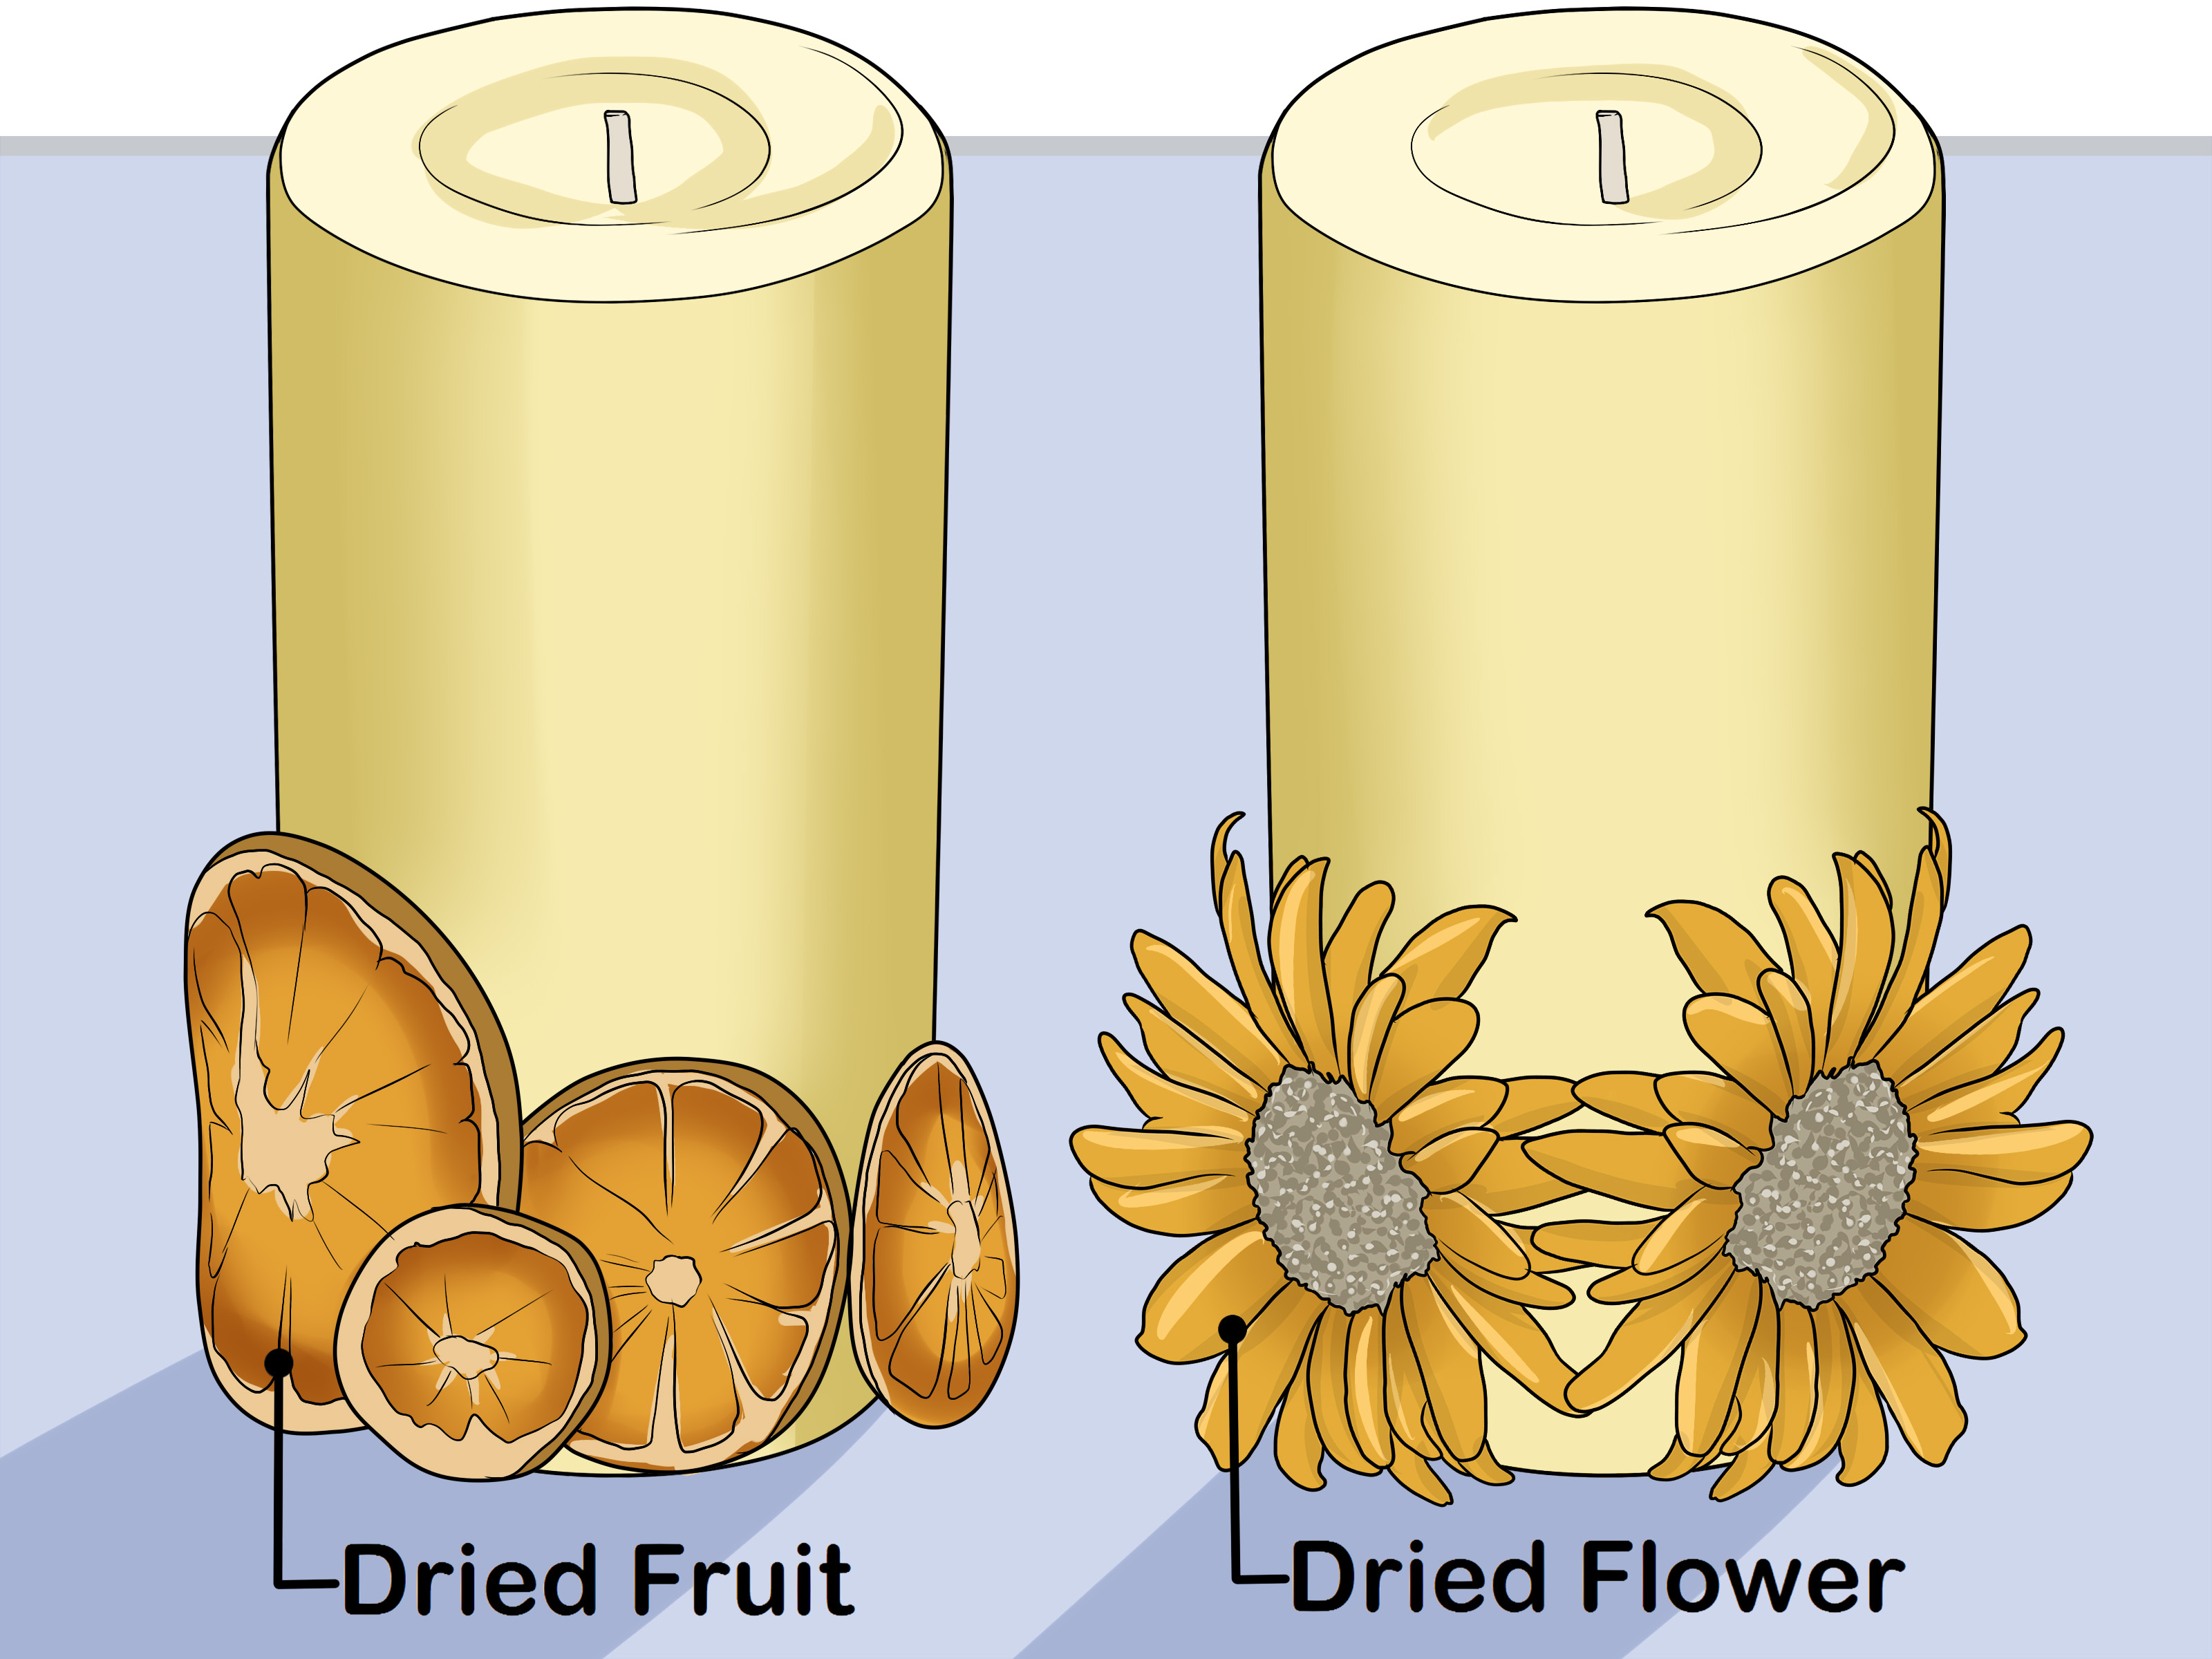
The safest decorative touches are usually outside the burn area. Add a label, ribbon, stamped tag, painted lid, twine wrap, wax seal, or decorative box. You can also decorate the outside of a glass jar with pressed flowers, stickers, dried citrus designs, or paint, as long as those materials do not come near the flame.
If you place anything on top of the candle, it should be nonflammable, removable, or clearly intended for display only. Never bury large dried flowers, paper decorations, crystals, or plastic charms near the wick of a candle that will be lit. If you are making a display-only candle, label it clearly so no one treats it like a regular candle.
Step 12: Let the Candle Cool and Cure
Allow the candle to cool slowly at room temperature, away from drafts. Moving it too soon can create cracks, sinkholes, or uneven tops. If the surface dips around the wick, you can use a heat gun carefully to smooth the top or pour a thin second layer.
After cooling, let the candle cure before burning. Soy candles often benefit from several days to two weeks of curing, depending on the wax and fragrance. Curing allows the wax and scent to settle, improving the candle’s scent throw and burn quality.
Step 13: Trim, Label, and Test Burn
Trim the wick to about 1/4 inch before lighting. Add a label with the fragrance name, wax type, and candle safety instructions. If you are giving or selling candles, include warnings such as “Burn within sight,” “Keep away from flammable objects,” and “Keep away from children and pets.”
Test burn your candle before making a large batch. Watch the melt pool, flame height, scent throw, and container temperature. A good candle should melt evenly across the surface after a proper first burn, usually about one hour per inch of candle diameter. If the candle tunnels, soot appears, or the jar gets too hot, adjust your wick, wax, fragrance load, or container choice.
Decorative Candle Ideas for Beginners
Minimalist Soy Jar Candle
Use white soy wax, a clean cotton wick, and a matte black or kraft paper label. Choose a soft scent like vanilla, sandalwood, lavender, or clean linen. This style works well for gifts, small shops, and modern home decor.
Layered Sunset Candle
Create three layers using peach, coral, and pale yellow wax. Pour each layer after the previous one has cooled. Add a citrus or tropical fragrance for a candle that looks like vacation in a jar.
Botanical-Inspired Candle
Instead of putting dried flowers in the wax near the wick, decorate the outside of a clear jar with pressed flowers or a floral label. Use a fresh scent such as rose, herbal mint, chamomile, or jasmine. You get the garden-party look without inviting dried petals to tango with fire.
Holiday Tin Candle
Use small metal tins, festive labels, and seasonal fragrances like pine, cranberry, peppermint, gingerbread, or cinnamon vanilla. These make excellent party favors and stocking stuffers.
Common Candle-Making Mistakes to Avoid
One common mistake is using the wrong wick. Even a beautiful candle can burn poorly if the wick does not match the wax and container. Another mistake is adding too much fragrance oil. A candle should smell pleasant, not like it shouted perfume into the room with a megaphone.
Pouring wax too hot or too cold can also cause problems such as sinkholes, frosting, wet spots, rough tops, or poor glass adhesion. Some of these flaws are cosmetic, especially with soy wax, but good temperature control improves consistency. Finally, avoid unsafe decorations. If a material can catch fire, melt unpredictably, or block the wick, it does not belong near the flame.
How to Burn Decorative Candles Safely
Always trim the wick to 1/4 inch before lighting. Burn candles on a stable, heat-resistant surface and keep them away from curtains, books, bedding, plants, and decorations. Never leave a burning candle unattended. Keep candles away from drafts, fans, open windows, children, and pets.
For the first burn, let the wax melt across the full surface to help prevent tunneling. Do not burn most container candles for more than four hours at a time. Stop using a candle when about 1/2 inch of wax remains at the bottom. The final bit of wax is not worth overheating the container.
Extra Experience: What I Learned Making Decorative Candles at Home
The first time you make decorative candles, you may imagine a calm afternoon with soft music, clean counters, and perfect wax pours. Reality may include one missing thermometer, three crooked wicks, and a spoon you will accidentally dedicate to candle making forever. That is completely normal. Candle making is simple, but it is also precise. The best results come from treating it like a cozy craft with a tiny bit of kitchen science mixed in.
One helpful experience is to begin with the plainest candle possible before adding decorative extras. Make one simple soy candle in a jar with no dye and one fragrance. This gives you a baseline. You can see how your wax melts, how the wick burns, and how the fragrance performs. Once that candle works, add color. Then try layers. Then try labels, decorative lids, or exterior floral designs. Building skills one at a time prevents you from wondering which of seven creative choices caused the candle to misbehave.
Another lesson is that wick testing matters more than beginners expect. Two candles can use the same wax and fragrance but burn differently because the jar diameter changed. A slightly wider container may need a different wick. A heavy fragrance oil may affect the burn. A deep color can change performance too. Testing sounds boring until you avoid making twelve beautiful candles that tunnel like tiny wax caves.
Temperature also makes a big difference. If the wax is too hot when poured, it may shrink, dip, or create rough tops. If it is too cool, it may not adhere well to the glass or may set before the surface smooths out. Keep notes on melt temperature, fragrance temperature, pour temperature, room temperature, and cooling time. This may sound like overkill, but future you will be grateful. Future you enjoys not repeating mistakes.
For decorative designs, less is often more. A candle with one soft color, a centered wick, a smooth top, and a beautiful label usually looks more professional than a candle overloaded with glitter, botanicals, beads, and mystery sparkle. If you want a dramatic look, use the container and packaging to carry the style. A gold lid, a textured label, or a ribbon can transform a simple candle without affecting how it burns.
When making gifts, choose scents that are friendly and not too intense. Vanilla, lavender, citrus, amber, sandalwood, and clean cotton are safer bets than unusual blends. Label the candle clearly and include burning instructions. Handmade gifts feel more special when they are also practical and safe.
Finally, embrace imperfections. Soy wax frosting, tiny surface marks, or slight color variation can happen even when you do many things right. Handmade candles are not supposed to look like they rolled off a conveyor belt while wearing a tiny business suit. They should feel personal, warm, and thoughtfully made. With practice, your candles will become smoother, safer, prettier, and more consistent. And yes, your home will probably smell fantastic while you learn.
Conclusion
Making decorative candles is one of those crafts that feels fancy but becomes approachable once you break it into steps. Choose the right wax, match the wick to the container, control your temperatures, use candle-safe fragrance and dye, and decorate in ways that do not interfere with the flame. Start with simple container candles, then experiment with layers, colors, labels, and seasonal designs.
The real secret is testing. A decorative candle should not only look beautiful on a table; it should also burn evenly, smell pleasant, and remain safe from first light to final glow. Once you learn the basics, you can create candles for holidays, weddings, gifts, home decor, or even a small handmade business. Just remember: the best candle is pretty, practical, and not secretly plotting to scorch your coffee table.
Note: This article is written for general DIY education. Always follow the instructions provided by your wax, wick, fragrance, and container suppliers, and test candles carefully before gifting, selling, or regular use.