
PVC pipe is basically the craft world’s sleeper hit: cheap, lightweight, easy to cut, and weirdly good-looking once you
stop treating it like “plumbing stuff” and start treating it like “modern sculpture material.” With a little sanding and paint,
PVC can go from “under-the-sink vibes” to “Is that from a gallery in SoHo?” in an afternoon.
This guide walks you through designing, building, finishing, and hanging DIY PVC pipe indoor artplus a few project
ideas that don’t require an engineering degree or a trust fund. We’ll keep it practical, we’ll keep it safe, and yes,
we’ll keep it fun (because if you’re going to inhale the aroma of spray paint, you deserve a good time).
Why PVC Pipe Works Surprisingly Well for Indoor Art
PVC is consistent. That’s the big advantage. Wood grain varies, metal needs special tools, and clay has opinions.
PVC just… shows up and behaves. It’s also:
- Budget-friendly (especially compared to wood panels, metal stock, or large-format canvases).
- Lightweight, which makes wall mounting easier and renter-friendly options more realistic.
- Modular: rings, elbows, tees, couplersPVC is basically adult building blocks.
- Paintable with proper prep, letting you match your décor instead of fighting it.
- Easy to shape with heat (carefully), opening the door to curves and sculptural forms.
Pick a Style: 6 DIY PVC Pipe Indoor Art Ideas
Before you buy anything, decide what kind of piece you’re making. Here are a few styles that work great indoors:
1) Ring Mosaic Wall Art (a.k.a. “PVC Pipe Slices”)
Cut PVC into rings, arrange them like bubbles or honeycomb, glue to a backing board, then paint the whole thing.
It’s modern, textured, and looks expensive in a “this was definitely curated” way.
2) Geometric Grid Sculpture
Use straight segments plus fittings (elbows/tees) to create a shallow 3D grid. Paint it matte black for “industrial,”
white for “minimal,” or metallic for “I own at least one turtleneck.”
3) Bent-PVC Wave or Arch Sculpture
Heat and bend longer sections to form waves, arches, or loops. This can be freestanding or wall-mounted and
looks especially good with soft lighting nearby.
4) Faux Bamboo “Texture Art”
Paint PVC with layered tones and dry-brushing to mimic bamboo or aged wood. This is a great option if your room
leans coastal, boho, or tropical.
5) Shadowbox Relief (PVC + Backing Depth)
Mount PVC elements inside a deep frame (or build a simple shadowbox). The cast shadows make it look more
complex than it isyour secret is safe with me.
6) Functional Art: Hooks, Mini Shelves, or LED Accent Pieces
A piece that holds keys, a tiny plant, or hides an LED strip behind it? That’s not just artthat’s art with benefits.
Materials and Tools
Materials
- PVC pipe (common sizes for art: 1/2″, 3/4″, 1″, 2″, 3″)
- PVC fittings (optional): elbows, tees, couplers, end caps
- Backing board (for wall art): plywood, MDF, or a sturdy craft panel
- Adhesive (choose based on your designdetails below)
- Primer for plastic (recommended for long-lasting paint adhesion)
- Paint: spray paint made for plastic, or spray + protective clear coat
- Hanging hardware: D-rings, sawtooth hangers, French cleat, or heavy-duty strips
Tools
- Measuring tape + marker
- Cutting tool: ratcheting PVC cutter, hacksaw, or miter saw
- Sandpaper (200–300 grit is a good “prints and scuffs” range; keep 120–150 for heavier shaping)
- Deburring tool or utility knife (for smoothing cut edges)
- Clamps (helpful for assemblies and gluing)
- Drop cloth / cardboard (spray paint zone)
- Safety gear: eye protection, gloves, and a respirator if you’re spraying indoors
Safety First (Because the Art Shouldn’t Come With Side Quests)
A few parts of this project involve chemicals and/or heat. Keep it simple:
- Ventilation matters: spray paint and PVC solvent cement fumes should be used outdoors or with strong airflow.
- Keep flames away: many cements/primers are flammable.
- Wear eye protection when cutting or sanding (PVC shavings are tiny and determined).
- If heating PVC: use a controlled heat source (like a heat gun), avoid direct flame, and don’t hover over it breathing deeply like it’s fresh-baked bread. It is not.
Step-by-Step: Make PVC Pipe Indoor Art (The Core Process)
Step 1: Design Your Piece (and Save Yourself Later)
Decide your final size based on where it will hang. Painter’s tape on the wall works great for visualizing the footprint.
Then sketch your concept or do a quick “mock layout” on the floor.
Pro move: Take a photo of your layout once you like it. That photo becomes your assembly map when your rings
inevitably roll away like they have places to be.
Step 2: Choose Pipe Size and Quantity
For ring mosaics, 2″ or 3″ pipe creates bold shapes that read well from across a room. For delicate grids, 1/2″–1″ looks cleaner.
Example math that actually helps: a 10-foot pipe is 120 inches long. If you cut 1-inch rings, you’ll get about 120 rings (minus blade thickness).
That’s enough to make a medium wall pieceespecially if you mix ring sizes.
Step 3: Cut PVC Cleanly
Mark your cut lines with a wraparound guide (a strip of paper works) so the cuts stay straight. Then choose your tool:
- Ratcheting cutter: fast and clean for smaller diameters.
- Hacksaw: budget-friendly; go slow and keep the blade square.
- Miter saw: best for repeat cuts (rings!)use eye/ear protection and secure the pipe.
After cutting, deburr the edges (utility knife, deburring tool, or sandpaper). Smooth edges look more professional and help paint lay evenly.
Step 4: Remove Printing and Prep the Surface
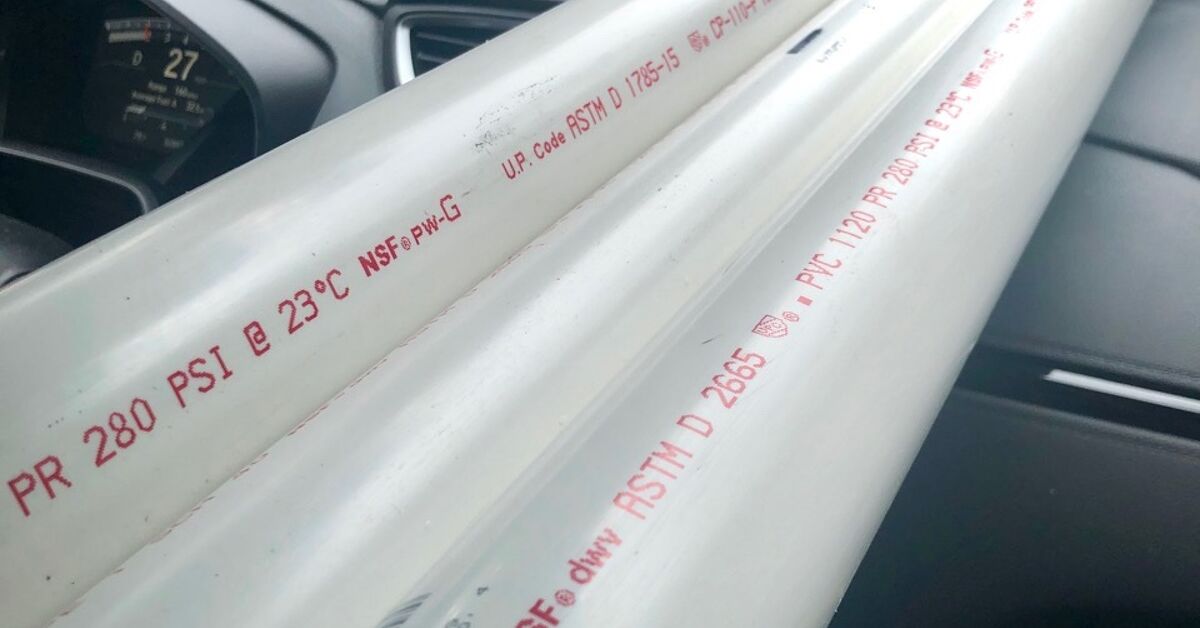
Most PVC has printed text. For art, that text is… not the vibe. Light sanding (often around 200–300 grit) removes markings and adds “tooth” for paint.
Then clean the surface. A mild detergent wash removes oils from handling. Let everything dry completely before priming or painting.
Step 5: Dry-Fit Your Layout
Lay everything out before committing to glue. Adjust spacing, rotate pieces so seams or print remnants face inward, and check the edges so the overall shape looks intentional.
If your piece will hang, consider how weight is distributed. Heavier clusters should sit closer to where the hanging hardware will support.
Step 6: Choose the Right Adhesive
Glue choice depends on what you’re connecting:
- PVC-to-PVC structural joints: PVC primer + solvent cement (very strong, permanent). Use with ventilation and away from ignition sources.
- PVC rings to a backing board: a strong construction adhesive or epoxy works well.
- Tricky shapes or mixed materials: a 2-part epoxy formulated for plastics can give a reliable bond.
Tip: If you want time to reposition pieces, avoid instant “sets-in-seconds” glues for large layouts. You’ll want a few minutes of wiggle room.
Step 7: Mount to a Backing (For Wall Art)
For a ring mosaic, backing makes the whole piece easier to paint and hang. Options:
- Plywood/MDF: strongest and most stable for larger pieces.
- Thick craft panels: lighter, but choose sturdy material to prevent warping.
Lightly sand the backing, wipe off dust, then glue your PVC elements down. Use weights or clamps where possible, and let it cure fully.
Step 8: Prime and Paint Like You Mean It
Plastic can be finicky. The winning combo is: clean → scuff sand → plastic-friendly primer → paint.
Spray paint formulated for plastics is a popular choice because it bonds better and is easy to apply evenly.
Spray painting rules that never get old:
- Use multiple light coats instead of one heavy coat (drips are the enemy of “professional”).
- Keep the can movingthink “misting,” not “firehose.”
- Paint in recommended conditions (temperature/humidity guidelines on the can matter more than people admit).
- Let it cure fully before hanging (dry-to-touch is not the same as cured).
Step 9: Add Optional Details (Texture, Metallics, Two-Tone, or Lighting)
Want it to look more expensive? Here are easy upgrades:
- Two-tone shading: spray a base coat, then lightly dust edges with a second color for depth.
- Metallic highlight: use a dry brush technique over a matte base.
- Matte clear coat: protects and evens out sheen.
- Hidden LEDs: mount a strip behind the piece to create a floating glow.
Step 10: Hang It Securely (Without Anxiety)
Hanging method depends on weight and wall type:
- Small/light pieces: heavy-duty picture hangers or strong mounting strips (follow weight ratings).
- Medium/large pieces: D-rings with wall anchors, or a French cleat for better stability.
- Rental-friendly: keep the piece smaller and lighter; use removable hooks rated for the load.
Final check: if you can gently wiggle the piece and it doesn’t flex or creak, you’re good.
3 Project Walkthroughs You Can Copy (Or Remix)
Project A: “Bubble Bloom” Ring Mosaic
Look: clustered circles with a floral/organic vibe.
- Cut rings in 2–3 different widths (example: 1″, 1.5″, 2″) for variety.
- Lay out the rings so larger ones anchor the design and smaller ones fill gaps.
- Glue rings together first (in clusters), then glue clusters to backing.
- Prime and spray paint in a single matte color (white and black both look amazing).
- Hang with D-rings or a cleat depending on size.
Why it works: repetition + variation = art school math you can do in sweatpants.
Project B: Minimalist Geometric Grid
Look: modern, architectural, clean lines.
- Cut equal-length segments (example: 4″ or 6″). Consistency is the whole point here.
- Assemble rectangles using fittings or adhesive depending on your design.
- Mount grid slightly off the wall (spacers create dramatic shadows).
- Paint matte black or warm white. Add metallic accents if you’re feeling fancy.
Why it works: it looks “designed” even if you made it while watching sitcom reruns.
Project C: Bent-PVC Wave Sculpture
Look: sculptural curves; great for entryways or behind a couch.
- Fill the pipe with dry sand and cap/tape the ends to help prevent kinks while bending.
- Use a heat gun and warm the bend area gradually, rotating the pipe for even softening.
- Gently form the curve and hold until cool. Repeat for additional waves.
- Mount to a board or build a base. Paint in a satin finish for a “gallery” look.
Safety note: use controlled heat, strong ventilation, and avoid direct flame. If it smells “angry,” you’re overheating it.
Troubleshooting: Common Problems (and How to Fix Them)
Paint peels or scratches easily
- Cause: poor prep (too smooth, oily, or dusty).
- Fix: scuff sand, clean, use plastic-friendly primer, then repaint with light coats.
Glue won’t hold
- Cause: wrong adhesive for plastic or too little contact area.
- Fix: rough up surfaces, use a plastic-bonding epoxy, and clamp/weight until cured.
Rings look uneven or “wobbly”
- Cause: inconsistent cuts.
- Fix: use a stop block on a miter saw for repeat cuts, or sand ring edges flat in batches.
The piece looks “flat”
- Fix: add depthmix ring widths, use spacers, or apply subtle two-tone shading for dimension.
FAQ
Do I have to use primer before painting PVC?
If you want it to last and resist scratching, primer is a strong ideaespecially on glossy new PVC. Some paints made
for plastic can bond well with proper cleaning and light sanding, but primer helps consistency.
Can I make PVC art without power tools?
Yes. A hacksaw and sandpaper can get you there. It’s slower, but totally doable. If you’re making lots of rings, a miter
saw just saves time (and your patience).
What’s the easiest PVC art project for beginners?
Ring mosaic wall art. The cuts are straightforward, the layout is forgiving, and paint unifies everything so it looks cohesive.
Will PVC art yellow over time?
Indoors, painted PVC generally holds up well. If you’re worried, use a quality paint system and consider a clear coat.
Keeping it out of direct sunlight also helps.
Conclusion: Your Walls Deserve Better Than “Generic Print #4”
DIY PVC pipe indoor art is one of those rare projects that checks every box: affordable, customizable, beginner-friendly,
and weirdly satisfying. Whether you go for a clean geometric grid, a sculptural wave, or a full-on ring mosaic that looks like
modern coral, the magic is in the prep and the finish. Take your time on cutting, sanding, and paintingand your final piece
will look less like “weekend craft” and more like “intentional design choice.”
DIYer’s Notes: of Real-World Experience
The first thing most people learn with PVC art is that layout is everything. Rings and segments have a way of looking
amazing in your head and slightly chaotic on the floor. The trick is to step backliterally. Put the pieces down, walk to the
other side of the room, and look at the silhouette. If the outer edges feel random, tighten the outline. If the center looks too
evenly spaced (hello, boring), add one surprise: a larger ring cluster, a diagonal line, a “gap” that creates negative space.
PVC is forgiving because you can rearrange it endlessly before glue enters the chat.
The second lesson is about prep. Skipping sanding feels like a harmless shortcut until the paint starts scratching off
when you bump it with a fingernail. A quick scuff sand and a proper clean don’t feel glamorous, but they’re what make the
piece feel finished. Think of it like washing your face before skincaresure, you can skip it, but the universe will judge you
quietly and the results won’t be as good.
Third: don’t underestimate test pieces. Cut one extra ring or segment and try your full paint process on itprimer,
paint, clear coat if you’re using it. This tiny test saves you from painting a whole wall piece only to realize the finish is too
glossy, too dull, or gives off “office cubicle furniture.” Testing also helps you choose between a single bold color (sleek and
modern) versus a layered finish (more depth, more drama).
Adhesives are the fourth lesson. “Strong” isn’t a single category; it’s “strong for this material and this type of stress.” A wall
piece doesn’t just need to stickit needs to stick while gravity tugs on it 24/7. That’s why surface roughing and cure time
matter so much. Many failures aren’t because the glue is bad; they’re because the parts moved before the adhesive fully cured.
If you can leave it overnight under weights, do it. Your future self (the one who doesn’t want to re-glue 37 rings) will be thrilled.
Finally, the best surprise: PVC art photographs really well once it’s painted. The shadows between rings, the depth of a grid,
the subtle texture from sandingthese details pop under indoor lighting. If you want your piece to look extra polished, mount it
so it sits slightly off the wall. That tiny float creates shadow lines that instantly feel “designer.” And if you mess up a section?
Congratulationsyou’ve discovered the most underrated art technique: call it intentional, repaint it, and move on like a confident
gallery owner.