
Flowers are tiny emotional time machines. A rose from a wedding bouquet, a daisy from a first date, a wildflower from a summer hike, or a bloom from a memorial arrangement can hold more meaning than a drawer full of souvenirs. The tricky part? Flowers are dramatic little things. One day they look like poetry; the next day they look like they have been personally offended by oxygen.
That is where resin comes in. Learning how to preserve flowers in resin lets you turn delicate blooms into long-lasting keepsakes, jewelry, coasters, paperweights, ornaments, bookmarks, wall art, and display blocks. When done correctly, resin creates a clear, glass-like casing that protects dried flowers while showing off their shape, color, and texture.
But here is the important truth: resin is not magic soup. You cannot simply toss fresh flowers into epoxy and hope for a fairy-tale ending. Fresh flowers contain moisture, and moisture inside resin can cause browning, bubbles, cloudiness, moldy-looking spots, and general sadness. The secret to beautiful resin flower preservation is preparation, patience, and not acting like the resin instructions are optional suggestions written by a very cautious aunt.
What Does It Mean to Preserve Flowers in Resin?
Preserving flowers in resin means sealing completely dried flowers inside a clear resin material, usually epoxy resin, so they can be displayed and protected. The resin cures into a hard, transparent finish. It does not keep a fresh flower alive; instead, it captures the flower after it has been properly dried.
This technique is popular for wedding bouquets, funeral flowers, anniversary arrangements, prom corsages, garden blooms, baby shower flowers, and sentimental gifts. Depending on the mold and design, preserved flowers can become small pieces of jewelry or large decorative blocks that look like floral fossils from a very stylish prehistoric era.
Why Flowers Must Be Dried Before Resin
The most common beginner mistake is using fresh flowers. Fresh flowers look tempting because they are bright, full, and photogenic. Unfortunately, they are also full of water. Resin and water are not best friends. When moisture is trapped inside resin, the flower may rot, discolor, or release bubbles as it breaks down.
For the clearest and longest-lasting results, flowers should be thoroughly dried before being embedded. A flower may feel dry on the outside but still hold moisture deep inside the petals or center. Thick flowers such as roses, peonies, dahlias, carnations, and ranunculus need extra drying time because their layered petals hold more moisture than thin flowers like pansies or daisies.
Best Flowers to Preserve in Resin
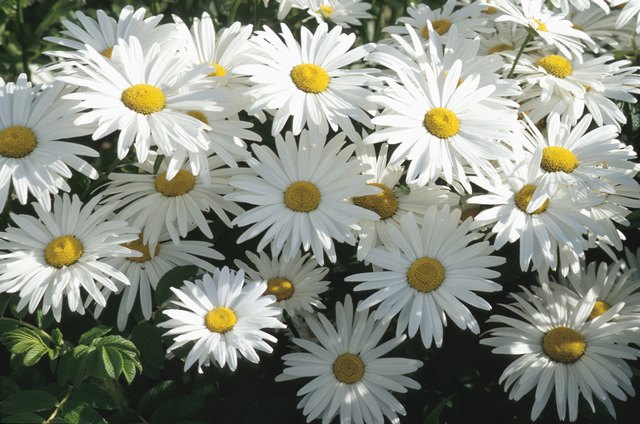
Some flowers behave beautifully in resin. Others behave like tiny divas under a spotlight. Thin, flat, or naturally sturdy flowers are usually easier for beginners. Good choices include daisies, violets, pansies, baby’s breath, lavender, small roses, ferns, Queen Anne’s lace, hydrangea petals, forget-me-nots, and small wildflowers.
Large flowers can also be preserved, but they require better drying and deeper molds. Roses, orchids, lilies, sunflowers, and peonies can look stunning in resin, especially when dried in silica gel to help maintain their shape. However, bulky flowers may trap more bubbles and need layered pouring rather than one giant pour.
Supplies You Need
Before starting, gather everything in one place. Resin has a working time, often called pot time, and once it starts curing, it does not care that you forgot the toothpicks in the kitchen.
Basic Materials
- Completely dried flowers
- Two-part epoxy resin or casting resin suitable for molds
- Silicone molds
- Disposable mixing cups
- Wooden stir sticks or silicone stir tools
- Nitrile gloves
- Safety glasses
- Respirator or proper ventilation, depending on product instructions
- Tweezers
- Toothpicks or a small craft stick for positioning flowers
- Heat gun, small torch, or alcohol spray for surface bubbles, if recommended by your resin brand
- Dust cover, such as a plastic storage bin
- Level work surface
Optional but Helpful Tools
- Silica gel for drying flowers
- Clear-drying spray sealer
- UV-resistant resin
- Fine-grit sandpaper
- Polishing compound
- Small drill for jewelry hardware
- Pigments, gold flakes, labels, charms, or glitter
How to Dry Flowers for Resin
Drying is the foundation of resin flower preservation. Think of it as the part of the project where the flower goes to finishing school. The better the drying method, the better the final piece.
Method 1: Silica Gel Drying
Silica gel is one of the best choices for preserving flowers in resin because it helps maintain the flower’s shape and color. Despite the name, silica gel is usually a sand-like drying material. It pulls moisture from the flower while supporting the petals.
To use it, pour a layer of silica gel into an airtight container. Place the flower face-up or in the position you want it to dry. Gently spoon more silica gel around and over the petals until the flower is completely covered. Seal the container and wait several days to one or two weeks, depending on the flower size. Small flowers may dry quickly; thick roses may need longer.
When removing the flower, be gentle. Dried petals can be fragile, and one aggressive grab can turn your treasured rose into botanical confetti.
Method 2: Pressing Flowers
Pressed flowers work beautifully for flat resin projects such as bookmarks, trays, framed art, phone grips, and jewelry. Place flowers between parchment paper or absorbent paper, then press them inside a heavy book or flower press. Leave them for one to three weeks until fully dry.
Pressed flowers lose their three-dimensional shape, but they gain a graceful, vintage look. They are also easier to embed because they do not float as dramatically as larger blooms.
Method 3: Air Drying
Air drying is simple and inexpensive. Tie stems together and hang them upside down in a dark, dry, well-ventilated space. This works well for lavender, eucalyptus, roses, statice, strawflowers, and baby’s breath.
The downside is that air-dried flowers often shrink, darken, or curl. They can still look beautiful, especially if you like a rustic or antique style. Just know that air drying may not preserve color as well as silica gel.
Method 4: Microwave Drying
Microwave drying can speed up the process, especially for pressed flowers or flowers dried with silica gel in a microwave-safe container. The key is short intervals and careful monitoring. Too much heat can scorch petals, and burnt flowers in resin are not exactly the heirloom look most people are chasing.
How to Preserve Flowers in Resin Step by Step
Once the flowers are completely dry, you can begin the resin process. Work slowly, follow your resin manufacturer’s instructions, and protect your workspace. Resin is gorgeous when cured, but while liquid, it has the personality of sticky syrup with commitment issues.
Step 1: Prepare Your Workspace
Choose a clean, level surface in a well-ventilated area. Cover the table with a silicone mat, plastic sheet, or disposable protective covering. Keep pets, children, snacks, and curious elbows away from the area. Put on nitrile gloves and safety glasses before opening the resin bottles.
Temperature matters. Most epoxy resins cure best in a moderate room temperature range. If the room is too cold, resin may thicken, trap bubbles, or cure slowly. If it is too hot, resin may cure too quickly or overheat. Always check the label for the recommended working conditions.
Step 2: Choose the Right Mold
Silicone molds are the easiest option because cured resin usually releases from them cleanly. Choose a mold that fits the size and shape of your flowers. For large flowers, use a deep casting mold and a resin designed for deeper pours. For small pressed flowers, shallow molds are perfect.
Make sure the mold is clean and dry. Dust, lint, and pet hair have an unbelievable talent for appearing exactly where you do not want them. Wipe the mold gently if needed and let it dry completely.
Step 3: Plan the Design Before Mixing Resin
Arrange your flowers outside the mold first. Decide which side should face the front, whether you want flowers centered or layered, and whether you will add extras such as flakes, pigment, names, dates, or charms.
This planning step prevents panic later. Resin is not the time to suddenly discover your hydrangea is too wide or your charm says “Happy Birthday” upside down.
Step 4: Mix the Resin Carefully
Most epoxy resin comes in two parts: resin and hardener. Measure exactly according to the product directions. Some formulas use a 1:1 ratio by volume; others use different ratios by weight or volume. Guessing is risky because inaccurate measuring can leave resin soft, sticky, cloudy, or unevenly cured.
Stir slowly and thoroughly, scraping the sides and bottom of the cup. Fast, frantic stirring can whip air into the mixture and create bubbles. A calm stir is better. Think spa day, not scrambled eggs.
Step 5: Pour a Thin Base Layer
Pour a small amount of resin into the mold first. This base layer helps position the flowers and reduces the chance of them touching the bottom surface. Let it sit briefly until it thickens slightly if your design needs more control.
For deep pieces, pouring in layers is usually better than filling the entire mold at once. Thick pours can trap bubbles, generate too much heat, or cure unevenly if the resin is not designed for deep casting.
Step 6: Add the Dried Flowers
Use tweezers to place the dried flowers into the resin. Press them gently into position with a toothpick or craft stick. If flowers float, do not panic. Many dried flowers are lightweight and will rise. You can hold them in place with a partial layer, wait until the resin becomes tacky, then add more resin.
For a three-dimensional flower, pour resin gradually around the petals. Use a toothpick to release trapped air from tight petal folds. This is especially important for roses and dense blooms.
Step 7: Remove Bubbles
Bubbles are normal. Some will rise on their own. For surface bubbles, use a heat gun or small torch carefully if your resin instructions allow it. Move the heat quickly across the surface rather than holding it in one place. Too much heat can damage flowers, warp molds, or yellow the resin.
For bubbles trapped inside petals, use a toothpick to coax them out. Work patiently. The goal is not perfection; it is clarity with character. A tiny bubble or two may remain, and honestly, it might just be the flower’s way of signing the artwork.
Step 8: Cover and Cure
Cover the mold with a dust cover and let it cure undisturbed. Do not poke it every twenty minutes. Resin needs time to harden, and constant checking increases the chance of dust, fingerprints, or accidental dents.
Cure time varies by product. Some pieces can be demolded in 24 hours, while deeper castings may need several days. Full hardness can take longer than initial curing, so handle freshly demolded pieces gently.
Step 9: Demold and Finish
Once fully cured, peel the silicone mold away from the resin. If the edges are sharp, sand them with fine-grit sandpaper. For a glossy finish, polish the surface or add a thin topcoat of resin if appropriate.
If making jewelry, drill holes slowly and carefully, then add jump rings, chains, earring hooks, or keychain hardware. For display blocks, wipe the piece clean and keep it away from long-term direct sunlight.
How to Keep Flowers From Floating in Resin
Floating flowers are one of the biggest resin frustrations. The best fix is layering. Pour a thin layer, place the flower, let the resin become slightly tacky, then add another layer. This helps lock the flower in position.
You can also use a tiny dot of clear-drying glue or resin to attach pressed flowers to the base layer before adding more resin. For large flowers, pour in stages and rotate the piece if needed so the bloom stays centered.
How to Prevent Resin From Yellowing
All resin can change over time, especially with UV exposure. To reduce yellowing, choose a high-quality, UV-resistant epoxy or casting resin. Avoid displaying pieces in direct sunlight, near windows with strong sun, or in hot areas. Heat and UV light are not kind to clear resin.
Also avoid overheating the resin during mixing or curing. Pouring too thickly, using too much heat to pop bubbles, or mixing incompatible additives can increase discoloration. A clear resin piece is a little like fair skin at the beach: give it protection, shade, and common sense.
Should You Seal Flowers Before Putting Them in Resin?
Sealing is optional, but it can help with fragile or porous flowers. A clear-drying spray sealer may reduce bubbles and prevent resin from soaking into petals. This is especially useful for pressed flowers, paper-like petals, or leaves that darken when wet.
Always test first. Some sealers can change the flower’s color or leave a cloudy finish. Spray lightly, let the flowers dry completely, and never rush them into resin while the sealer is still damp.
Common Mistakes to Avoid
Using Fresh Flowers
Fresh flowers almost always cause problems in resin. Dry them fully first. This single step can save an entire project.
Mixing Resin Incorrectly
Wrong ratios or incomplete stirring can lead to sticky resin. Measure accurately and mix thoroughly.
Pouring Too Much at Once
Deep pours require the correct resin type. If using standard craft resin, pour in thin layers to avoid overheating, bubbles, and curing issues.
Ignoring Safety
Uncured resin can irritate skin and eyes, and some formulas require stronger ventilation or respiratory protection. Read the safety data sheet and product label. Gloves are not decorative accessories here; they are your first line of defense.
Demolding Too Early
If the resin is still flexible or tacky, wait longer. Early demolding can bend the piece or leave fingerprints.
Creative Ideas for Preserved Flowers in Resin
Once you learn the basics, resin flower preservation opens the door to many creative projects. Wedding flowers can become ring holders, trays, ornaments, initials, or bookends. Funeral flowers can be preserved as memorial blocks, heart-shaped keepsakes, rosary holders, or framed resin art. Garden flowers can become seasonal coasters, bookmarks, magnets, earrings, pendants, or wall hangings.
You can also add meaningful details. A small printed date, a ribbon from a bouquet, a tiny charm, gold leaf, mica powder, or a handwritten note copied onto sealed paper can make the piece more personal. Just remember that everything added to resin should be dry and compatible with the resin.
How Long Do Flowers Last in Resin?
Properly dried and sealed flowers can last for years in resin. However, natural flowers may still fade slowly over time. Color changes are more noticeable in pale pinks, whites, purples, and reds. Keeping resin pieces away from direct sunlight and high heat helps preserve both the resin and the flowers.
White flowers may turn cream or beige, even when dried carefully. Red flowers can darken. Purple flowers may shift toward blue or gray. This does not mean you failed. Nature simply refuses to sign a permanent color contract.
Experience Notes: What Preserving Flowers in Resin Teaches You
The first thing you learn when preserving flowers in resin is that patience is not just a virtue; it is basically a required supply. Many beginners want to rush from bouquet to finished keepsake in a single afternoon. That sounds efficient, but flowers do not work on our emotional timeline. If the flower is not fully dry, the resin will reveal the shortcut later through bubbles, browning, or cloudy patches. Waiting a few extra days can be the difference between a crystal-clear keepsake and a mysterious swamp cube.
Another practical lesson is that every flower behaves differently. A small daisy may dry flat and bright with very little drama. A rose, on the other hand, has layers of petals that trap air like it is saving bubbles for retirement. Dense flowers need more careful drying, slower pouring, and extra attention with a toothpick. The more resin projects you make, the better you become at predicting which blooms will cooperate and which ones will require a diplomatic negotiation.
It also helps to start small. A beginner may dream of preserving an entire wedding bouquet in a giant resin block, but a small pendant or coaster is a better first project. Small molds teach you how resin mixes, how bubbles rise, how flowers float, and how long your specific product takes to cure. After a few smaller successes, larger projects feel less intimidating. Resin rewards practice. It is not difficult forever, but it does expect you to pay attention.
One experience-based tip is to photograph the flowers before drying them. This gives you a color and arrangement reference. Flowers often shift in color after drying, and having a photo helps you plan the resin layout. For sentimental flowers, especially wedding or memorial blooms, photos also create a backup memory in case a petal breaks or a test piece does not turn out as planned.
Another useful habit is making test pieces. If you are preserving flowers with strong emotional value, do not make the final keepsake your first attempt with that resin, mold, or drying method. Test with similar flowers first. Try sealing one flower and leaving another unsealed. Try a thin layer and a deeper layer. See how the colors react. This small experiment can prevent heartbreak when working with irreplaceable blooms.
Finally, resin preservation teaches you to appreciate imperfections. Handmade pieces may include tiny bubbles, slight color shifts, or petals that move a millimeter from where you placed them. That is part of the charm. A preserved flower in resin is not a factory-made object; it is a captured moment. The little variations are proof that real hands made it and real flowers are inside. In a world full of mass-produced décor, that is exactly what makes resin flower keepsakes special.
Conclusion
Learning how to preserve flowers in resin is a beautiful way to turn meaningful blooms into lasting keepsakes. The process is part science, part craft, and part gentle emotional blackmail from flowers that refuse to stay fresh forever. The key steps are simple: dry the flowers completely, choose the right resin and mold, work safely, pour in layers, remove bubbles carefully, and give the piece enough time to cure.
Whether you are preserving wedding flowers, funeral flowers, garden blooms, or a tiny wildflower from a memorable day, resin can transform fragile petals into art you can hold, display, and share. Start with a small project, respect the drying process, and remember that every bloom has its own personality. Some flowers behave like angels. Some behave like toddlers in formalwear. Either way, with the right technique, you can create a keepsake that feels personal, polished, and wonderfully permanent.