
Note: This method is best for small indoor craft projects, unfinished wood signs, trays, shelves, bead garlands, picture frames, and decorative pieces. For outdoor furniture, tabletops, cutting boards, or heirloom-quality projects, use a proper wood stain and finish system.
Introduction: The Tiny Craft Hack That Makes Wood Look Expensive
Sometimes the best DIY ideas come from having exactly zero of the “right” supplies. You want a warm wood stain look, your project is sitting on the table, your inspiration photo is glowing on your phone, and then you open the garage cabinet and discover your actual wood stain has either dried into a historic artifact or vanished into the same dimension as missing socks.
Good news: you may not need it. With cheap acrylic paint, a baby wipe, and a little patience, you can create a beautiful faux wood stain that lets the grain show through while giving raw wood a soft, custom color. It is not traditional stain in the chemical sense. Real wood stain penetrates the pores of bare wood. Acrylic paint sits more on the surface, especially when it is not heavily diluted. But when you thin it and wipe it on lightly, it behaves like a semi-transparent color wash. The result can look surprisingly close to stained wood, especially on small craft projects.
This technique is budget-friendly, beginner-friendly, and wonderfully forgiving. If you can wipe a counter, you can probably do this. The baby wipe acts like a disposable applicator, soft cloth, and blending tool all in one. The acrylic paint brings the color. The wood grain brings the drama. You bring the snacks.
What Does It Mean to "Stain" Wood With Acrylic Paint?
When people say they are staining wood with acrylic paint, they usually mean they are creating a stain-like finish using watered-down paint. Instead of covering the wood completely like normal paint, the mixture is applied thinly so the natural grain remains visible. The effect is closer to a color wash, glaze, or faux stain than a deep penetrating stain.
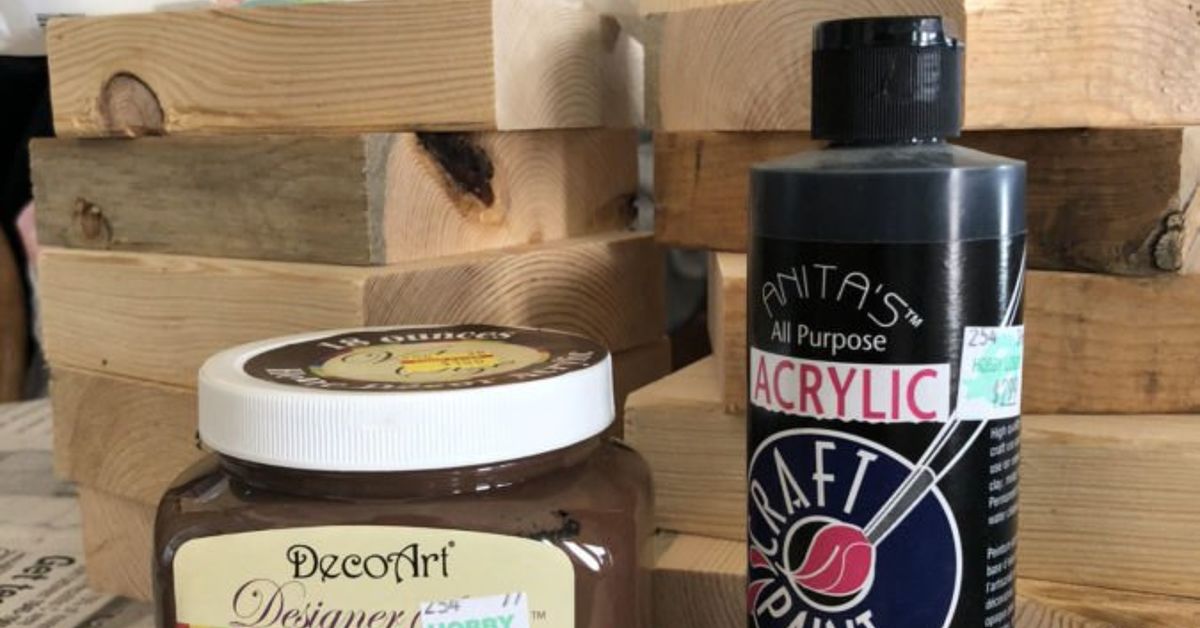
Acrylic craft paint is water-based, easy to clean up while wet, fast drying, and available in almost every color imaginable. That makes it perfect when you want a rustic brown, weathered gray, soft whitewash, coastal blue, farmhouse black, or even a moody green without buying a full can of stain. A two-dollar bottle of craft paint can go a long way, especially on small wood décor.
The baby wipe matters because it already contains moisture. That moisture helps thin the paint slightly as you wipe, giving you more control and fewer harsh brush marks. It also makes blending easy. You can add more paint, wipe some away, work it into corners, or create layered tones without hauling out a professional finishing kit.
Why Use Acrylic Paint Instead of Regular Wood Stain?
Traditional wood stain is fantastic, but it is not always convenient. It may require specific ventilation, gloves, cleanup products, longer drying times, and a little more commitment. Acrylic paint is the casual cousin who shows up in jeans and still somehow looks good in photos.
Here are the biggest reasons crafters love this acrylic paint staining method:
- It is inexpensive. A small bottle of craft acrylic paint costs far less than many cans of stain.
- It is easy to customize. Mix brown with black for espresso, add white for driftwood, or blend tan and gray for a weathered farmhouse finish.
- It dries quickly. Thin acrylic layers usually dry much faster than many oil-based stains.
- It is beginner-friendly. If the color is too dark, wipe it back while wet. If it is too light, add another layer.
- It works on many craft woods. Pine, plywood, basswood, unfinished wood cutouts, crates, signs, and small décor pieces all respond well.
- It has low odor. Most craft acrylics are water-based and easier to use indoors than strong-smelling stains.
That said, this technique is not the best choice for every surface. If you are refinishing kitchen cabinets, staining a deck, restoring antique furniture, or finishing a dining table that will face daily use, choose a proper stain and protective topcoat designed for that job. Acrylic paint “stain” is a creative finish, not a replacement for every woodworking product ever made. It is clever, not magical. Sadly, it will not also fold laundry.
Supplies You Need
You only need a few basic supplies to stain wood with cheap acrylic paint and a baby wipe:
- Unfinished wood piece
- Cheap acrylic craft paint
- Unscented baby wipes
- Fine-grit sandpaper, such as 180- to 220-grit
- Paper plate, palette, or scrap cardboard
- Disposable gloves
- Lint-free cloth or microfiber cloth
- Clear sealer, such as water-based polyurethane, polycrylic, or clear acrylic sealer
- Drop cloth or newspaper to protect your work surface
Use regular baby wipes, not disinfecting wipes. Disinfecting wipes may contain alcohol or cleaning chemicals that can interfere with the finish, dry out raw wood unevenly, or affect previously finished surfaces. For this project, plain and gentle is the goal. Think baby wipe, not “industrial lemon thunder.”
Best Paint Colors for a Wood Stain Look
The color you choose determines the personality of the finished piece. Brown is the obvious classic, but acrylic paint lets you go far beyond the hardware store stain aisle.
For a Classic Wood Stain Look
Use burnt umber, raw umber, chocolate brown, coffee brown, or a mix of brown and black. These shades create a traditional stained wood appearance, especially on pine and craft boards.
For a Weathered Farmhouse Finish
Mix gray, white, and a tiny touch of brown. Wipe lightly and let some raw wood peek through. This creates that “old barn board” look without requiring an actual barn, which is helpful for those of us currently short on barns.
For a Whitewashed Look
Use white acrylic paint and a very damp baby wipe. Apply in thin layers and wipe in the direction of the grain. This gives wood a soft, beachy, cottage-style finish.
For a Bold Color Stain
Try navy, sage green, black, charcoal, terracotta, or dusty blue. The secret is using a light hand so the color tints the wood rather than buries it.
How To "Stain" Wood With Cheap Acrylic Paint and a Baby Wipe
Step 1: Start With Bare, Clean Wood
This method works best on unfinished wood because the paint wash needs something to grip. If your piece has varnish, wax, glossy paint, or an old sealer, the acrylic mixture may slide around instead of soaking in or bonding well. Lightly sand the surface to remove rough spots and open the grain.
For most small craft projects, sand with 180- to 220-grit sandpaper. Always sand in the direction of the wood grain. Sanding across the grain can leave scratches that become more obvious once color is applied. After sanding, wipe away dust with a dry microfiber cloth or tack cloth. Do not leave sawdust behind unless your design style is “haunted workshop.”
Step 2: Put a Small Amount of Paint on a Plate
Squeeze a small puddle of acrylic paint onto a paper plate or palette. You do not need much. Start with about a teaspoon for a small sign or wood cutout. You can always add more, but once half a bottle of dark brown paint hits a tiny ornament, the ornament is now a chocolate brick.
If you want a thinner stain effect, add a few drops of water to the paint. You can also rely on the moisture in the baby wipe. The more water you add, the more transparent the color becomes. The less water you use, the closer the finish will be to paint.
Step 3: Wrap the Baby Wipe Around Your Fingers
Pull out one baby wipe and fold it into a small pad. Wrap it around two or three fingers so you have a smooth wiping surface. Wearing gloves is a good idea because acrylic paint loves fingers, fingernails, and every place you forget to check before touching your phone.
Dip one corner of the baby wipe lightly into the paint. Do not scoop. Do not shovel. Do not enter with the confidence of a bulldozer. A tiny amount goes a long way.
Step 4: Wipe the Paint Onto the Wood
Wipe the paint onto the wood in long strokes, following the grain. Work quickly and lightly. The goal is to tint the surface, not frost a cake. As you wipe, the baby wipe spreads the paint thinly and pushes color into the grain. You should still be able to see the natural lines, knots, and texture of the wood.
If the color looks too strong, use a clean part of the baby wipe to soften it. If it looks too pale, dip into a little more paint and wipe again. Keep blending until the surface looks even. For corners, edges, and carved details, use the tip of the wipe to work color into the grooves.
Step 5: Build the Color in Thin Layers
One of the biggest mistakes is trying to get the final color in one heavy coat. Thin layers look more natural. Heavy paint can hide the wood grain and create streaks. Let the first layer dry, then decide whether you want a second coat.
Acrylic paint dries quickly in thin applications, but drying time depends on humidity, temperature, wood type, and how wet your wipe is. Give the piece enough time to feel dry before adding another layer. If the surface feels tacky, wait longer.
Step 6: Add Depth With a Second Color
For a richer finish, layer two colors. Start with a medium brown, let it dry, then wipe on a tiny amount of black, gray, or dark brown. Immediately soften it with a clean damp wipe. This creates depth and makes cheap craft wood look less like it came from the “three for a dollar” bin, even if it absolutely did.
For a weathered finish, apply brown first, then dry-brush or wipe a pale gray or white over the top. For a rustic sign, darken the edges slightly. Edges naturally collect more color, which gives the piece an aged, dimensional look.
Step 7: Let It Dry Completely
Before sealing, allow the acrylic-stained wood to dry completely. A dry-to-the-touch surface is not always fully cured. If you seal too soon, you can trap moisture or cause smearing. For small craft projects, waiting several hours is usually enough, but overnight is safer if you applied multiple layers.
Step 8: Seal the Finish
Sealing is the step that takes your project from “cute experiment” to “finished piece.” Acrylic paint becomes more durable when dry, but a clear topcoat protects the color from scratches, moisture, dust, and handling. Use a water-based polyurethane, polycrylic, clear acrylic spray, or brush-on craft sealer.
Choose the sheen based on the look you want. Matte sealer keeps the finish rustic and natural. Satin adds a soft glow. Gloss makes the color deeper and shinier. Apply thin coats according to the product directions, and let each coat dry fully. For pieces that will be handled often, two thin coats are better than one thick coat.
Common Mistakes and How to Avoid Them
Using Too Much Paint
Too much paint turns a stain effect into a painted surface. Start with less than you think you need. You can always add more, but removing thick acrylic after it dries is about as fun as peeling labels off jars with your hopes and fingernails.
Skipping Sanding
Rough wood creates uneven color. Glossy wood resists the finish. Sanding helps the paint wash apply more smoothly and gives the surface better grip.
Not Testing First
Different woods absorb color differently. Pine can look blotchy. Plywood edges may darken quickly. Basswood may take color softly. Always test on the back, bottom, or a scrap piece before committing to the front.
Wiping Against the Grain
Wiping with the grain creates a more natural stained look. Wiping in circles or random directions can leave cloudy marks and uneven streaks.
Forgetting to Seal
Unsealed acrylic finishes can scratch or dull over time. A clear sealer helps preserve the color and makes the project easier to dust and clean.
Where This Technique Works Best
This acrylic paint wood stain hack is ideal for decorative indoor projects. It works beautifully on wood signs, craft boxes, trays, bead garlands, seasonal ornaments, picture frames, small shelves, tiered tray décor, and unfinished wood cutouts. It is especially useful when you need a custom color quickly and do not want to buy a whole can of stain for one tiny project.
It is also great for layered craft finishes. For example, you can “stain” a wood sign with watered-down brown acrylic, let it dry, add vinyl lettering or hand-painted words, then seal the whole piece. You can also use this method under distressing techniques. Paint a darker faux stain first, add a lighter paint layer, then sand the edges so the darker color peeks through.
Where This Technique Is Not the Best Choice
Do not use this method as the main finish for surfaces that need heavy-duty protection. Dining tables, kitchen counters, bathroom vanities, outdoor benches, decks, floors, and cutting boards need finishes designed for durability, moisture resistance, food safety, or exterior exposure.
Also, avoid using this method on oily, waxy, or sealed wood unless you sand and prepare the surface properly. Acrylic paint needs a clean, dull surface to bond well. If the surface is slick, the finish may scratch off easily.
Color Recipes You Can Try
Warm Walnut
Mix burnt umber with a tiny dot of black. Wipe on lightly, then add a second thin layer if needed. This creates a warm, classic brown that looks great on signs and trays.
Weathered Gray
Mix gray with a small touch of brown and plenty of water. Wipe with the grain and remove excess quickly. Add white in a second layer for a sun-faded look.
Rustic Whitewash
Use white acrylic paint with a very damp baby wipe. Apply thinly and wipe off the high spots. This works well for coastal, cottage, and farmhouse projects.
Charcoal Black Stain
Use black acrylic paint sparingly with extra moisture. Wipe quickly and keep the layer transparent. This creates a modern black-washed wood effect without hiding all the grain.
Safety and Cleanup Tips
Even though water-based acrylic paint is generally easy to use, basic safety still matters. Work in a ventilated area, protect your table, and wear gloves if you do not want stained fingertips. When sanding wood, wear eye protection and a dust mask, especially if you are working with plywood, old finishes, or unknown wood materials.
Clean wet acrylic paint with soap and water. Once it dries, it becomes much harder to remove. Throw away used baby wipes responsibly, and do not rinse large amounts of paint into the sink. Wipe excess paint from plates and tools with a paper towel before washing.
Real-World Experience: What This Technique Teaches You After a Few Projects
After using the acrylic paint and baby wipe method on several small wood projects, one thing becomes obvious: the best results come from restraint. The first instinct is to dip into more paint because the wet color looks pale. Then it dries darker, and suddenly your “soft walnut” sign looks like it spent a semester studying espresso. The trick is to sneak up on the color. Apply one thin coat, step away, let it dry, and then decide. Wood finishing rewards patience, which is annoying but true.
Another lesson is that cheap wood has personality. Sometimes too much personality. Small craft boards, pine plaques, and unfinished cutouts often have uneven grain, glue marks, dents, or fuzzy edges. Traditional stain can exaggerate these issues, and acrylic paint wash can do the same. A few minutes of sanding makes a huge difference. If the wood feels fuzzy before you start, it will look fuzzy after color goes on. Sand first, wipe clean, and treat the prep work like part of the project, not a boring opening act.
The baby wipe also changes the whole experience. A brush can leave strokes. A rag can absorb too much paint. A sponge can make dots or bubbles. A baby wipe gives you a smooth, damp, flexible applicator that blends as it goes. It is especially helpful around edges and corners because you can fold it into a point and push color exactly where you want it. The only downside is that wipes can break down if you scrub too hard, so use a fresh one when it starts to pill or drag.
Layering colors is where the method becomes really fun. A flat brown wash is nice, but a brown base with a whisper of gray over it looks more natural. A whitewash over tan can create a beachy finish. A little black on the edges can make a brand-new wood tray look aged. The key is to keep each layer thin. Think “tinted veil,” not “mud mask.” If you go too dark, grab a clean damp wipe immediately and pull some color back before it dries.
Sealing is the final lesson. Unsealed acrylic-stained wood may look finished, but it is more vulnerable to scratches and water spots. A matte or satin clear coat protects the surface while keeping the handmade look. For rustic signs and shelf décor, matte sealer usually looks the most natural. For trays or handled pieces, satin adds a little extra polish. Gloss can be pretty, but it may make a rustic piece look more like it is wearing lip gloss to a campfire.
The biggest advantage of this technique is freedom. You are not limited to stain colors with names like “Provincial Something” or “Cabin Brown Number 47.” You can make sage-stained wood, dusty blue wood, charcoal wood, creamy whitewashed wood, or a custom brown that matches your living room. It is a low-cost way to experiment, and if a project fails, you have not wasted expensive materials. Sand it, repaint it, or call it “distressed” and act confident. In DIY, confidence is at least 40 percent of the finish.
Conclusion
Learning how to “stain” wood with cheap acrylic paint and a baby wipe is one of those DIY tricks that feels almost too simple to work, yet it delivers charming results. It is affordable, fast, customizable, and ideal for small indoor craft projects. By thinning acrylic paint, wiping it with the grain, building color in light layers, and sealing the final finish, you can create a faux stained wood look without opening a traditional stain can.
The method is not meant to replace professional wood finishing for high-wear furniture or outdoor surfaces, but for signs, trays, ornaments, frames, and decorative pieces, it is a little craft-room miracle. Test first, use a gentle hand, and let the wood grain stay visible. Your project will look warm, handmade, and intentionally finished instead of accidentally attacked by brown paint.
So grab a bottle of acrylic paint, rescue a baby wipe from the pack, and give that plain wood piece a glow-up. It may not be fancy woodworking, but it is practical, creative, and wonderfully satisfying. Plus, any project that costs less than a coffee and still makes you feel like a design wizard deserves a permanent spot in the DIY toolbox.