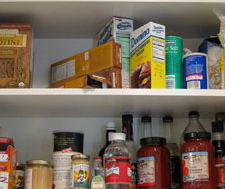

Kitchen cabinets have a special talent: they look innocent from the outside while secretly hosting a tiny indoor yard sale. Open one door and suddenly a plastic lid escapes, three mugs lean like they have gossip to share, and a bag of rice from “sometime before last winter” asks for legal representation. The good news? Organizing the kitchen cabinets does not require a renovation, a celebrity organizer, or a personality transplant. It just requires a plan, a little honesty, and possibly a snack break.
This guide is designed as a practical “let’s do it together” project. We will sort, clean, zone, arrange, label, and maintain your cabinets in a way that works for real life. Not magazine-only life. Real life, where someone puts the peanut butter behind the mixing bowls and calls it “helping.”
Whether you have a small apartment kitchen, a family-sized cooking zone, or one mysterious corner cabinet where pans go to retire, the goal is simple: create kitchen cabinet organization that saves time, reduces clutter, prevents duplicate buying, and makes cooking feel less like a treasure hunt with consequences.
Why Kitchen Cabinet Organization Matters More Than You Think
An organized kitchen cabinet system is not just about looking neat. It changes how your kitchen functions every day. When plates, spices, cookware, pantry items, and cleaning supplies all have logical homes, you move faster and waste less energy. You also stop buying the same item three times because the first two are hiding behind the slow cooker.
Good cabinet organization supports three big goals: visibility, accessibility, and routine. Visibility means you can see what you own. Accessibility means you can reach it without performing advanced yoga. Routine means the system matches the way you actually cook, clean, snack, prep lunches, make coffee, or toss together dinner while pretending you had a meal plan all along.
Step 1: Empty the Cabinets and Face the Tiny Chaos
The first move is the bravest one: empty the cabinets. Yes, all the way. Pull out dishes, mugs, pans, food containers, baking supplies, spices, canned goods, water bottles, and that novelty bowl shaped like a watermelon. Put everything on the counter or dining table where you can see it clearly.
This step may temporarily make your kitchen look worse. That is normal. Organizing is a little like cleaning out your email inbox: there is a dramatic middle phase where you question your life choices. Keep going.
Create Four Sorting Groups
As you remove items, divide them into four simple categories:
- Keep: Items you use, love, or genuinely need.
- Relocate: Items that belong somewhere else, such as holiday platters or extra party supplies.
- Donate: Duplicates and usable items you no longer reach for.
- Toss or recycle: Broken tools, cracked containers, expired food, and lidless mysteries.
Be honest but not dramatic. You do not need to throw away every extra mug. You simply need to stop storing twelve “backup mugs” in the prime cabinet next to the coffee machine if you use the same two every morning.
Step 2: Clean Before You Reload
Once the cabinets are empty, wipe the shelves, doors, corners, and handles. Crumbs have a way of collecting like tiny kitchen confetti, especially near pantry shelves and snack zones. Use a gentle cleaner appropriate for your cabinet material, and let the surfaces dry before putting items back.
This is also the perfect time to check for sticky spots, loose shelf pegs, warped shelf liners, leaks under the sink, or evidence that cereal dust has formed its own ecosystem. If shelf liners are stained or curling, replace them. If they are still in good shape, wipe and reuse them.
Step 3: Build Kitchen Zones That Match Real Life
The smartest cabinet systems are built around zones. Instead of asking, “Where can this fit?” ask, “Where would I naturally use this?” That tiny shift makes a huge difference.
Everyday Dish Zone
Store plates, bowls, glasses, and daily mugs near the dishwasher or sink if possible. This makes unloading easier and helps everyone in the house return items without needing a map, a flashlight, or a committee meeting.
Cooking Zone
Pots, pans, lids, oils, salt, pepper, and frequently used spices belong close to the stove. Keep heavy cookware in lower cabinets so nobody has to lift a cast-iron skillet from an overhead shelf like they are competing in a kitchen Olympics event.
Baking Zone
Group flour, sugar, baking powder, measuring cups, mixing bowls, muffin tins, and cookie sheets together. If you bake often, give these items convenient space. If you only bake when guilt or holidays demand it, store baking gear slightly farther away.
Food Storage Zone
Food containers, lids, reusable bags, foil, parchment paper, and wraps should be grouped near the prep area. If your container cabinet currently sounds like a drum solo every time you open it, it is time to separate bases from lids using bins, dividers, or a simple basket.
Snack and Lunch Zone
If children, teens, roommates, or snack-loving adults use the kitchen, create a grab-and-go area. Use bins for bars, crackers, dried fruit, lunch containers, and water bottles. A snack zone reduces cabinet digging and may prevent someone from asking, “Where are the chips?” while standing directly in front of the chips.
Step 4: Use Prime Cabinet Space Wisely
Not every cabinet is equally valuable. The easiest-to-reach shelves are prime real estate. They should hold the things you use most often: everyday dishes, favorite mugs, daily cookware, breakfast items, lunch supplies, and basic seasonings.
Less-used items should move higher, lower, or farther away. Think holiday serving dishes, extra pitchers, specialty appliances, fondue sets, and the fancy cake stand that appears twice a year and expects applause.
A simple rule works beautifully: daily items at eye level or waist level, weekly items within comfortable reach, occasional items in harder-to-reach spots. This one habit can make kitchen cabinet storage feel instantly more logical.
Step 5: Maximize Vertical Space Without Creating a Tower of Trouble
Many cabinets waste vertical space. You may have one stack of bowls sitting on a tall shelf with a large empty air column above it. Air is lovely, but it does not need an entire cabinet lease.
Shelf risers are one of the easiest kitchen cabinet organizers to add. They create a second level for mugs, small plates, bowls, canned goods, or pantry staples. Stackable shelves can turn one awkward shelf into two useful layers.
For plates and cutting boards, vertical dividers are often better than stacking. Instead of wrestling a baking sheet from the bottom of a pile, stand sheets, trays, lids, and cutting boards upright. It is faster, neater, and far less likely to sound like a cymbal crash.
Step 6: Make Deep Cabinets Easier to Reach
Deep cabinets are where good intentions disappear. Things in the front get used. Things in the back become kitchen folklore. To fix this, use pull-out drawers, sliding baskets, clear bins, or turntables.
A Lazy Susan is especially helpful for oils, vinegars, condiments, spices, baking extracts, or jars. Instead of knocking over six bottles to reach sesame oil, you spin the tray and feel briefly like a genius. Corner cabinets also benefit from turntables or swing-out organizers because they bring hidden items into view.
For renters or budget-conscious organizers, handled bins can do a similar job. Place related items in a bin, label it, and pull the whole bin forward when needed. This works well for snacks, baking supplies, packets, teas, supplements, and small pantry items.
Step 7: Tame the Food Container Cabinet
Every home has one cabinet that appears to be breeding plastic lids. Food storage containers are useful, but they become chaos when every brand, shape, and size is mixed together.
Start by matching containers with lids. Recycle or repurpose pieces that no longer have partners. Then group containers by shape: squares with squares, rounds with rounds, glass with glass. Nest containers when possible, but do not create stacks so tall they threaten democracy.
Use a lid organizer, narrow bin, or file sorter to hold lids upright. If you prefer sets, consider gradually switching to containers that share lid sizes. You do not need to replace everything at once. Simply stop adding random new pieces to a system already begging for mercy.
Step 8: Organize Spices So Dinner Stops Becoming Detective Work
Spices should be visible, easy to reach, and close to where you cook. A tiered spice rack works well in upper cabinets because it lets you see labels in rows. Drawer inserts work beautifully if you have a shallow drawer near the stove. Turntables are great for deeper cabinets.
Check freshness while organizing. Spices do not usually become dangerous overnight, but they lose flavor over time. If a jar smells like dusty air with ambition, it may be time to replace it. Keep everyday seasonings in the most accessible spot and move rarely used spices to a secondary area.
Labels matter here. If you decant spices into matching jars, label the tops or fronts clearly. Pretty jars are wonderful, but mystery powder is not a cooking strategy.
Step 9: Give Pantry Cabinets a Simple System
If your pantry is inside kitchen cabinets, organize it by category. Group breakfast items, baking goods, canned foods, grains, pasta, snacks, sauces, and drinks. Clear containers can help with dry goods, but they are not mandatory. The best system is the one you will maintain.
For foods with dates, use the first-in, first-out method: older items in front, newer items behind. This helps reduce waste and prevents the classic discovery of three unopened pasta boxes hiding behind one dramatic bag of chips.
Bins are useful for loose packets, snack bags, seasoning mixes, tea, coffee pods, and small baking decorations. Choose shallow bins when you want to see everything and deep bins when you need to corral bulky extras.
Step 10: Be Smart About the Under-Sink Cabinet
The cabinet under the kitchen sink can be useful, but it is also one of the trickiest areas because of plumbing, moisture, and limited space. Start by removing everything and checking for leaks. If anything smells musty or looks damp, solve that issue before organizing.
Store only practical, safe items here. Dish soap, dishwasher tablets, trash bags, a small caddy, and cleaning cloths may work well. Avoid storing paper goods, pet food, small appliances, or anything that could be damaged by moisture. If there are young children in the home, use child-safe locks and keep cleaning products secure.
Use stackable bins or pull-out trays designed to fit around pipes. Hooks on the inside of the cabinet door can hold gloves, brushes, or small tools. The goal is not to pack the space full; it is to keep it functional and safe.
Step 11: Label Only Where Labels Actually Help
Labels are powerful, but they should solve problems, not decorate every square inch like a craft project escaped. Use labels for bins, pantry categories, decanted dry goods, snack baskets, baking supplies, and shelves shared by multiple people.
Good labels help everyone put items back in the right place. They also reduce the number of “Where does this go?” questions, which is good for household peace and your emotional health.
Keep labels simple: “Snacks,” “Breakfast,” “Baking,” “Pasta,” “Lunch Boxes,” “Spices,” “Cleaning,” and “Food Storage.” Clear beats clever. A label that says “Crunchy Joy Collection” may amuse you today and confuse everyone tomorrow.
Step 12: Organize for the People Who Use the Kitchen
A cabinet system should fit the household. If kids pack lunches, put lunch containers and approved snacks within safe reach. If someone makes coffee every morning, keep mugs, filters, beans, sweeteners, and travel cups together. If one person cooks most dinners, place their favorite tools where they can grab them quickly.
Accessibility also matters for height, mobility, and strength. Heavy items belong low. Frequently used items should not require a step stool. Sharp tools, breakable pieces, and cleaning products should be stored safely.
The best kitchen organization ideas are not about perfection. They are about making the kitchen easier for the people who actually live there.
Step 13: Avoid the Biggest Cabinet Organization Mistakes
Mistake 1: Buying Organizers Before Sorting
Do not buy bins, baskets, risers, or turntables before you know what you need to store. That is how you end up with a cabinet full of organizers organizing nothing except regret.
Mistake 2: Keeping Too Many Duplicates
Three spatulas may be useful. Twelve spatulas may be a support group. Keep what you use and donate extras in good condition.
Mistake 3: Ignoring Cabinet Height
Adjustable shelves can often move up or down. Before buying anything, check whether changing shelf height solves the problem for free.
Mistake 4: Storing Items Where They Fit Instead of Where They Function
A blender may fit above the fridge, but if you make smoothies every morning, that location will become annoying by Tuesday. Store by routine, not just available space.
Step 14: Make Maintenance Easy
The real test of organizing kitchen cabinets is not how they look on day one. It is whether they still make sense three weeks later. Maintenance should be simple and quick.
Try a five-minute cabinet reset once a week. Straighten snack bins, return stray cups, rotate older pantry items forward, and check whether anything has migrated to the wrong zone. Once every few months, do a deeper review. Remove expired food, donate unused duplicates, wipe shelves, and adjust the system if your routine has changed.
Remember: a kitchen is a working room. It will not stay photo-perfect, and that is fine. The goal is not to make cabinets look untouched. The goal is to make them easy to use and easy to restore.
Budget-Friendly Kitchen Cabinet Organization Ideas
You do not need to spend a fortune. Some of the best cabinet organizing solutions are inexpensive or already in your home. Shoeboxes can become temporary pantry bins. A small tray can group oils. A mug can hold measuring spoons. Binder clips can close bags. Tension rods can separate cutting boards or baking sheets. A simple basket can turn a messy shelf into a pull-out zone.
If you do buy organizers, start with the most useful basics: shelf risers, turntables, clear bins, drawer dividers, lid organizers, and vertical tray dividers. Measure your cabinets before shopping. Cabinet doors, hinges, pipes, and shelf depths can surprise you, and not in a fun birthday-party way.
Small Kitchen Cabinet Organization Tips
Small kitchens demand strategy. Use every shelf intentionally. Move rarely used items out of the kitchen if another storage area is available. Add hooks inside cabinet doors. Use narrow bins to group small items. Store appliances based on frequency of use. Keep countertops clear by giving daily tools a cabinet home.
In a small kitchen, visual clutter matters too. Matching containers can help, but consistency is more important than perfection. Even simple grouped categories can make a compact kitchen feel calmer and larger.
Family-Friendly Cabinet Organization
For busy households, cabinet organization should reduce friction. Create zones that support daily routines: breakfast, school lunches, after-school snacks, dinner prep, leftovers, and cleanup. Put safe, kid-friendly items low enough for children to access independently. Store fragile or hazardous items higher.
Use labels with words or pictures depending on age. Clear bins help kids see choices without dumping everything out. A family kitchen should invite participation, not require one person to act as the full-time cabinet security guard.
Real-Life Experiences: What Organizing Kitchen Cabinets Actually Feels Like
Here is the honest experience of organizing kitchen cabinets: at first, it feels like opening a museum exhibit titled “Things I Bought With Confidence and Then Forgot.” You may discover three bags of flour, a fondue fork set, six travel mugs, and a lid that fits nothing in this known universe. That is part of the process.
One of the most helpful lessons is that the first arrangement is rarely perfect. You might put coffee mugs near the dishwasher, then realize they belong above the coffee maker. You may create a snack bin, then discover it needs to be lower because everyone keeps leaving snacks on the counter. You may organize pans beautifully, only to learn that the lid system needs its own intervention. That is not failure. That is information.
The best experience comes when the kitchen begins to answer your movements. You reach for a plate and it is right there. You need oregano and can see it immediately. You open the food container cabinet and nothing falls out with the confidence of a stage performer. The calm is small but very real.
Another practical discovery: organizing together works better than organizing alone if multiple people use the kitchen. When everyone helps decide where things go, they are more likely to maintain the system. Ask simple questions: “Where would you look for this?” “Do we use this often?” “Is this easy to put away?” The answers may surprise you. Sometimes the person who never cooks has strong opinions about cereal placement. Let them have their moment.
There is also an emotional side. Kitchen cabinets often hold guilt: wedding gifts never used, expensive gadgets that disappointed us, chipped dishes we keep “just in case,” and bulk purchases from our optimistic era. Letting go of those things can feel oddly personal. But cabinets are not storage units for old intentions. They are tools for the life happening now.
A good organizing session usually ends with a few wins you can feel immediately. Dinner prep becomes smoother. Grocery lists become more accurate. Cleaning takes less time. The kitchen looks quieter. Even if nobody else notices, you will notice every time you open a cabinet and do not have to negotiate with a leaning tower of bowls.
My favorite experience-related tip is to live with the new system for two weeks before declaring it finished. Use sticky notes if needed: “mugs here,” “snacks here,” “lids here.” After two weeks, adjust anything that feels awkward. Organization is not a one-time performance. It is a conversation between your habits and your space. And yes, sometimes your space says, “Please stop buying water bottles.” Listen to it.
Conclusion: A Better Kitchen Starts Behind the Doors
Organizing the kitchen cabinets is one of the most satisfying home projects because the results show up every single day. You cook faster, clean easier, shop smarter, and stop losing things in plain sight. More importantly, you create a kitchen that supports your routine instead of arguing with it.
Start by emptying and sorting. Clean the shelves. Build zones around real habits. Keep daily items easy to reach. Use vertical space, turntables, bins, dividers, and labels where they help. Store food safely, rotate pantry items, and give awkward cabinets a clear purpose.
The magic is not in having perfect cabinets. The magic is in opening a door and knowing exactly where things are. That small moment of order can make cooking feel lighter, mornings feel smoother, and your kitchen feel like it is finally on your team.