
Note: This article is original web-ready content synthesized from current U.S. manufacturer manuals, retailer installation guides, and practical home-improvement recommendations. No source links are inserted in the article body.
Assembling a plastic resin shed kit sounds wonderfully simple at first. The box shows a neat little backyard building, the product description says “easy assembly,” and your optimistic inner handyman says, “How hard can snapping together a giant plastic house really be?” Then the truck drops off a pallet the size of a small rhinoceros, the instruction manual unfolds like a treasure map, and suddenly your Saturday has developed a personality.
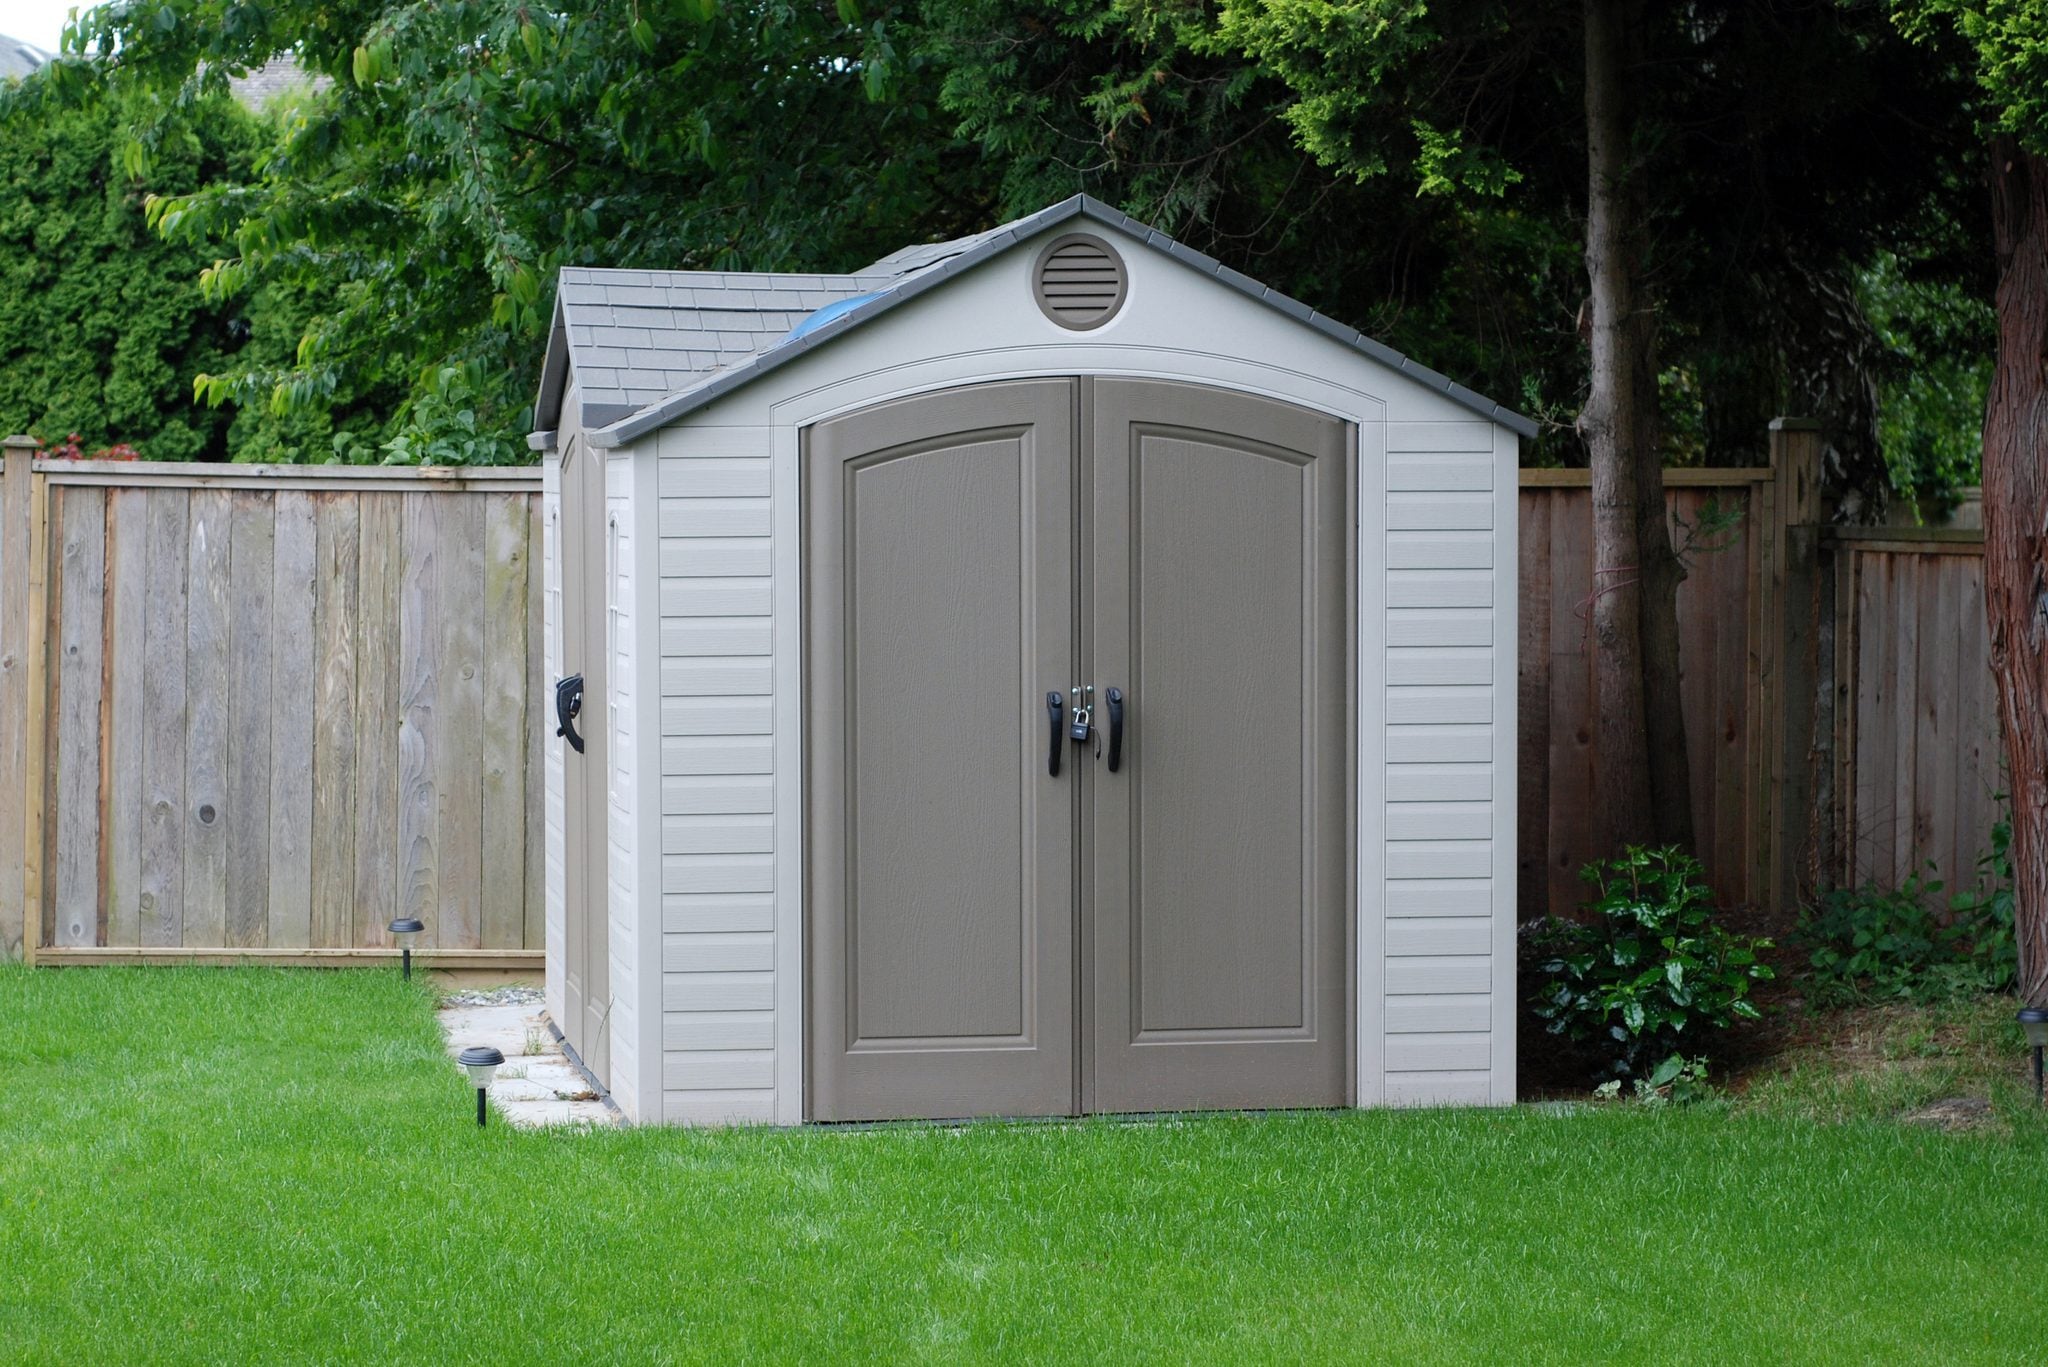
The good news: a plastic resin shed kit can absolutely be a smart DIY project. Resin sheds are popular because they resist rot, rust, and many everyday weather problems better than untreated wood or metal. They are usually made from durable plastic materials such as high-density polyethylene or polypropylene, and many models include molded wall panels, roof panels, floor sections, doors, hardware, and anchoring points. They are also lower maintenance than wood sheds because you do not need to paint, stain, or constantly defend them from termites like you are in a backyard medieval battle.
The not-so-secret secret is that resin shed assembly depends heavily on preparation. A resin shed is forgiving in some ways, but it is not magic. If the base is uneven, the walls can fight you. If the floor is unsupported, the doors may not close correctly. If you build on a windy day, the wall panels can behave like very expensive plastic sails. Before you grab a drill and declare victory over clutter, here are the most important things to know before assembling a plastic resin shed kit.
1. Choose the Right Location Before You Open the Box
The best time to think about shed placement is before 200 pounds of panels are scattered across your lawn. A plastic resin shed should sit in a spot that is level, accessible, well-drained, and legally allowed. That last part may sound boring, but “move the shed because the HOA hates it” is not a fun weekend sequel.
Start by checking local building rules, zoning requirements, setbacks, and homeowners association guidelines. Many U.S. cities treat small storage sheds differently from larger accessory structures, but rules vary widely. Some areas allow sheds under a certain square footage without a building permit, while others still require zoning approval based on placement, height, lot coverage, or distance from property lines. If your shed will be near a fence, easement, utility line, or neighbor’s view, double-check before building.
What Makes a Good Shed Location?
A good resin shed location should have enough clearance for assembly, enough room for doors to swing open, and a walking path wide enough to carry a mower, wheelbarrow, trash bin, or storage tote without performing backyard gymnastics. Avoid low spots where water collects after rain. Resin does not rot like wood, but standing water can still create mud, shifting soil, mildew, and an unpleasant “why does my shed smell like a swamp?” situation.
Also think about sun exposure. Resin sheds are built for outdoor use, but long-term direct sun can cause some plastic materials to fade over time. If you live in a hot climate, a location with partial afternoon shade can help keep the interior cooler. However, do not tuck the shed into a damp, hidden corner with poor airflow. A little sun and ventilation help keep stored items dry.
2. The Foundation Matters More Than the Shed Itself
If there is one lesson every resin shed owner learns quickly, it is this: the foundation is not optional. A plastic resin shed kit is only as strong, square, and cooperative as the surface underneath it. The panels are manufactured to fit together with specific tolerances. When the base is twisted, sloped, soft, or uneven, those tolerances disappear faster than a 10 mm socket in a garage.
Most resin shed manufacturers recommend a solid, level foundation such as a concrete slab, wood platform, compacted gravel base, or manufacturer-approved foundation frame. Concrete offers the best long-term support for heavy equipment such as riding mowers, snow blowers, generators, or stacked tool chests. A properly built wood platform can also work well for moderate storage loads. Gravel bases are useful for drainage, especially in wet climates, but they must be compacted and edged properly so the shed floor does not settle unevenly.
Common Foundation Options
- Concrete slab: Best for maximum stability, heavy storage, and long-term use. It should be level, slightly larger than the shed footprint if recommended, and fully cured before assembly.
- Pressure-treated wood platform: A practical DIY option when concrete is not possible. Use ground-contact-rated lumber where appropriate and follow the shed manual’s support spacing.
- Compacted gravel pad: Good for drainage and moderate loads. It should be boxed in, compacted, and level from corner to corner.
- Paver base: Works for smaller sheds if the pavers are set on a compacted, level bed. Uneven pavers can cause door and panel alignment problems.
- Manufacturer foundation kit: Useful when available for your exact model, but still requires a level, prepared site underneath.
Do not assemble a resin shed directly on grass or bare dirt unless the manufacturer specifically allows it. Soil shifts, grass decomposes, weeds push up, and moisture lingers. The shed may look fine on day one and start leaning like it has strong opinions by month six.
3. Read the Manual Before Assembly Day
Yes, reading the manual feels like admitting defeat. Do it anyway. Plastic resin shed kits are engineered systems, not random puzzle pieces. Many panels look similar, but small differences in tabs, grooves, pre-drilled holes, or molded labels matter. A wall panel installed backward may not reveal itself until the roof refuses to line up. At that point, your “quick assembly” becomes a full-scale emotional renovation.
Before assembly day, open the manual and read it from start to finish. Note the required tools, recommended number of helpers, estimated assembly time, anchor instructions, and warnings about temperature or wind. Some resin sheds use self-tapping screws that require extra pressure at first. Some models include special hand tools for certain bolts and warn against using power tools on those fasteners. Others need roof supports, corner locks, or door hardware installed in a precise order.
Inventory Every Part
Lay out every panel, screw pack, hinge, handle, bracket, skylight piece, and trim section. Match each item to the parts list before you begin. If a roof connector or door hinge is missing, you want to know before three walls are standing and your neighbor has already been promised pizza for helping.
Inspect panels for shipping damage, cracked tabs, warped edges, or missing molded features. Resin panels are durable, but large plastic parts can be damaged during delivery. If something is broken, contact the manufacturer or retailer before forcing parts together. “Persuading” a cracked panel with a hammer rarely improves the relationship.
4. Pick the Right Weather Window
Weather can make or break a resin shed assembly. Choose a calm, dry day with moderate temperatures. Strong wind is the enemy because wall and roof panels are large, lightweight, and excellent at catching air. Building in wind can damage parts, bend panels, or turn a simple wall section into a neighborhood kite festival.
Extreme cold can also be a problem. Some resin materials become more brittle in freezing temperatures, and certain manuals warn against assembly below 32 degrees Fahrenheit. Hot weather brings its own challenges: panels can expand slightly, metal hardware gets uncomfortable to handle, and working inside a partly assembled shed can feel like assembling furniture in a toaster.
Best Conditions for Resin Shed Assembly
- Dry ground and no rain in the forecast
- Light wind or no wind
- Mild temperatures
- Good daylight, especially for roof and door alignment
- Enough time to finish major structural sections the same day
If you cannot finish the shed in one day, secure loose panels and hardware before stopping. Do not leave tall wall sections unsupported overnight. Even a moderate gust can knock them out of alignment or damage connection points.
5. Have at Least One Helper
Some small vertical storage cabinets can be assembled solo, but most full-size plastic resin shed kits are a two-person job. The pieces may not be extremely heavy, but they are awkward, flexible, and sometimes taller than the person holding them. A helper can hold walls steady while you fasten corners, align roof panels, or keep the door opening square.
For larger resin sheds, three people can make the job smoother, especially during roof installation. One person can guide the panel, one can support the opposite side, and one can fasten hardware. This is much better than balancing a roof panel on your head while whispering motivational quotes to yourself.
Helpful Tools to Prepare
- Cordless drill with adjustable clutch
- Manual screwdriver for delicate or special fasteners
- Rubber mallet
- Tape measure
- Level
- Work gloves
- Safety glasses
- Step ladder
- Flashlight or headlamp for interior hardware
- Containers or magnetic trays for screws and small parts
Use power tools carefully. Resin can crack or strip if screws are overdriven. Set your drill clutch low and finish snugging fasteners by hand when needed. The goal is secure, not “tightened with the force of a moon launch.”
6. Keep the Floor Square From the Start
The floor is the blueprint for the entire shed. If the floor panels are not fully locked, level, and square, every step after that becomes harder. Resin shed floors usually connect with molded tabs, grooves, or interlocking edges. They need to sit flat on the foundation and stay aligned while the walls go up.
After connecting the floor panels, measure diagonally from corner to corner. If both diagonal measurements match, the floor is square. If they do not, gently shift the assembly until it is correct. This small step can prevent big problems later, especially with doors. Doors are excellent truth-tellers. They will reveal every foundation mistake, every rushed corner, and every moment you thought, “Close enough.”
Anchor the Floor Correctly
Many resin shed kits include anchoring locations or hardware recommendations, but the exact method depends on your foundation. Concrete may require masonry screws or expansion anchors. Wood platforms may require lag screws or structural screws. Gravel bases may need a separate ground-anchor system or a manufacturer-approved approach. Follow the manual and local wind requirements, especially if you live in a storm-prone region.
Anchoring is not just about theft prevention. It helps keep the shed stable during high winds and protects the structure from shifting. A lightweight plastic shed without proper anchoring can move, rack, or suffer panel damage in severe weather.
7. Do Not Force Panels That Do Not Fit
Resin shed panels are designed to slide, snap, screw, or lock into place in a certain order. When something does not fit, stop and check the manual. The problem is usually orientation, order of assembly, foundation level, or a tab that has not fully seated.
Forcing panels can break tabs, enlarge screw holes, crack corners, or permanently distort the plastic. A rubber mallet can help gently seat parts, but it should not be used like a medieval weapon. If a wall panel seems impossible to install, check whether the previous panel is fully engaged. If the roof panel does not align, check whether the walls are plumb and the corners are locked.
Watch for “Almost Right” Mistakes
The sneakiest assembly mistakes are not dramatic. They are tiny. A floor panel is off by a quarter inch. A wall tab is not fully snapped. A roof support is flipped. A hinge bracket is installed on the wrong side. Each mistake seems harmless until the doors rub, the roof gaps, or the final trim piece refuses to cooperate.
Move slowly through the first half of the project. Once the floor and walls are square, the rest often goes faster. Rushing early steps usually creates the kind of delay that turns a three-hour project into a two-day character-building exercise.
8. Plan Interior Storage Before You Fill the Shed
A resin shed is not just a box for outdoor clutter. It works best when you think about what will go inside before you start piling things into it. Heavy items should go low and near the walls or corners, depending on the floor support and manufacturer guidance. Tall tools can hang from compatible wall accessories if the shed design allows it. Shelving should be freestanding or manufacturer-approved unless the manual permits wall-mounted systems.
Do not lean very heavy items against resin walls. Plastic panels can deform under constant pressure, especially in heat. Store gas cans, chemicals, fertilizers, and power equipment safely and according to product labels. Some manufacturers caution against storing flammable or caustic chemicals in plastic sheds, and hot items such as grills or recently used equipment should never be placed against resin walls.
Smart Organization Ideas
- Use labeled bins for seasonal items.
- Keep frequently used tools near the door.
- Use a freestanding shelf for small containers.
- Store heavy items on the floor, not overhead.
- Leave a center walkway for safe access.
- Use hooks only where the shed design supports them.
Good organization also prevents damage. When a shed is packed too tightly, doors strain, walls get bumped, and roof panels collect items they were never designed to hold. The roof is for weather protection, not spare lumber, storage totes, or your secret collection of “I might need this someday” pipes.
9. Understand Maintenance Before You Buy
Plastic resin sheds are low maintenance, not no maintenance. That distinction matters. You do not need to paint, stain, or treat them like wood, and you do not need to fight rust the way you might with metal. However, you should still inspect and clean the shed regularly.
At least once a year, check the roof, walls, floor, doors, hinges, handles, vents, and anchor points. Clean the exterior with mild soap and water. Avoid harsh cleaners, bleach, ammonia, abrasive pads, and stiff brushes unless your specific manual allows them. Harsh products can dull or damage the plastic surface. Keep leaves, branches, and snow loads off the roof. Trim weeds and vegetation around the base to discourage pests and improve airflow.
Common Maintenance Tasks
- Wash exterior panels with mild soap and water.
- Clear leaves and debris from the roof.
- Check door alignment and hardware.
- Inspect for cracks or damaged tabs.
- Confirm anchors remain tight.
- Keep soil, mulch, and plants away from the base.
- Reorganize stored items so heavy objects do not press against walls.
If you notice a crack, repair it promptly with a product suitable for outdoor plastic repair or contact the manufacturer for replacement parts. Small problems are easier to fix before they become large gaps that invite water, insects, and regret.
10. Know the Limits of a Plastic Resin Shed
A resin shed is great for lawn tools, gardening supplies, patio cushions, bicycles, trash cans, pool gear, and seasonal storage. It is not meant to be a storm shelter, workshop with heavy electrical equipment, living space, or climate-controlled storage room unless specifically designed and permitted for that use.
Temperature inside the shed can rise in direct sun, so avoid storing heat-sensitive items such as paint, electronics, candles, aerosol cans, or delicate fabrics unless the conditions are safe. Ventilation helps, but a shed is still an outdoor storage structure. If an item would be ruined in a hot garage or damp basement, think carefully before storing it in a backyard resin shed.
Also consider security. Many resin sheds include lockable handles or latch points, but plastic doors are not vault doors. For expensive equipment, use additional security measures such as a high-quality padlock, motion lighting, a camera, or storing the most valuable items elsewhere.
Practical Example: Why a Level Base Saves the Whole Project
Imagine you are assembling a 7-by-7-foot resin shed for garden tools, a push mower, and patio cushions. You place it on pavers because pavers seem solid. However, one rear corner is half an inch lower than the front corner. At first, everything looks fine. The floor snaps together. The first wall stands. Then the side panels require more force. The roof holes are slightly misaligned. Finally, the doors rub at the top and leave a gap at the bottom.
The shed is not defective. The base is. Resin shed panels depend on a flat, square footprint. That half-inch difference travels upward through the walls and roof. The solution is not shaving the door, drilling new holes, or blaming the plastic. The solution is to correct the foundation. In many cases, spending an extra afternoon leveling the base saves hours of frustration during assembly and years of annoying door problems afterward.
Extra Field Experience: Lessons Learned From Real Resin Shed Assembly
Here is the kind of practical experience that does not always show up on the product box. The first mistake many DIYers make is underestimating the unpacking stage. A resin shed kit is not like opening a bookshelf box and finding six boards and a bag of mystery screws. It often contains large panels, several hardware packs, duplicate-looking pieces, and protective packaging that can quickly cover your yard. Before assembling anything, create zones: wall panels in one area, roof panels in another, floor pieces near the foundation, and hardware on a table or sheet of cardboard. Labeling with painter’s tape can save time, especially when two panels look nearly identical but only one belongs on the left side.
The second lesson is to protect the panels while they are on the ground. Resin is tough once assembled, but individual tabs and corners can be vulnerable. Do not drag panels across concrete or gravel. Lay them on cardboard, moving blankets, or clean grass. If a panel has molded hooks or tabs, keep those areas away from foot traffic. One careless step can break the tiny connector that the whole next step depends on. That is when the project turns from “DIY storage upgrade” into “customer service phone call with emotional background music.”
The third lesson is to check the base more than once. A foundation can appear level when empty but reveal small problems after the floor panels are connected. Use a long level or straight board with a level on top. Check front to back, side to side, and diagonally. If you are using pavers, do not rely on the paver tops alone. Each paver needs firm support underneath. A hollow or soft spot can settle after the first rain or after you roll in a mower.
The fourth lesson is that doors deserve patience. Door alignment is usually the final exam of shed assembly. If the doors do not meet evenly, resist the urge to immediately adjust hinges or force the latch. First, confirm the shed is square. Check that the roof panels are fully seated, the corners are locked, and the floor is flat. Sometimes loosening a few screws, gently shifting the frame, and retightening in the correct order solves the issue. Doors tell the truth, but they do not always tell you where the lie started.
The fifth lesson is to plan the first rain. After assembly, watch what happens during a storm. Does water collect near the entrance? Does runoff from the roof splash mud onto the walls? Does the surrounding soil slope toward the shed? This is the best time to add gravel, extend a splash path, adjust grading, or improve drainage. A resin shed can handle weather, but it should not be asked to sit in a puddle like a duck with a lawn mower inside.
The sixth lesson is to keep the manual even after the shed is done. Store it in a plastic bag inside the shed or save a digital copy. You may need it later for replacement parts, accessory compatibility, anchoring details, warranty questions, or disassembly. Future you will be grateful. Future you may even forgive present you for buying too many storage bins.
Conclusion
Assembling a plastic resin shed kit is one of the most achievable backyard DIY projects for homeowners who plan carefully. The shed itself may be designed for easy assembly, but the real success happens before the first wall goes up. Choose a legal and practical location, build a level foundation, read the manual, organize the parts, recruit a helper, and avoid windy or freezing conditions. Pay close attention to the floor, corners, roof supports, and door alignment. Most “bad shed” experiences are really “bad base” or “rushed assembly” experiences wearing a plastic disguise.
A resin shed can be a clean, durable, low-maintenance storage solution for tools, garden gear, bikes, patio cushions, and seasonal clutter. Treat it like a structure, not a toy box, and it will reward you with years of useful backyard organization. Build it square, anchor it properly, maintain it lightly, and your shed will quietly do its job while your garage finally stops looking like a hardware store exploded.