
Old office storage has a serious image problem. Metal file cabinets, index-card drawers, document organizers, and rolling pedestal units are usually associated with beige carpet, buzzing fluorescent lights, and meetings that should have been emails. Look more closely, however, and that dull cabinet may be a sturdy, drawer-packed workshop hero waiting for a second career.
With thoughtful preparation, durable paint, practical drawer organizers, and a few custom details, you can turn boring office storage into an OOAK toolboxan original, one-of-a-kind storage system designed around the tools you actually use. Instead of paying for a generic chest with compartments that are never quite the right size, you can create a personalized tool cabinet that fits your workshop, craft room, garage, or repair corner.
This project is not simply about spraying an old cabinet a fashionable color and hoping for the best. A successful office storage makeover requires checking the cabinet’s condition, controlling rust, preparing the finish properly, organizing tools by workflow, and respecting the weight limits of drawers originally designed for paper rather than socket sets. Do those things well, and yesterday’s paperwork prison can become tomorrow’s workshop command center.
Why Office Storage Makes a Surprisingly Good Toolbox
Many older office cabinets were built from steel and designed to survive years of daily use. Their shallow drawers are particularly useful for screwdrivers, pliers, measuring tools, drill bits, fasteners, carving supplies, electrical components, and other objects that disappear whenever they are tossed into one enormous bin.
Office storage also offers several advantages over building a tool cabinet from scratch:
- Multiple drawers: Separate compartments make it easier to organize tools by type or task.
- Compact dimensions: Pedestal cabinets and card-catalog units can fit under benches or beside machines.
- Strong shells: Steel exteriors tolerate workshop grime better than many lightweight household organizers.
- Affordable availability: Used office furniture often appears at surplus sales, thrift stores, resale shops, and local marketplaces.
- Customization potential: Flat metal surfaces are perfect for labels, decals, stencils, magnetic accessories, and color blocking.
The catch is that not every filing cabinet should become a toolbox. A shallow steel drawer unit may be ideal for hand tools, while a lightweight plastic paper organizer may be better reserved for sandpaper, manuals, or craft supplies. Choose the cabinet according to the weight and dimensions of the items it will hold.
Choose the Right Office Cabinet for the Project
Look for Solid Construction
Open every drawer before bringing a cabinet home. The drawers should move without twisting, grinding, or dropping off their runners. Examine the corners for impact damage and check whether the cabinet rocks when placed on a level surface. Minor scratches are cosmetic; bent frames and failing slides are structural headaches wearing a bargain-price disguise.
Steel card-catalog cabinets, map drawers, printer stands, mobile office pedestals, and small filing cabinets are excellent candidates. A unit with many shallow drawers is ideal for small hand tools and hardware. Deeper drawers can store power tools, batteries, chargers, protective equipment, and bulky accessories.
Check the Drawer Depth
Measure your longest and tallest tools before selecting a cabinet. A beautiful drawer is not especially useful when it is half an inch too short for your favorite ratchet. Lay representative tools on the drawer bottom and confirm that the drawer can close without handles, cords, or blades catching the cabinet frame.
Inspect for Rust and Mystery Coatings
Light surface rust can usually be removed and treated. Deep corrosion around the bottom, drawer rails, or caster mounts may indicate that the metal has become too weak for heavy tools. Be cautious with very old painted furniture whose coating history is unknown. Avoid aggressive dry sanding until you have considered whether the existing finish could contain hazardous material.
Safety research basis:
Tools and Materials You May Need
Your exact supply list will depend on the cabinet’s condition and the finish you want, but most office-storage toolbox makeovers use the following:
- Protective gloves and safety glasses
- Appropriate respiratory protection
- Drop cloths or plastic sheeting
- Screwdrivers, wrenches, and pliers
- Degreasing cleaner and clean shop rags
- Wire brush, scuffing pad, or suitable sandpaper
- Rust treatment or rust-converting primer, if needed
- Bonding or metal primer
- Paint formulated for metal surfaces
- Painter’s tape and masking paper
- Replacement drawer pulls or label holders
- Non-slip drawer liner
- Small bins, dividers, foam, or modular trays
- Stencils, decals, paint markers, or vinyl lettering
- Locking casters or a stable base, if mobility is required
Read the instructions for every cleaner, primer, coating, and adhesive you use. Products that appear similar may require different temperatures, recoat windows, ventilation, and curing times.
How to Transform Office Storage Into an OOAK Toolbox
1. Plan the Cabinet Before Taking It Apart
Photograph the cabinet from several angles and take close-up pictures of the drawer slides, stops, handles, and locking mechanism. These photos will be extremely helpful when a mysterious clip appears on the floor two hours later and pretends it has never met you.
Decide where the cabinet will live, what it will store, and whether it needs to move. A stationary cabinet can often carry more weight safely than a modified rolling unit. If you plan to add casters, verify that the cabinet base is strong enough to support them and that the completed unit will remain stable with drawers open.
2. Remove Drawers and Hardware
Take out removable drawers, pulls, label frames, locks, and rubber bumpers. Place screws and small parts in labeled containers rather than creating a metal confetti collection across the workbench.
Avoid painting drawer slides, rollers, lock components, or surfaces that rub against each other. Added coating thickness can make drawers drag or prevent them from closing. Mask these areas carefully if they cannot be removed.
3. Clean Every Surface Thoroughly
Office furniture collects hand oils, furniture polish, adhesive residue, dust, and substances best described as “break-room history.” Paint will not bond reliably to grease. Wash the cabinet with a cleaner appropriate for its existing finish, rinse or wipe it as directed, and allow all surfaces to dry completely.
Pay particular attention to drawer fronts, handles, lower corners, and the cabinet top. Silicone-based polish and oily residue can create craters or fisheyes in a new finish.
4. Remove Loose Paint and Treat Rust
Use a hand wire brush, scuffing pad, or appropriate abrasive to remove loose coating and unstable rust. Feather rough paint edges so they do not show through the final color. Stable glossy paint should generally be scuffed enough to help the primer adhere.
For small rusted areas, remove as much corrosion as practical and apply a compatible rust treatment or primer. If rust has eaten through the cabinet or weakened a load-bearing section, replacement may be safer than restoration.
5. Prime for Adhesion and Protection
Primer is the bridge between the old cabinet and the new finish. Use a product intended for the surface you have: bare steel, lightly rusted metal, or previously painted glossy material. Spot-prime exposed metal at minimum, although a full primer coat can provide more uniform color and adhesion.
Apply light, controlled coats rather than one heroic coat that immediately begins traveling south. Let the primer dry according to its label, and lightly smooth imperfections only when the product instructions allow it.
Surface preparation basis:
6. Apply the Finish in Thin Coats
Spray paint can create a smooth, factory-like finish on detailed metal cabinets, while a small foam roller can work well on broad, flat panels. Whichever method you choose, apply multiple thin coats. Keep spray passes moving, overlap them slightly, and begin each pass just beyond the cabinet edge to reduce heavy spots.
Work outdoors or in a properly ventilated location suited to the coating. Keep paint mist and solvent vapor away from flames, pilot lights, heaters, sparks, and other ignition sources. Wear the protective equipment specified by the product manufacturer and appropriate for the work.
Ventilation and spray-safety basis:
7. Give the Cabinet a One-of-a-Kind Identity
This is where functional storage stops looking like office leftovers. Choose a design that suits your workspace rather than chasing a trend that will feel dated before the paint finishes curing.
Possible OOAK toolbox themes include:
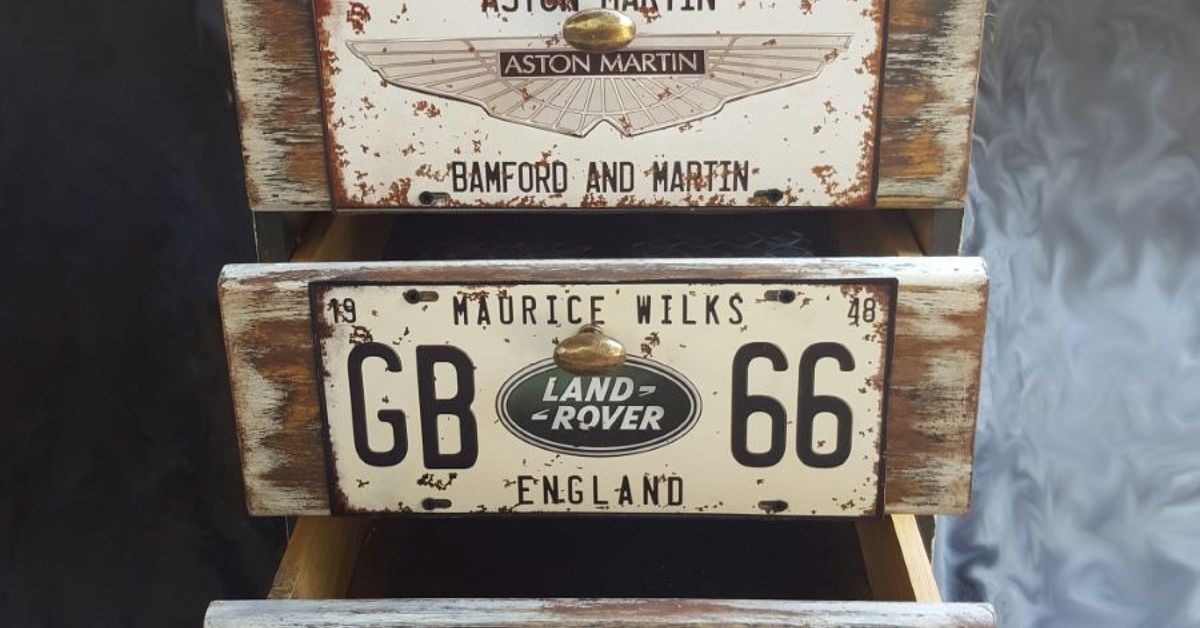
- Vintage service station: Deep red, cream lettering, numbered drawers, and aged metal label holders.
- Industrial workshop: Charcoal paint, white stencil lettering, brushed-metal pulls, and hazard-stripe accents.
- Retro office: Muted green, mustard, or blue with restored original hardware.
- Modern minimalist: Matte black or warm gray with small, consistent labels.
- Color-coded utility: Different drawer colors for woodworking, electrical, automotive, and household tools.
- Personal shop branding: Add a family name, workshop logo, favorite number, or invented repair-company emblem.
A restrained design often looks more convincing than covering every inch with decoration. One logo, a contrasting handle color, and clear drawer labels may provide all the character the cabinet needs.
8. Allow the Paint to Cure
Dry paint and fully cured paint are not the same thing. A surface may feel dry while remaining soft enough to dent under a wrench or stick to a rubber drawer liner. Follow the coating manufacturer’s curing guidance before reassembling and loading the cabinet.
Patience at this stage protects all the work you have already completed. Installing hardware too early can twist fresh paint around screw holes, while loading tools prematurely can leave permanent impressions.
9. Line and Divide the Drawers
Cut non-slip liner to fit each drawer. The liner reduces rattling, protects the finish, and helps keep tools from migrating into one noisy pile every time a drawer moves.
Use modular trays for driver bits, sockets, blades, fasteners, and electrical connectors. Longer tools can be separated with adjustable dividers or custom-cut foam. Leave some open space for future additions; a toolbox filled to maximum capacity on day one has nowhere to put tomorrow’s new gadget.
10. Organize by Workflow, Not Just Appearance
A beautiful drawer layout is useless when the tools you use together are scattered across five locations. Group equipment according to real tasks:
- Measuring tape, combination square, pencils, and marking knives
- Pliers, wire strippers, electrical tape, connectors, and testers
- Ratchets, sockets, extensions, and torque accessories
- Drill bits, drivers, countersinks, and depth stops
- Scrapers, putty knives, sanding blocks, and finishing supplies
Place frequently used tools between knee and chest height. Reserve lower drawers for heavier objects, especially power tools and dense socket sets. Small, lightweight items belong higher in the cabinet.
Organization research basis:
Smart Upgrades That Make the Cabinet More Useful
Add a Replaceable Work Surface
A plywood or hardwood top can turn a sturdy cabinet into a compact assembly station. Attach the top in a way that allows future replacement, because workshop surfaces eventually collect drill holes, glue, paint, dents, and one burn mark nobody remembers creating.
Use the Metal Sides
Magnetic hooks, parts cups, paper-towel holders, and small tool bars can expand storage without drilling holes. Avoid loading one side so heavily that a narrow cabinet becomes unbalanced.
Install Better Labels
Labels should describe what belongs in the drawer, not merely what happened to be there on Tuesday. Broad labels such as “Measuring,” “Electrical,” and “Drilling” adapt better than extremely specific lists.
For a vintage appearance, use metal label frames with printed paper inserts. For a clean modern cabinet, try vinyl lettering. Removable magnetic labels are useful when the storage layout changes frequently.
Improve Mobility Carefully
Locking casters can make a compact toolbox much more convenient, but mobility changes the cabinet’s stability. Use properly rated hardware, reinforce weak mounting areas, and keep heavy tools low. Do not roll the cabinet with drawers open, and avoid using the top as a workbench unless the wheels are locked and the unit is stable.
Common Makeover Mistakes to Avoid
Painting Over Dirt
New paint cannot compensate for oily residue. Poor cleaning often leads to peeling, fisheyes, and frustrating touch-ups.
Painting Drawer Slides
Paint on sliding or rubbing surfaces may create drag, chips, and alignment problems. Mask mechanical parts instead.
Applying Heavy Coats
Thick coats can run, wrinkle, trap solvent, and extend curing time. Several light coats usually produce a cleaner result.
Ignoring Drawer Capacity
Paper is heavy, but a drawer full of sockets can be heavier. Distribute dense tools across lower drawers and watch for sagging, loose slides, or frame distortion.
Choosing Style Before Function
Decorative drawer pulls may look magnificent but feel terrible when your hands are oily or gloved. Select hardware that is easy to grip and strong enough for the loaded drawer.
Skipping the Test Layout
Arrange tools in the drawers before cutting liner, foam, or dividers. A five-minute test can prevent an hour of reorganizing and several minutes of vocabulary expansion.
Workshop Experiences and Lessons From Similar Conversions
The most revealing lesson from office-storage-to-toolbox projects is that the cabinet rarely behaves exactly as expected. On paper, the transformation seems wonderfully simple: clean it, paint it, organize it, and admire it. In practice, the project becomes a sequence of small discoveries, each one offering a useful lesson.
A common first surprise is grease contamination. A cabinet may look clean after an initial wipe, yet the first primer coat develops tiny craters on a few drawer fronts. Those spots are usually found near the handles, where years of skin oils, polish, or cleaning products have accumulated. The experience teaches an important rule: clean the cabinet twice, using fresh rags for the second pass. Turning a rag frequently is not excessive fussiness; it prevents dirt from being redistributed across the metal.
Drawer fit provides another memorable lesson. Removing the drawers makes painting easier, but coating the wrong edges can reduce already-tight clearances. One converted pedestal cabinet looked excellent until its top drawer refused to close. The culprit was not a bent slide. Several coats of primer and paint had accumulated on the drawer’s rubbing surfaces. Carefully removing the excess coating solved the problem, but proper masking would have saved considerable time and muttered commentary.
Tool layout often changes after the cabinet enters daily use. An early arrangement may look perfectly symmetrical, with every screwdriver aligned by length and every pair of pliers positioned like exhibits in a museum. After several projects, convenience begins rewriting the plan. Measuring tools move toward the top. Frequently used drivers migrate to the easiest drawer. Specialty tools settle lower because they are needed less often.
This evolution is not evidence of failed organization. It means the storage system is adapting to real work. Removable trays, magnetic labels, and adjustable dividers make these changes far easier than permanently gluing every organizer into place.
Weight distribution can also alter the project. Small steel drawers appear tough, encouraging the owner to fill one with every socket, wrench, and metal accessory available. The drawer may open normally while the cabinet is empty, then sag or bind after loading. Spreading dense tools among several lower drawers typically produces better results. It also prevents a top-heavy cabinet from lunging forward when a full drawer is opened.
One of the happiest discoveries is how effective shallow office drawers can be. Traditional deep toolboxes encourage stacking, which hides small objects beneath larger ones. Shallow drawers create a single visible layer. Drill bits, layout tools, files, blades, punches, and precision screwdrivers become easier to find. The cabinet may hold fewer cubic feet than a large chest, but it often makes better use of every inch.
Paint choice creates its own lesson in patience. Bold colors can make an ordinary cabinet spectacular, but the excitement of reassembly must not outrun the curing process. A cabinet loaded too soon may develop dents beneath tool organizers or marks around freshly tightened handles. Waiting until the coating has hardened is far less exciting than installing shiny new hardware, but it is also much less annoying than repainting a drawer.
Finally, the project demonstrates that useful workshop furniture does not need to begin life as workshop furniture. A discarded office cabinet carries history in its scratches, labels, faded inventory numbers, and stubborn little dents. Some makers erase every trace of that past. Others preserve one original label holder, leave a small patch of patina, or incorporate the old asset number into the new design.
That decision is what makes the finished toolbox genuinely one of a kind. The cabinet becomes more than painted storage. It becomes evidence that good materials can be reassigned, redesigned, and made useful againwith considerably more personality than anything beige ever expected to have.
Conclusion: Give Office Storage a Better Job
Turning boring office storage into an OOAK toolbox combines practical organization with creative reuse. The best results begin with a sound cabinet, careful cleaning, safe surface preparation, a compatible primer, and a durable finish. Thoughtful drawer planning then transforms the cabinet from attractive furniture into a storage system that improves the way you work.
Do not rush the curing process or overload delicate drawers. Keep heavy tools low, protect mechanical parts from paint, and design the interior around tasks rather than appearances. Add labels, liner, dividers, custom hardware, and a distinctive color scheme, and the former office castoff will look completely at home among saws, drills, clamps, and half-finished weekend projects.
The final result does not need to resemble a commercial tool chest. That is the point. An OOAK toolbox should reflect your tools, your workspace, and your sense of humor. Somewhere, a beige filing cabinet is quietly hoping you choose racing green.