
You seal an envelope, press the flap firmly, and admire your rare moment of organizational competence. Then you notice the check,eted the stationery equivalent of locking your keys in the car.
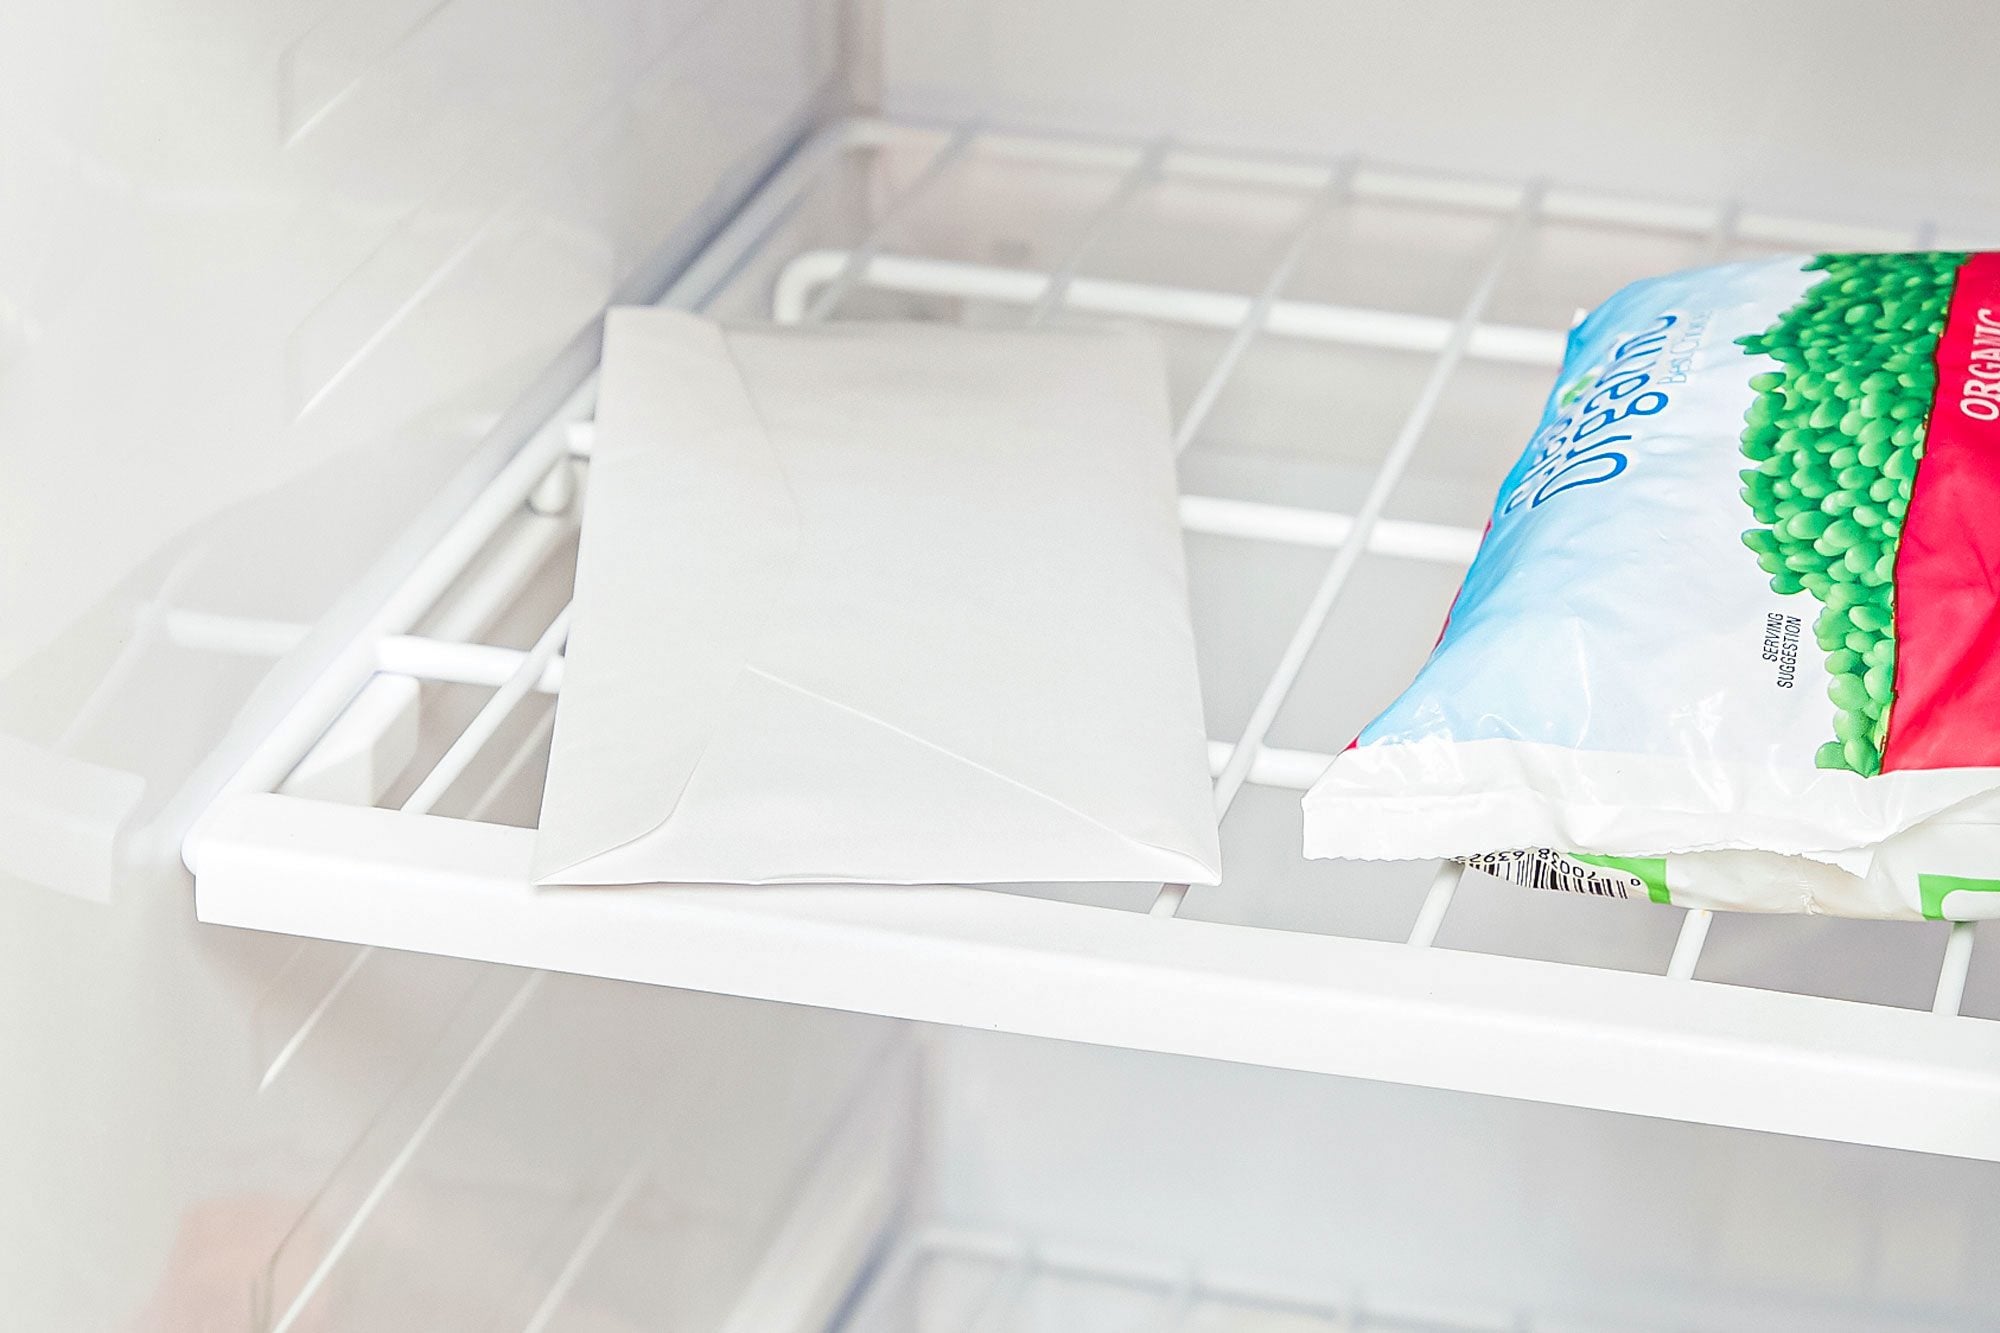
Before reaching for scissorsor steaming the envelope like a detective in an old movieconsider a surprisingly useful household trick: put the envelope in the freezer. Cold temperatures can make certain envelope adhesives temporarily firmer or less tacky, allowing the flap to separate with less tearing.
The freezer envelope trick is inexpensive, simple, and especially useful when you need to reopen your own mail without destroying the paper. However, it is not guaranteed to work. The outcome depends on the adhesive, paper coating, sealing pressure, time since sealing, and contents inside.
Important note: Use this technique only on envelopes you own or have clear permission to open. Never use it to access another person’s correspondence, confidential mail, ballots, legal evidence, or tamper-evident packaging.
Why Put an Envelope in the Freezer?
Most envelopes are closed with a thin layer of adhesive applied to the flap. Traditional envelopes usually have remoistenable gum, which becomes sticky when dampened. Self-seal and peel-and-seal envelopes may use latex or pressure-sensitive adhesives designed to bond when two surfaces meet.
Cold can temporarily change the physical behavior of some adhesives. Certain glues become firmer, more brittle, or less flexible at low temperatures. This may reduce their ability to cling tightly to the paper fibers, particularly around the corners of the flap.
Once chilled, a small gap may appear along the seam. A dull letter opener, butter knife, or thin plastic card can then be used to lift the flap slowly.
The important word is some. Modern adhesives are manufactured for different temperature ranges. A basic paper envelope may open neatly after an hour in the freezer, while a heavy-duty shipping envelope may remain sealed as though it has taken a personal oath.
Why You Need a Freezer Bag
Paper absorbs moisture easily. A cold envelope brought into warm air can develop condensation, much like an iced drink “sweating” on a summer afternoon. That moisture can wrinkle the paper, smear sensitive ink, stain the contents, or reactivate the glue before you are ready.
Always place the envelope in a clean, dry, resealable freezer bag. Press out excess air and close the bag completely. This protects the envelope from frost, food spills, freezer odors, and direct contact with damp surfaces.
How to Open a Sealed Envelope Using the Freezer
What You Will Need
- A sealed envelope that belongs to you
- A clean resealable freezer bag
- A dull butter knife, letter opener, or plastic card
- A dry, flat work surface
- A glue stick, double-sided tape, or replacement envelope
Step-by-Step Instructions
- Inspect the contents. Do not freeze envelopes containing electronics, delicate photographs, wax seals, thermal receipts, irreplaceable documents, or materials that may be damaged by temperature changes.
- Place the envelope in a bag. Keep it flat and avoid bending the contents. Remove excess air without crushing anything, then seal the bag.
- Lay it flat in the freezer. Choose a clean shelf away from leaking food packages and strongly scented items.
- Wait one to two hours. This is usually enough time to test an ordinary paper envelope. Leaving it overnight is rarely necessary.
- Work while the envelope is cold. Remove it from the bag in a dry room and examine the corners of the flap.
- Lift gently. If a gap appears, slide a dull tool under the flap and move slowly along the seam. Keep the tool nearly parallel to the paper.
- Stop if the paper tears. Fuzzy paper fibers or strong resistance mean the adhesive is not releasing. Do not turn the task into a wrestling match.
- Let the envelope warm naturally. Place it flat on a dry surface before adding the forgotten item or resealing it.
When the Freezer Envelope Trick Is Useful
You Forgot to Include Something
This is the most common reason to freeze an envelope. Perhaps the birthday card is sealed, but the gift card remains in your wallet. Maybe the tax form is ready, yet the signed page is still under the printer.
If the envelope uses ordinary gum adhesive, freezing may allow you to reopen it, add the missing item, and reseal the flap without wasting stationery.
You Used the Wrong Envelope
Holiday cards, wedding invitations, and business mailings often involve stacks of similar envelopes. It is easy to put the Anderson family’s card in the Henderson family’s envelope. Catching the mistake early improves the chances of reopening the flap cleanly.
You Need to Correct a Document
You may have included an outdated return form, forgotten to initial a page, or inserted the wrong receipt. The trick can preserve an envelope that was professionally printed, carefully addressed, or decorated with calligraphy.
You Want to Save Custom Stationery
Embossed envelopes, invitation sets, and branded business mailers can be expensive. Reopening one successfully may save both money and the trouble of finding a matching replacement.
Decorative paper is more unpredictable than plain paper, however. Test a spare envelope from the same package whenever possible.
Which Types of Envelopes Work Best?
Ordinary paper envelopes with remoistenable gum are generally the best candidates. Their adhesive layer is often thin and evenly applied, giving the cold a better chance to affect the bond.
Self-seal envelopes are less predictable. Some use latex or pressure-sensitive adhesive that becomes firmer in the freezer. Others are specifically designed to stay secure across a wide range of temperatures.
Peel-and-seal business envelopes often have a much stronger bond. The paper may tear before the adhesive releases. Padded mailers, plastic shipping bags, Tyvek-style envelopes, courier packs, and tamper-evident packaging are also poor candidates.
Never attempt the freezer trick on historic letters, collectible materials, legal exhibits, original certificates, or valuable documents. Museums and archives use carefully controlled temperatures, humidity levels, and protective enclosures. Your kitchen freezer, admirable though it may be, is not the Smithsonian.
Common Mistakes to Avoid
Freezing the Envelope Without Protection
Bare paper can absorb freezer odors, touch frost, or become damp. Always seal the envelope inside a clean bag first. Your anniversary card should not emerge smelling like frozen garlic bread.
Using a Sharp Knife
A sharp blade can cut the flap, the contents, or your fingers. Choose a dull tool with a smooth edge and use shallow pressure.
Pulling the Flap Too Quickly
Once a corner begins to lift, the temptation is to pull the whole flap open. That is how a promising rescue becomes a paper autopsy. Slide your tool gradually along the adhesive line instead.
Handling the Paper With Damp Hands
Use clean, dry hands and a dry work surface. Moisture can soften paper, reactivate gum, and smear inkjet printing or felt-tip pen.
Assuming the Original Adhesive Will Work Again
The old gum may become sticky again after warming, but the bond might be uneven or weak. Use a thin glue stick or double-sided tape when resealing ordinary cards. For confidential documents, transfer everything to a new security envelope.
Is Freezing Better Than Steaming an Envelope?
Steam is another traditional method for reopening sealed envelopes. Warm moisture can soften water-activated gum, but it can also warp the paper, loosen ink, damage photographs, create stains, or burn your fingers.
The freezer method is usually cleaner because it does not intentionally add water. It is also easier to control. You can chill the envelope, test one corner, and stop immediately if the paper resists.
A hair dryer is sometimes recommended, but heat may curl paper, affect thermal receipts, or make certain pressure-sensitive adhesives stickier. For an ordinary envelope containing ordinary paper, freezing is generally the lowest-drama first attempt.
If it fails, replacing the envelope is usually wiser than escalating to every appliance in the kitchen.
How to Reseal the Envelope Neatly
Allow the opened envelope to return gradually to room temperature while lying flat. Do not reseal it while it feels cold or damp.
For greeting cards and routine correspondence, apply a very thin layer of glue stick to the flap. Press it closed and place a clean book on top for several minutes. Double-sided tape also creates a neat bond without adding moisture.
Avoid applying too much liquid glue. It can soak through the paper and create wrinkles that announce, “Something unusual happened here.”
For checks, contracts, identity documents, medical records, or other confidential items, use a fresh envelope. A repaired flap may look acceptable but provide weaker security than the original seal.
Legal and Ethical Limits
The freezer envelope hack is suitable for your own outgoing mail, your own sealed greeting card, or an envelope you have explicit permission to reopen. It is not a legal or ethical shortcut for reading someone else’s correspondence.
Federal law protects mail from obstruction, theft, destruction, and unauthorized opening before delivery. Workplace policies, privacy laws, contracts, and state laws may create additional restrictions.
Do not open a roommate’s bank statement, a coworker’s confidential mail, someone else’s medical correspondence, or a package addressed to another person. The freezer is for correcting a stationery mistake, not launching an espionage career.
Frequently Asked Questions
How long should an envelope remain in the freezer?
Begin with one to two hours. Test one corner gently. Another hour may help, but some adhesives will not release regardless of how long the envelope stays cold.
Will freezing damage the contents?
Ordinary dry paper usually tolerates a brief chill. Photographs, thermal paper, foil decorations, wax seals, electronics, coated documents, and moisture-sensitive inks may not.
Can I use the refrigerator instead?
A refrigerator may firm certain adhesives, but it is warmer and often more humid than a freezer. The method is generally less effective.
Can I mail the envelope afterward?
Yes, as long as it is dry, flat, securely resealed, correctly addressed, and structurally sound. Replace envelopes that are torn, wrinkled, or weakened.
Experiences and Practical Lessons From the Freezer Envelope Hack
The most satisfying version of this trick begins with a familiar mistake: a birthday card is sealed and stamped while the gift card remains on the counter looking innocent. With a standard greeting-card envelope, an hour inside a sealed freezer bag may create a tiny opening at one corner.
The first lesson is not to celebrate too early. Once people see that first millimeter of separation, they often pull the flap as though opening a bag of chips. Slow, sideways pressure along the seam is far more likely to preserve the envelope.
Holiday cards and wedding invitations provide another common experience. These projects turn dining tables into temporary postal factories filled with envelopes, address lists, inserts, stamps, and one dangerously placed cup of coffee.
When two envelopes are accidentally switched, freezing can save carefully addressed stationery. The best results usually occur when the error is discovered quickly and the flap uses traditional gum. Heavy cardstock can sometimes help because it remains flatter while the adhesive is separated.
Decorative envelopes teach a less cheerful lesson. Metallic finishes, textured paper, and dark ink can reveal every scratch and crease. Even when the glue releases, the flap may show a pale line where the paper fibers stretched.
Testing a spare envelope first is worth the sacrifice. One test can prevent an entire invitation suite from acquiring what might generously be described as “handcrafted distressing.”
Peel-and-seal office envelopes often produce the least impressive experience. After two hours in the freezer, the flap may remain firmly bonded while the paper begins tearing around it. That is the moment to stop.
A replacement envelope costs far less than repairing a document punctured by an enthusiastic butter knife. The freezer method is a rescue option, not a personal challenge issued by industrial adhesive.
Another important lesson comes after removing the envelope from the freezer. Opening the protective bag immediately in a warm, humid kitchen may allow condensation to form on the paper. Letting the sealed bag sit for a few minutes in a dry room reduces the sudden temperature change.
Once the flap is open, leave everything flat until it reaches room temperature. This makes the envelope easier to reseal and reduces curling.
Resealing separates a successful repair from a suspicious-looking one. The original gum may still hold, but it may not bond evenly. A thin glue stick generally creates a cleaner result than liquid school glue, which can leave ripples or dark wet patches.
The biggest practical takeaway is that expectations should remain modest. The freezer trick is useful for rescuing a routine card, correcting a forgotten insert, or saving custom-addressed stationery. It is not guaranteed, it is not appropriate for valuable documents, and it is never permission to open mail that does not belong to you.
Conclusion
Putting an envelope in the freezer sounds strange until it saves you from rewriting a card, wasting expensive stationery, or mailing an empty birthday envelope. Cold may temporarily make certain adhesives firmer and easier to separate, allowing the flap to lift with less damage.
Protect the envelope in a sealed freezer bag, chill it for one to two hours, work slowly from a corner, and stop if the paper resists. Remember that adhesives vary, moisture can damage paper, and a fresh envelope is sometimes the smartest solution.
Most importantly, use the technique only on mail you own or have permission to open. A freezer may correct a stationery mistake, but it cannot repair poor judgment.