
Leather shoes have a dramatic personality. Treat them well and they look polished, confident, and ready for a corner office. Forget them under the bed for three months, and suddenly they resemble a treasure map with laces. Scratches are part of owning leather footwear, especially if you walk through parking lots, office chair legs, subway platforms, gravel paths, or the occasional mystery puddle that appears out of nowhere.
The good news is that most scratches on leather shoes are repairable at home. A light scratch may only need cleaning, conditioning, and buffing. A faded scuff may need cream polish or wax polish to restore color. A deeper gouge may require leather repair cream, filler, or professional help from a cobbler. The secret is not to panic, not to attack the shoe with random kitchen products, and definitely not to pretend the scratch “adds character” if it bothers you every time you look down.
This guide explains three practical ways to repair scratches on leather shoes, from simple touch-ups to deeper restoration. You will learn how to identify the type of scratch, choose the right repair method, avoid common mistakes, and keep your shoes looking sharp for years. Whether you own dress oxfords, leather loafers, boots, or smooth leather sneakers, these methods will help you rescue your footwear without turning your living room into a shoe-repair crime scene.
Before You Start: Know What Kind of Leather You Have
Before repairing scratches on leather shoes, identify the material. Smooth finished leather is the easiest to treat because it responds well to cleaning, conditioning, polish, and buffing. Full-grain leather and calfskin dress shoes often fall into this category. Oil-tanned and waxed leathers, common on boots, may show scratches more easily but can often be revived by brushing and conditioning. Patent leather has a glossy coated surface and needs a different approach. Suede and nubuck should not be treated with regular shoe polish or heavy conditioners because those products can flatten the nap and create stains.
If you are unsure, test any cleaner, conditioner, polish, or filler on a hidden area first, such as the inside heel or tongue. Leather is wonderfully durable, but it is also a natural material. It can darken, absorb product unevenly, or react badly to harsh cleaners. A small test spot is much cheaper than discovering your brown dress shoe has become “experimental espresso.”
Tools and Supplies You May Need
You do not need a professional workshop to repair leather shoe scratches, but a few proper tools make the job easier. Start with a soft cloth or microfiber towel, a horsehair brush, leather cleaner or mild leather-safe soap, leather conditioner, cream polish that matches the shoe color, optional wax polish, cotton swabs, and a clean applicator cloth. For deeper scratches, you may need leather repair cream, recoloring balm, leather filler, very fine sandpaper, and a small artist brush.
Avoid harsh detergents, bleach, strong acids, aggressive alcohol, and random oils from the pantry. Olive oil and coconut oil may sound charmingly natural, but they can darken leather, leave greasy patches, and attract dirt. Your shoes deserve better than becoming a salad dressing experiment.
Way 1: Repair Light Scratches with Cleaning, Conditioning, and Buffing
This is the best method for shallow surface scratches, dry-looking marks, and fine lines that have not removed much color. Light scratches often happen when leather loses moisture or when the top finish gets lightly disturbed. In many cases, you are not rebuilding the leather; you are simply rehydrating and smoothing the surface so the scratch blends back in.
Step 1: Remove Dirt and Dust
Take out the laces if they are in the way. Brush the shoe gently with a horsehair brush to remove dust and grit. This matters more than people think. If you rub polish or conditioner over dirty leather, you can grind tiny particles into the surface and create more scratches. That is not repair; that is accidental sanding with extra steps.
After brushing, wipe the upper with a slightly damp cloth. Use warm water, not soaking water. Leather dislikes being drenched, and wet leather can lose shape as it dries. If the shoes are muddy, wipe them carefully and let them air dry at room temperature before continuing.
Step 2: Apply Leather Conditioner to the Scratch
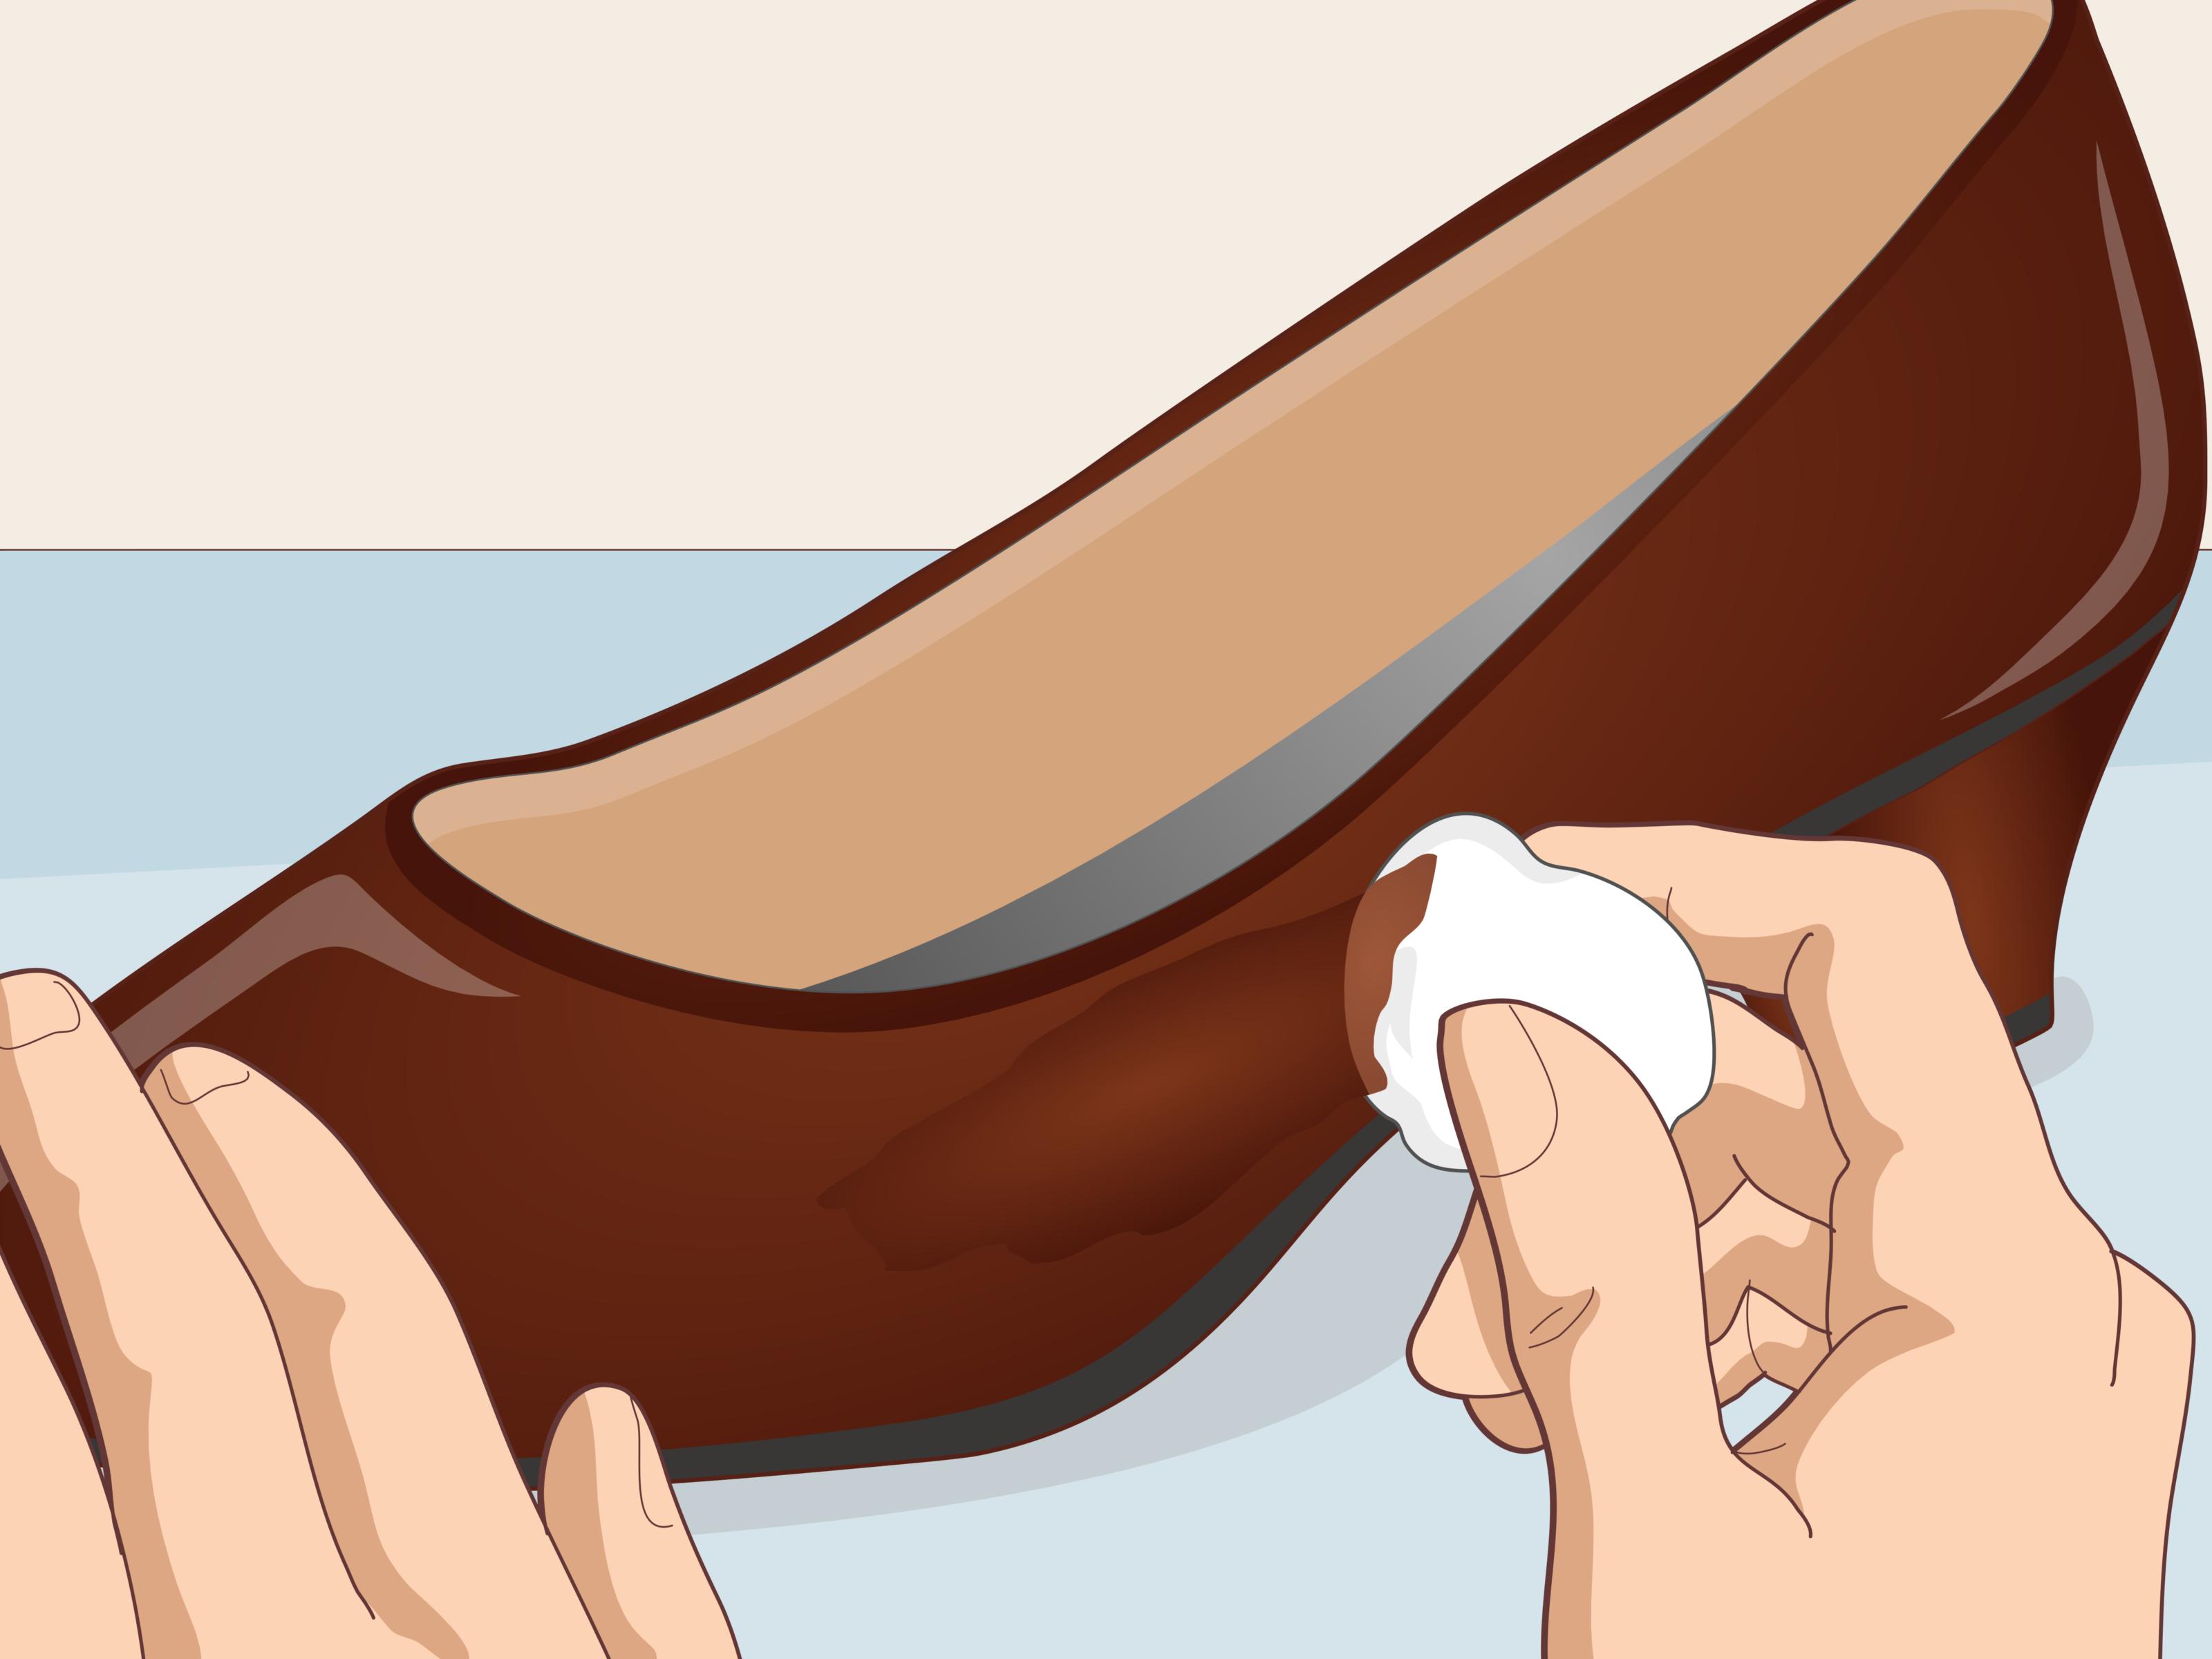
Put a tiny amount of leather conditioner on a cotton swab or soft cloth. Work it directly into the scratch using small circular motions. Do not flood the area. A thin coat is enough. The goal is to replenish moisture and help the leather fibers relax. After treating the scratch, apply a very light, even coat of conditioner across the entire shoe so the finish looks consistent.
Let the shoes rest in a cool, dry place. Depending on the conditioner, drying may take several hours. Do not use a hair dryer, heater, radiator, or direct sunlight to speed things up. Heat can dry out leather and make small problems worse. Patience is cheaper than replacement shoes.
Step 3: Buff Until the Scratch Blends
Once the leather feels dry to the touch, buff the shoe with a horsehair brush or clean cloth. Use quick, light strokes. Buffing generates a small amount of friction, distributes oils and waxes, and restores the surface sheen. On pull-up leather or waxed leather boots, vigorous brushing can sometimes make scratches nearly disappear because the oils move back into the marked area.
This method works especially well for brown leather boots, black dress shoes with minor scuffs, and leather shoes that look dull rather than deeply damaged. If the scratch is still visible but feels smooth, move to the second method: color correction with cream polish.
Way 2: Hide Scuffs and Color Loss with Cream Polish and Wax Polish
Some scratches do not cut deeply into the leather, but they remove color from the surface. These marks usually look gray, pale, or chalky. You see them most often on toe caps, heel counters, and the outer side of shoes where doors, curbs, and chair legs launch surprise attacks. Cream polish is ideal here because it adds pigment, moisture, and a soft shine. Wax polish can then add protection and gloss, especially on dress shoes.
Step 1: Choose the Right Polish Color
Pick a cream polish that matches the shoe as closely as possible. For black shoes, this is easy. For brown shoes, it becomes a small philosophical journey because brown has more shades than a coffee shop menu. Light brown, cognac, tan, walnut, dark brown, burgundy-brown, and burnished brown all behave differently. When in doubt, choose a slightly lighter polish rather than a darker one. Dark polish can stain seams and change the character of the shoe.
Neutral cream polish can condition and add shine, but it will not replace lost color. Use neutral polish for very light scratches, multi-toned leather, or shoes where you do not want to alter the shade. Use colored cream polish when the scratch has visibly faded.
Step 2: Apply Cream Polish Sparingly
Use a soft cloth, dauber, or your finger wrapped in cloth. Apply a small amount of cream polish to the scratched area first, then spread a thin coat over the rest of the shoe. Work in circular motions so the pigment settles evenly into the grain. Do not pile polish into the scratch like frosting on a cupcake. Too much polish can become sticky, cloudy, or uneven.
Let the cream polish sit for several minutes, or follow the product directions. Then buff with a horsehair brush. The scratch should look darker, smoother, and less noticeable. If needed, repeat with another thin coat. Two light coats are usually better than one heavy coat.
Step 3: Add Wax Polish for Protection and Shine
Wax polish is useful on the toe and heel areas of dress shoes because it creates a higher shine and adds a protective layer. Apply wax sparingly with a cloth, allow it to haze, then buff. Do not use heavy wax on areas that bend, such as the vamp, because wax can crack where the leather flexes.
For a simple everyday finish, cream polish alone may be enough. For a formal shine, use cream polish first to restore color, then wax polish on the toe and heel. Think of cream polish as skincare and wax polish as the suit jacket. Both have their moment, but neither should be used like house paint.
Way 3: Fix Deep Scratches with Leather Repair Cream, Filler, or Professional Help
Deep scratches are different. If the leather surface is gouged, raised, cut, or missing color and texture, conditioner and polish may improve the appearance but will not fully repair the damage. You may need a leather repair cream, recoloring product, or flexible leather filler. This method requires more care, but it can dramatically improve shoes that look almost ready for retirement.
Step 1: Clean the Scratch Carefully
Start by brushing and wiping the shoe. If dirt is trapped inside the scratch, use a leather-safe cleaner and a cotton swab. The surface must be clean and dry before repair products are applied. Any grime left in the scratch can prevent filler or pigment from bonding properly.
Let the shoe dry naturally. Again, avoid direct heat. Leather repair works best when the material is dry, clean, and stable.
Step 2: Smooth Loose Edges
If the scratch has raised edges, gently press them down with a clean cloth. For a rough gouge, some repair methods use very fine sandpaper to smooth the surface before filling, but be careful. Sanding can permanently change the finish if you are too aggressive. If the shoes are expensive, rare, sentimental, or made from delicate leather, this is a good moment to consult a cobbler instead of pretending you are the star of a restoration show.
Step 3: Apply Leather Repair Cream or Filler
For scratches that have removed finish but not created a deep hole, use a recoloring leather repair cream in a matching shade. Apply it only to the damaged area with a cotton swab or small brush. Let it dry, then buff gently. Some colors can be blended to match the shoe more accurately.
For deeper gouges, use a flexible leather filler designed for shoes. Apply a tiny amount into the scratch, level it with a small spatula or card edge, and let it dry according to the product instructions. Once dry, smooth the area lightly if needed, then recolor with matching leather dye, repair cream, or leather paint. Finish with a compatible conditioner or protective topcoat if the product requires it.
Deep repairs are about blending, not perfection. From three feet away, the shoe should look clean, cared for, and intentional. If you expect a gouged shoe to look factory-new under a magnifying glass, you may be disappointed. Leather remembers life. Good repair simply helps it tell a better story.
Special Cases: Patent Leather, Suede, Nubuck, and White Leather
Patent Leather
Patent leather has a glossy coating, so regular cream polish will not absorb the same way it does on smooth leather. For small scuffs, wipe with a damp cloth and buff gently. A tiny amount of petroleum jelly can help reduce the appearance of surface scuffs, but use it sparingly and wipe away residue. Deep cuts in patent leather are harder to repair invisibly because the glossy coating is difficult to recreate at home.
Suede and Nubuck
Suede and nubuck need brushing, not cream polish. Use a suede brush to lift the nap and a suede eraser for marks. Do not apply regular leather conditioner, wax polish, or oily products. They can darken the material and create a flat, greasy patch. For serious scratches on suede or nubuck, use a specialized suede care kit or ask a cobbler.
White Leather
White leather shoes show every scuff like they are filing a formal complaint. Clean gently with a leather-safe cleaner or mild soap solution, then use white cream polish or leather paint for color loss. Avoid colored toothpaste, harsh bleach, or abrasive scrubbing. White leather can yellow, stain, or lose its finish if treated too aggressively.
Common Mistakes to Avoid When Repairing Leather Shoe Scratches
The first mistake is using too much product. Conditioner, cream polish, wax, and filler all work best in thin layers. Overloading the shoe can clog the leather, create a sticky surface, or make the repair stand out.
The second mistake is skipping the cleaning step. Scratches often contain dust, salt, or grit. If you polish over that debris, the result may look muddy or uneven. Always clean first, repair second, shine third.
The third mistake is using household products without testing. Baking soda, vinegar, rubbing alcohol, and petroleum jelly appear in many shoe-cleaning tips, but they are not universal solutions. Some may help with certain scuffs; others may dry, dull, or discolor leather. If you use any household method, test first and keep it gentle.
The fourth mistake is treating all leather the same. Smooth leather, patent leather, suede, nubuck, pull-up leather, and corrected-grain leather all respond differently. A product that works beautifully on black calfskin oxfords may be wrong for matte leather boots.
How to Prevent Future Scratches on Leather Shoes
Prevention is easier than repair. Brush your leather shoes after wearing them, especially if you walked through dust, grit, or wet streets. Use cedar shoe trees to help shoes hold their shape and absorb moisture. Let leather shoes rest between wears so perspiration can evaporate naturally. Regular conditioning keeps leather flexible, which makes it less likely to crack or show scratches severely.
Use a leather protector spray when appropriate, especially for shoes worn in unpredictable weather. Be careful with waterproofing products on light-colored or delicate leather because some can darken the finish. Store shoes in dust bags or on a rack where they are not rubbing against each other. A surprising number of scratches happen not on the sidewalk, but inside closets where shoes are piled together like they are fighting for territory.
When to Call a Cobbler
Call a professional if the scratch is deep enough to expose raw leather, if the shoe has a torn surface, if the color is hard to match, or if the shoes are expensive enough that a mistake would ruin your week. Cobblers can recolor, refinish, patch, stretch, resole, and rebuild shoes in ways that home products cannot. Professional repair is also wise for luxury leather, exotic leather, patent leather cracks, and vintage shoes.
A good rule: if the damage is cosmetic, try a careful home repair. If the damage affects structure, comfort, stitching, or the shape of the shoe, go professional.
Real-Life Experiences: What Actually Works When Leather Shoes Get Scratched
Anyone who wears leather shoes regularly eventually becomes a tiny bit of a shoe-care detective. You notice where scratches happen, which leather hides them well, and which pair seems to attract scuffs like a magnet at a paperclip convention. After dealing with many types of leather footwear, one lesson stands out: the best repair depends less on the scratch itself and more on the leather’s finish.
For example, dark brown pull-up leather boots often respond beautifully to brushing. A scratch that looks alarming at first can fade after a few minutes with a horsehair brush because the oils inside the leather move around. Add a light conditioner, let the boots rest, and the mark may become part of the patina rather than an obvious flaw. This is why many boot lovers do not panic over small scratches. On the right leather, they become character.
Black dress shoes are different. They usually need color correction because pale scuffs stand out sharply against the dark finish. A small amount of black cream polish can make a dramatic difference. The trick is to apply polish to the whole shoe, not just the scratch. If you only treat one spot, that area may become shinier or darker than everything around it. A full light coat creates a uniform finish and makes the repair look intentional.
Tan and cognac shoes require the most patience. Their color variation is beautiful, but it also makes matching polish difficult. A dark brown polish can ruin the warm tone. Neutral polish is safer for minor scratches, while a carefully chosen light brown or cognac cream works better for visible color loss. If the shoe has a burnished toe, avoid spreading dark polish too far beyond the burnished area unless you want the entire shoe to look older overnight.
Deep scratches are where expectations matter. A leather filler can improve a gouge, but the repair may still be visible up close. That does not mean the repair failed. Shoes live close to the ground, where curbs, pedals, gravel, and office furniture all conspire against perfection. The goal is not always invisibility. The goal is making the scratch clean, smooth, protected, and far less noticeable.
One practical habit is to keep a small shoe-care kit ready: brush, cloth, conditioner, black polish, brown polish, neutral polish, and a suede brush if you own suede. When supplies are easy to reach, you are more likely to fix scratches early. Fresh scuffs are easier to repair than old, dry, neglected ones. Think of leather care like dental care for shoes. A quick brushing now prevents a dramatic appointment later.
Another useful experience is learning when not to do anything immediately. If shoes get wet and scratched at the same time, let them dry naturally before repair. Wet leather can look darker and more damaged than it really is. Stuff the shoes lightly with paper or use shoe trees, keep them away from heat, and reassess the next day. Many marks look less terrifying after the leather dries.
Finally, a little imperfection is not the enemy. Leather shoes are not plastic display objects. They crease, darken, soften, and develop personality. Repairing scratches keeps them handsome and wearable, but a few marks also prove the shoes are doing their job. The best-looking leather shoes are not always flawless. They are clean, conditioned, polished, and cared for. In other words, they look like they belong to someone who has places to go and knows how to arrive well-dressed.
Conclusion
Repairing scratches on leather shoes is usually simple once you match the method to the damage. Light scratches need cleaning, conditioning, and buffing. Color-loss scuffs need cream polish and possibly wax polish. Deep scratches may need leather repair cream, filler, recoloring, or a professional cobbler. Start gently, use thin layers, test products first, and never rush drying with heat.
Leather shoes reward care. A few minutes with a brush and conditioner can add years of life, while the right polish can turn tired footwear back into shoes you are proud to wear. Scratches may be inevitable, but sad shoes are optional.
SEO Tags