
Note: This guide is written for homeowners who want practical, safety-first AC maintenance advice. Always turn off power before opening an HVAC panel, and call a licensed technician if you see ice, damaged wiring, refrigerant leaks, heavy mold, or anything that makes your eyebrows climb into your hairline.
Why Cleaning an Evaporator Coil Matters
Your air conditioner’s evaporator coil is the quiet overachiever hiding inside the indoor air handler or furnace cabinet. It does not have the curb appeal of the outdoor condenser unit. It does not hum dramatically in the yard. But without it, your AC would be little more than an expensive indoor fan with delusions of grandeur.
The evaporator coil is where warm indoor air gives up its heat. Refrigerant inside the coil absorbs that heat, while moisture from the air condenses on the cold metal fins and drips into a drain pan. When everything works properly, your home feels cooler, less humid, and much less like a laundry room in July.
But when dust, pet hair, pollen, grease, or microbial buildup collects on the coil, the system has to work harder. Dirty evaporator coils restrict airflow, reduce heat transfer, increase energy use, and may contribute to frozen coils, musty odors, water leaks, and uneven cooling. In plain English: dirt turns your AC into a sweaty little drama queen.
The good news is that many light cleaning tasks are manageable for careful homeowners. The better news is that knowing when not to DIY can save you from damaged fins, electrical trouble, and repair bills that make you suddenly interested in ceiling fans. Below are four safe and effective ways to clean an evaporator coil, from simple dust removal to professional deep cleaning.
Before You Start: Safety and Tools
Before cleaning an AC evaporator coil, shut off the system at the thermostat and turn off power at the breaker or disconnect switch. The air handler contains electrical components, sharp sheet-metal edges, and delicate coil fins. Treat it with respect, not “I saw one video and now I am basically an HVAC wizard” confidence.
Basic tools you may need
- Work gloves and safety glasses
- Screwdriver or nut driver for the access panel
- Soft-bristle brush
- Wet/dry vacuum with a soft brush attachment
- No-rinse evaporator coil cleaner
- Spray bottle with warm water
- Microfiber cloths or towels
- Fin comb, if fins are lightly bent
- Flashlight
Avoid harsh household cleaners, bleach, pressure washers, stiff wire brushes, and aggressive scrubbing. Evaporator coil fins are thin aluminum pieces designed for airflow, not for battle. If you crush them, bend them, or knock debris deeper into the coil, your “quick cleaning” can become a service appointment with a side of regret.
Way 1: Dry Clean the Evaporator Coil With a Soft Brush and Vacuum
The simplest way to clean an evaporator coil is dry cleaning. This method is best when the coil has light dust, lint, pet hair, or surface debris. It is also the least messy option, which is excellent news if you are cleaning in a closet, attic, basement, or utility room where one wrong move can turn into a home improvement blooper reel.
How to dry clean the coil
- Turn off the HVAC system and power supply.
- Remove the access panel carefully and set screws aside in a cup or magnetic tray.
- Use a flashlight to inspect the evaporator coil and surrounding area.
- Gently brush dust and debris in the direction of the fins.
- Use a vacuum with a soft brush attachment to collect loosened debris.
- Wipe nearby surfaces, but do not force cloths deep into the coil.
- Replace the access panel securely before restoring power.
The keyword here is gently. You are not scrubbing a barbecue grate. Move the brush lightly, and avoid pushing dirt deeper into the coil. If the fins look clogged inside or coated with sticky grime, dry cleaning alone probably will not be enough.
When this method works best
Dry cleaning is ideal for seasonal HVAC maintenance, especially when the system has a clean filter and the coil is easy to access. It is also useful before applying coil cleaner because removing loose dust first allows the cleaner to reach the actual grime instead of making a muddy dust smoothie.
Way 2: Use a No-Rinse Evaporator Coil Cleaner
No-rinse evaporator coil cleaner is one of the most common products used for indoor AC coil cleaning. These cleaners are designed to foam, loosen dirt, and then drain away with normal condensation as the air conditioner runs. That makes them especially helpful for indoor coils where rinsing with a hose is not realistic unless you enjoy indoor waterfalls.
How to use coil cleaner safely
- Turn off the system and power.
- Open the access panel and inspect the coil.
- Dry brush or vacuum loose dust first.
- Shake the coil cleaner according to the label directions.
- Spray the cleaner evenly across the coil surface.
- Let the foam sit for the recommended dwell time.
- Reassemble the panel and run the AC if the product label instructs you to do so.
Always read the product label. Some coil cleaners are made for evaporator coils, some for condenser coils, and some for professional use only. Indoor evaporator coils require products that are safe for the materials, safe for the drain system, and appropriate for occupied homes. If a cleaner smells like it could remove paint from a battleship, it probably does not belong in your air handler.
Should you rinse the coil?
Many evaporator coil cleaners are marketed as no-rinse formulas because condensation naturally rinses the coil during normal cooling operation. However, if the product instructions call for a light water rinse and your system allows it, use only a controlled spray bottle or low-pressure method. Never blast an indoor coil with high-pressure water. That can bend fins, soak insulation, damage electrical parts, or create water where water has no business throwing a pool party.
This method works well for moderate grime, musty smells caused by surface buildup, and routine AC maintenance. It may not solve heavy biological growth, compacted debris, or an evaporator coil that has been neglected since flip phones were cool.
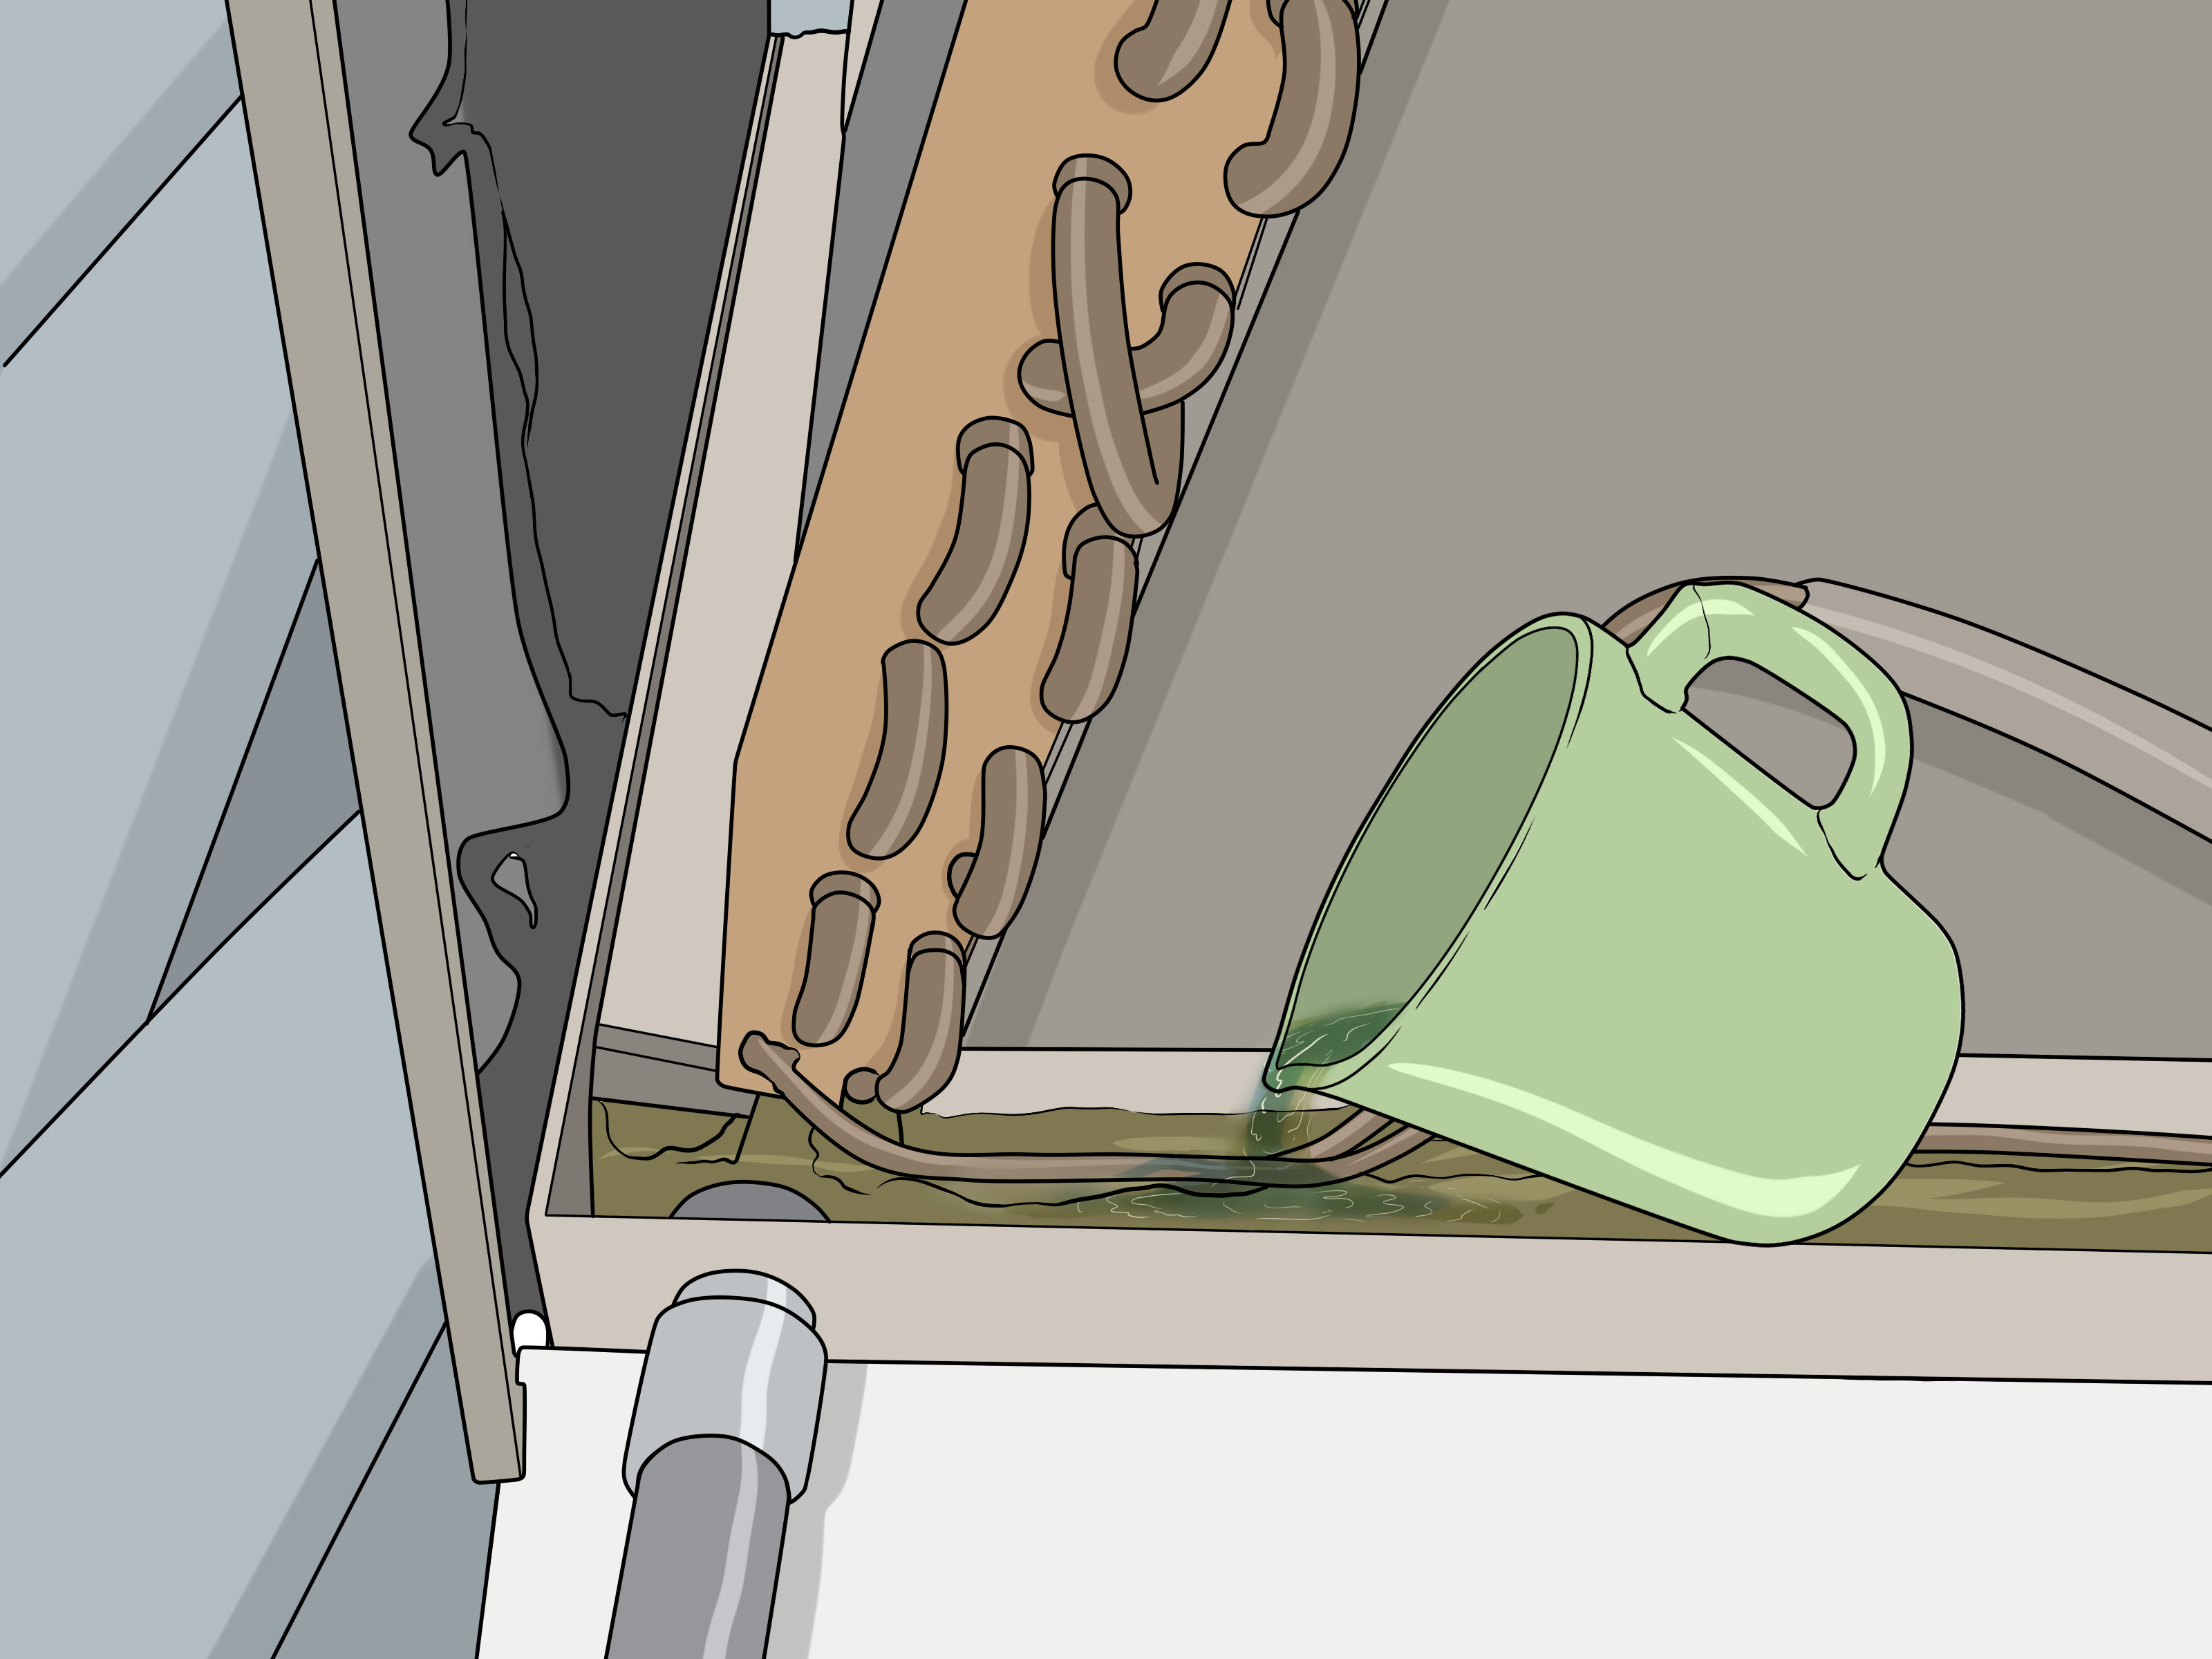
Way 3: Clean the Drain Pan and Condensate Drain Line
Technically, the drain pan and condensate line are not the coil itself. But cleaning an evaporator coil without checking the drainage system is like washing dishes and leaving the sink full of mystery water. The evaporator coil removes humidity from your home, and that moisture has to go somewhere. It drips into a pan and exits through the condensate drain line.
When dust and organic material wash off the coil, they can collect in the pan and drain. Over time, algae and sludge can clog the line. That may lead to water leaks, ceiling damage, musty odors, or an AC safety switch shutting the system down. Nobody wants their cooling system to quit because the drain line turned into a tiny swamp.
How to clean the drain area
- Turn off the system and power.
- Locate the drain pan under the evaporator coil.
- Remove standing water with a wet/dry vacuum or towels.
- Wipe accessible sludge from the pan using a disposable cloth.
- Find the condensate drain cleanout access, if available.
- Use a wet/dry vacuum at the outdoor drain termination to pull out clogs.
- Flush the line with water if your system design allows it.
Some homeowners use vinegar in the condensate line for maintenance, but you should follow your HVAC manufacturer’s recommendations and avoid pouring random chemicals into the system. Bleach can be harsh on certain materials and may create strong fumes in enclosed spaces. When in doubt, use plain water or ask a technician what is appropriate for your system.
Signs the condensate system needs attention
- Water around the indoor unit
- Musty odor near vents
- AC shuts off unexpectedly
- Standing water in the drain pan
- Ceiling stains below attic-mounted equipment
Cleaning the drain line supports evaporator coil performance because it helps moisture leave the system correctly. A clean coil plus a clogged drain is still a problem. It is simply a cleaner-looking problem with a higher chance of dripping through drywall.
Way 4: Schedule Professional Evaporator Coil Cleaning
Some evaporator coil cleaning jobs belong to professionals. This is not defeat. This is wisdom wearing work gloves. If the coil is heavily clogged, frozen, moldy, corroded, leaking refrigerant, or buried behind sealed panels, a licensed HVAC technician is the right person to call.
What a technician may do
During professional evaporator coil cleaning, a technician may remove panels, protect electrical parts, apply specialized coil cleaner, use controlled rinsing, clear the drain system, inspect refrigerant lines, check airflow, test temperature split, and look for signs of damage. Professionals can also identify problems that cleaning alone will not fix, such as low refrigerant, a failing blower motor, undersized ductwork, or a badly clogged filter rack.
Professional cleaning is especially important if you see ice on the coil. A frozen evaporator coil can be caused by restricted airflow, dirty coils, low refrigerant, blower issues, or metering device problems. Turning the AC back on without fixing the cause is like putting a bandage on a smoke alarm. It misses the point.
When to call an HVAC professional
- The coil is frozen or repeatedly ices over.
- You smell strong musty, chemical, or burning odors.
- The coil is hard to reach or sealed inside the cabinet.
- You see oily residue near refrigerant lines.
- The system leaks water after cleaning.
- Cooling remains weak even after filter and coil maintenance.
- The coil fins are crushed, corroded, or extremely dirty.
A professional tune-up once a year is a smart habit for most central air conditioning systems. Spring is often the best time because it prepares your equipment before peak summer demand. Your AC will appreciate the attention, although it will probably continue expressing gratitude only through lower drama and cooler rooms.
How Often Should You Clean an Evaporator Coil?
Most homes benefit from an annual evaporator coil inspection and cleaning as needed. Homes with pets, smokers, dusty conditions, frequent remodeling, or high pollen exposure may need more frequent attention. If your filter gets dirty quickly, your coil may be at higher risk too.
The air filter is your coil’s first bodyguard. A clean, properly fitted filter helps prevent dust from reaching the evaporator coil. Replace or clean filters according to the manufacturer’s schedule, often every one to three months during heavy use. If the filter is bent, undersized, missing, or installed backward, dust can bypass it and settle on the coil.
Common signs of a dirty evaporator coil
- Weak airflow from vents
- Longer cooling cycles
- Higher energy bills
- Warm air from the supply vents
- Frozen coil or ice on refrigerant lines
- Musty or “dirty sock” smell
- Indoor humidity that feels higher than usual
- Water leaks near the air handler
One symptom alone does not prove the coil is dirty, but several symptoms together are a strong clue. Think of it as your AC leaving sticky notes around the house that say, “Please help.”
Mistakes to Avoid When Cleaning an Evaporator Coil
Cleaning an evaporator coil is not complicated in theory, but the details matter. A few common mistakes can turn routine maintenance into a repair problem.
Do not use a pressure washer
Pressure washers are too powerful for delicate indoor coil fins. They can flatten fins, force water into electrical components, and make a spectacular mess. Save the pressure washer for sidewalks, not your HVAC system.
Do not use harsh chemicals
Bleach, acid-based cleaners, and strong household degreasers may damage metal, plastic, insulation, or drain components. Use products labeled for evaporator coils and follow directions exactly.
Do not scrape the fins
If fins are bent, use a fin comb carefully or ask a technician. Scraping or poking the coil can damage the fin pack or refrigerant tubing.
Do not ignore airflow problems
A clean coil cannot overcome a clogged filter, blocked return vent, closed supply registers, or failing blower. Evaporator coil cleaning works best as part of whole-system maintenance.
Extra Experience: Practical Lessons From Cleaning Evaporator Coils
The first real lesson of evaporator coil cleaning is that the job often looks easier before the access panel comes off. Many homeowners expect to see a neat, friendly coil sitting right there like a toaster oven tray. Instead, they may find a tight cabinet, awkward screws, dark corners, and a coil positioned at an angle that seems designed by someone who disliked wrists.
Experience teaches patience. Put screws in a container. Take a quick photo before removing a panel so you know how everything fits back together. Use a flashlight from different angles because dust can hide on the entering-air side of the coil. What looks clean from the front may be fuzzy on the side where air first hits. In older systems, that hidden layer of dust can be surprisingly thick, almost like the coil has been wearing a gray sweater.
Another practical lesson is that filters matter more than people think. Many dirty coils are not caused by one dramatic event. They happen slowly because a filter was not changed often enough, did not fit tightly, or was the wrong type for the system. A high-efficiency filter may sound impressive, but if it restricts airflow beyond what the system can handle, it can create cooling problems. The best filter is one that balances filtration with proper airflow and fits snugly in the rack.
Home layout also matters. A system in a garage, attic, laundry room, or dusty basement may collect more debris. Homes with pets often need more attention because pet hair has a magical ability to appear inside places it was never invited. Remodeling dust is another major culprit. Sanding drywall while the HVAC system is running can send fine particles into the return air and toward the coil. During renovation, keep the system off when possible and use temporary filtration strategies recommended by a professional.
People also learn quickly that moisture is part of the story. The evaporator coil is supposed to produce condensation, but that water must drain cleanly. If the drain pan is slimy or the line is slow, cleaning the coil may release more debris into an already struggling drain. That is why drain maintenance belongs with coil cleaning. A clean coil above a clogged pan is like a fresh haircut with muddy shoes.
One of the best habits is to inspect before peak cooling season. Waiting until the hottest week of summer is risky because HVAC companies get busy, systems run harder, and small problems become loud problems. A spring inspection gives you time to clean, schedule service, and replace filters before the AC becomes the most important appliance in the house.
Finally, experience teaches humility. If the panel does not open easily, the coil is inaccessible, the system has ice, or you smell something unusual, stop and call a technician. DIY maintenance is useful, but it has limits. The goal is not to prove bravery to an appliance. The goal is a cooler home, lower strain on the system, and fewer surprise repair bills. Your evaporator coil does not need heroics. It needs clean airflow, safe handling, and regular attention.
Conclusion
Cleaning an evaporator coil helps your air conditioner cool better, control humidity, and run with less strain. Start with simple maintenance: turn off power, inspect the coil, remove loose debris with a soft brush and vacuum, use an evaporator-safe no-rinse coil cleaner when needed, and keep the drain pan and condensate line clear. For heavy buildup, frozen coils, suspected mold, refrigerant issues, or hard-to-access equipment, professional HVAC cleaning is the safer and smarter choice.
A clean evaporator coil is not glamorous, but neither is paying extra for electricity while your AC wheezes like it just ran a marathon. Give the coil regular attention, keep your filters fresh, and your cooling system will have a much better chance of surviving summer without turning your living room into a sauna with furniture.
SEO Tags