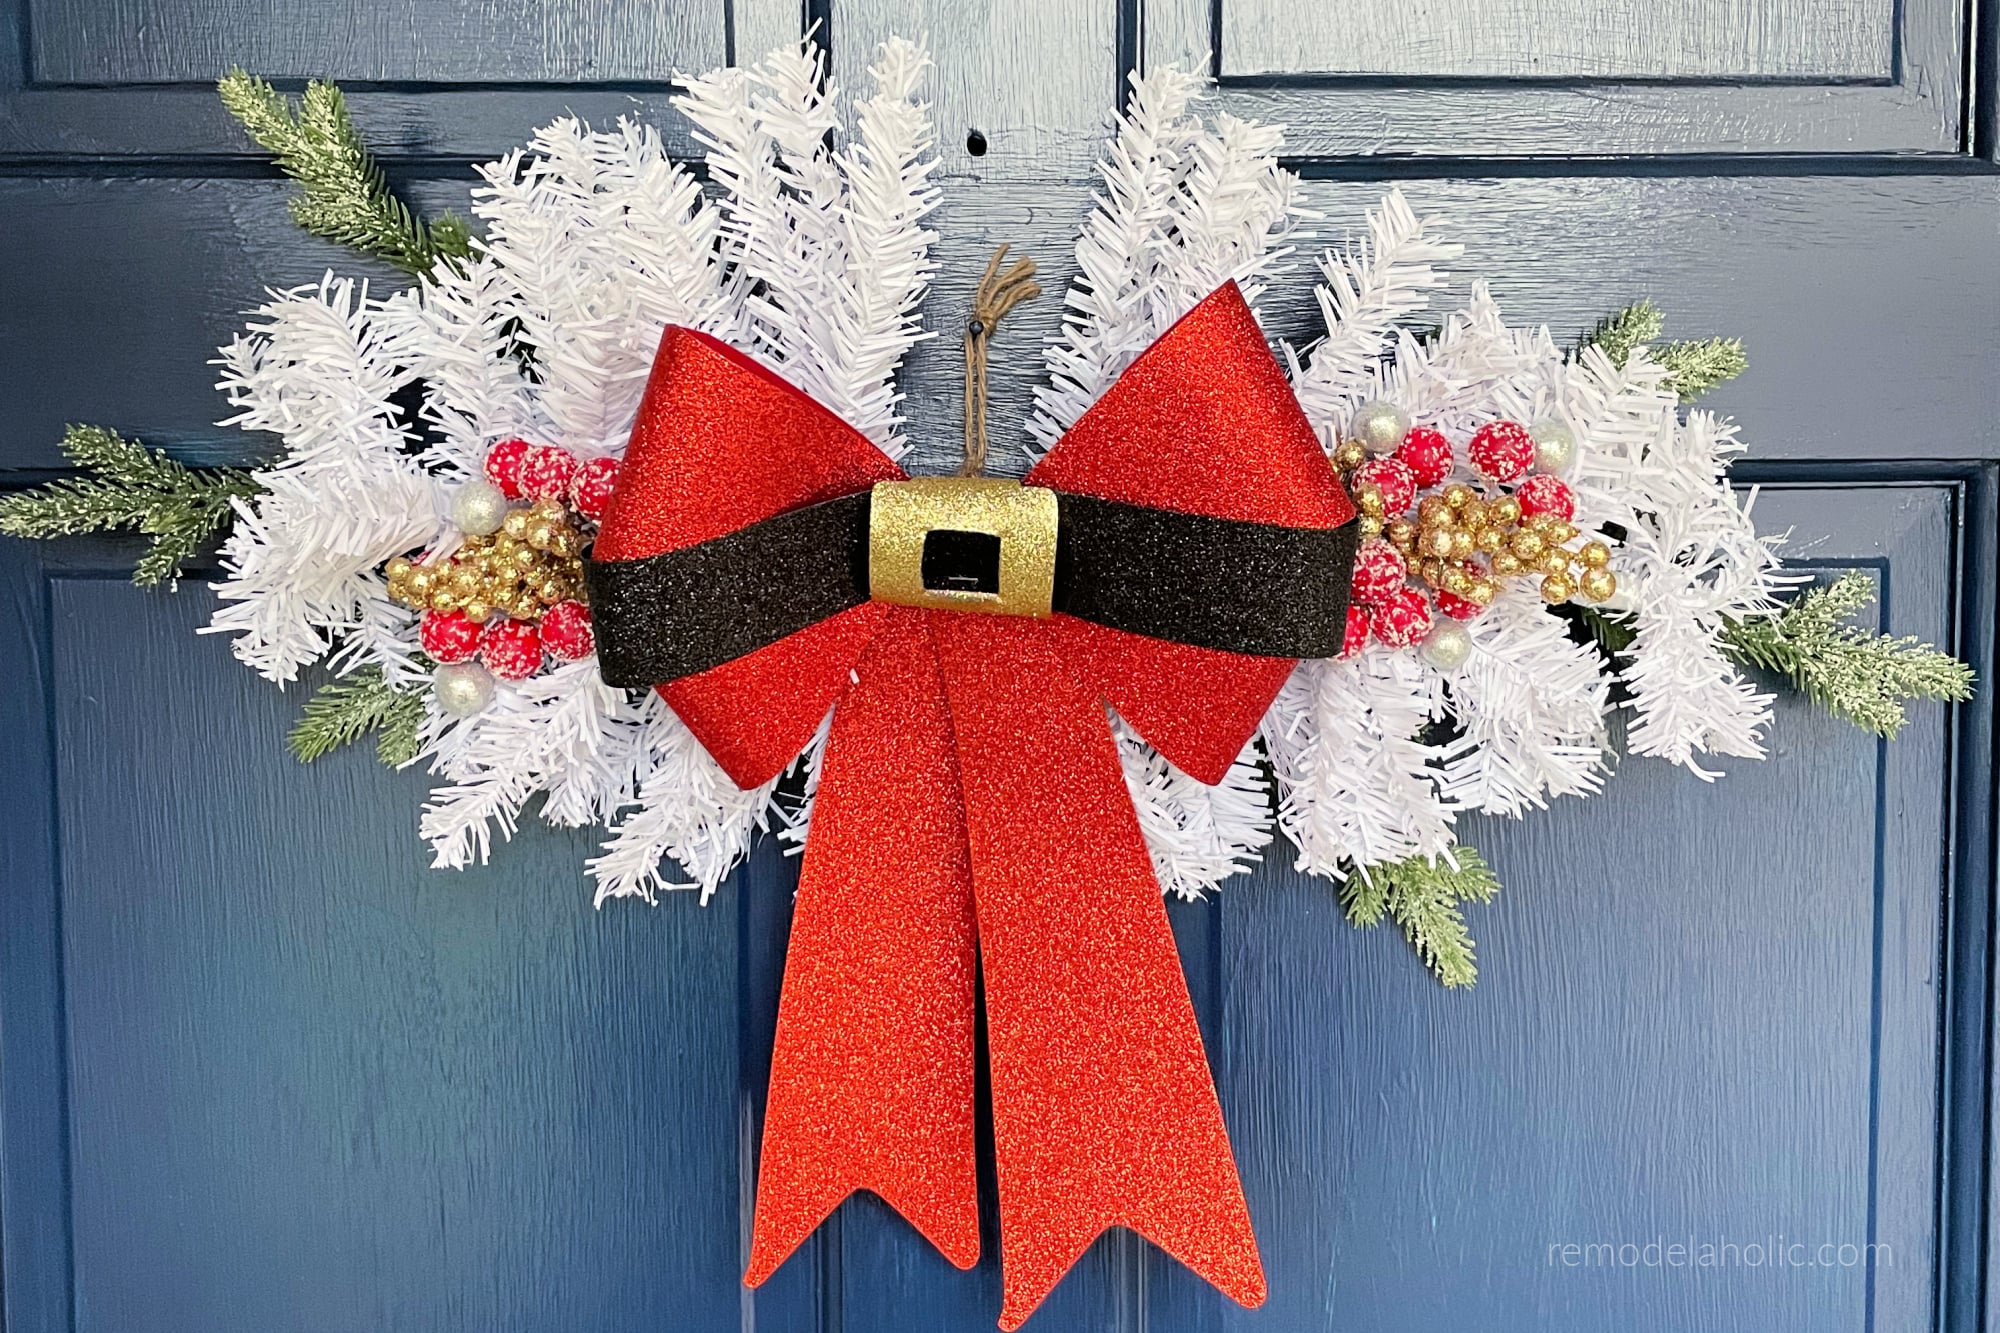

Note: Dollar Tree seasonal selection, colors, and price points can vary by store. Treat this shopping list as flexible and substitute similar items when needed.
There are two kinds of people during the holidays: the ones who have their front porch decorated before Thanksgiving leftovers are gone, and the ones who suddenly realize it is December 18 and their door still looks like it is waiting for a tax auditor. This easy Dollar Tree DIY Christmas swag is for both groups.
A Christmas swag is basically a cheerful bundle of greenery that hangs vertically instead of forming a traditional round wreath. It is simpler, more forgiving, and much less likely to make you question every life choice after wrestling with a wire wreath form for two hours. With a few inexpensive floral picks, ribbon, berries, pinecones, and floral wire, you can make a front-door decoration that looks cozy, polished, and pleasantly expensive-ish.
Better Homes & Gardens, HGTV, Country Living, Good Housekeeping, Martha Stewart, The Spruce, and Home Depot all use the same basic formula for successful holiday swags: layer greenery, secure the stems with floral wire, add texture with berries or pinecones, and finish with a statement bow.
This tutorial uses Dollar Tree-style supplies and a no-fuss method. You do not need professional floral skills. You do not need a craft room with labeled bins. You do not even need to know what “floral mechanics” means, although it sounds like someone who repairs poinsettias.
Why Make a DIY Christmas Swag Instead of a Wreath?
A Christmas swag gives you the same welcoming holiday look as a wreath but with less structure, fewer supplies, and far more room for improvising. The shape is naturally loose and vertical, so uneven branches are not a disaster. In fact, a little movement makes it look fuller and more natural.
Swags also work almost anywhere. Hang one on a front door, interior door, porch column, mailbox, staircase banister, mirror, kitchen cabinet, or wall hook. A modest swag can brighten a small apartment entry, while a longer version can make a porch feel dressed for the season without requiring twelve inflatable reindeer and a power strip the size of a lasagna pan.
Dollar Tree stores commonly carry seasonal holiday décor, floral supplies, ribbon, wreath forms, decorative accents, and Christmas floral items, making them a useful starting point for a low-cost craft project.
What You Need for a Dollar Tree Christmas Swag
Gather your supplies before you start. You can change the color palette, but try to keep the ingredients simple: greenery for volume, one or two accent colors for contrast, and one decorative focal point.
Basic Supplies
- 2 to 4 faux evergreen bushes, garland sections, or pine picks
- 1 to 2 berry picks, poinsettia picks, holly stems, or glittery branches
- 2 to 4 pinecones, either natural or faux
- Green floral wire, twist ties, chenille stems, or zip ties
- One roll of wired ribbon, mesh ribbon, velvet ribbon, or plaid ribbon
- A small bow, ornament, bell cluster, wooden holiday sign, or mini ornament
- Wire cutters or sturdy scissors
- A hot glue gun and glue sticks for lightweight finishing details
- A wreath hanger, removable hook, ribbon loop, or small command-style hook
Optional Upgrades
- Faux eucalyptus for a softer, designer-style look
- Magnolia leaves for a fuller Southern Christmas feel
- Gold ornaments for a classic, elegant theme
- Mini bells for a rustic farmhouse finish
- Battery-operated micro lights for a subtle nighttime glow
- Frosted picks, white berries, or silver ribbon for a winter wonderland palette
Budget tip: Do not try to buy every pretty thing in the aisle. Choose one main greenery style, one accent pick, and one ribbon. The holiday craft aisle is designed to make you feel like your front door needs seventeen kinds of glitter. It does not.
Choose a Color Theme Before You Start
Picking a color direction keeps your Christmas swag from looking like Santa lost a fight with a craft store. Use one of these easy combinations:
- Classic Christmas: evergreen, red berries, plaid ribbon, pinecones
- Rustic farmhouse: cedar greenery, natural pinecones, burlap ribbon, bells
- Winter white: flocked greenery, white berries, silver ornaments, white ribbon
- Elegant gold: deep green pine, gold berry sprays, champagne ribbon, gold bells
- Whimsical candy cane: bright green picks, red-and-white ribbon, mini peppermint ornaments
- Modern neutral: eucalyptus, cedar, cream ribbon, wooden accents, muted bronze bells
The easiest rule is the “three-texture trick”: use one greenery texture, one decorative texture, and one soft texture. For example, pine branches provide greenery, berries provide shine and color, and wired velvet ribbon adds softness. That is enough visual variety to make the swag look layered without turning it into a holiday casserole.
How to Make a Dollar Tree DIY Christmas Swag in 5 Easy Steps
Step 1: Build Your Shopping Pile and Plan the Shape
Lay everything on a table before cutting or tying. Decide whether you want a short, full swag or a longer teardrop shape. A short swag works well for cabinet doors, windows, and small apartment entryways. A longer swag makes a better statement on a front door, porch wall, or mailbox.
For a standard front-door swag, aim for a finished length of about 20 to 30 inches. If your faux branches are extra long, trim them slightly, but do not cut everything to the same size. Different stem lengths create a more natural layered look.
Place your largest evergreen stems at the bottom, your medium pieces in the middle, and your prettiest accent pick near the top or center. This little preview prevents the classic crafting mistake of gluing a giant glittery berry branch directly over the only good part of your design.
Step 2: Make a Strong Center Spine
Take two or three long faux evergreen branches and stack them together so the stems overlap by several inches. Arrange them with their tips pointing downward. This creates the backbone of the swag.
Wrap green floral wire, twist ties, chenille stems, or a small zip tie around the middle of the stems. Twist firmly, but do not crush the plastic branches. Leave a little extra wire at the top because you can use it later to create a hanging loop.
If you are using fresh greenery, bundle the stems tightly and secure them with floral wire. Fresh evergreen branches are often used for holiday swags because their natural variation gives the arrangement texture and movement.
Your swag may look skinny at this point. That is normal. Right now it is basically a Christmas broom with better ambitions.
Step 3: Layer the Greenery Until It Looks Full
Add more evergreen picks on both sides of the center spine. Angle each branch slightly outward, letting the tips cascade toward the bottom. Secure every few branches with floral wire so the swag stays sturdy when it hangs.
To make the swag look fuller, use different shades of green. A darker pine branch behind a lighter cedar pick creates depth. Add eucalyptus, frosted greenery, or thin twig branches near the edges to soften the outline.
Work from the back forward. The largest branches should sit closest to the door. The smaller, prettier branches should sit on top. This creates a layered look that photographs well and still looks good from the sidewalk, where neighbors are absolutely not judging your holiday décor. Probably.
Fluff the wired branches as you go. Pull some upward, angle some sideways, and let a few point downward. A swag should have movement. If every branch points in the same direction, it may look less “winter woodland” and more “broom aisle at a hardware store.”
Step 4: Add Berries, Pinecones, and Decorative Picks
Now comes the fun part: adding personality. Place berry picks near the middle or slightly above the center of the swag. This draws the eye upward and keeps the lower section from becoming too heavy.
Attach pinecones with floral wire whenever possible. Hot glue works for lightweight accents, but wire is better for anything that could fall, swing, or surprise a delivery driver. Wire the pinecone around its base, tuck the wire into the greenery, and twist it tightly around the main stem.
Add ornaments, bells, faux poinsettias, wooden snowflakes, or small holiday signs in groups of two or three. Odd-numbered clusters usually look more relaxed and intentional than evenly spaced decorations. You do not need to cover every inch. A little green space gives the decorations room to shine.
Country Living and Good Housekeeping both highlight the classic combination of greenery, bright berries, pinecones, and oversized ribbon for front-door holiday décor.
Step 5: Add the Bow, Create a Hanger, and Fluff the Final Shape
Your bow is the finishing touch that tells everyone this is a deliberate Christmas decoration and not a very festive shrub that wandered indoors. Use wired ribbon if possible because it holds its shape better.
For an easy bow, cut a long ribbon strip, create two large loops, and pinch them in the middle. Wrap floral wire around the center, then attach the bow near the top of the swag. Let the tails hang downward and trim the ends into a V-shape for a polished finish.
Use the extra floral wire at the top of the greenery bundle to create a hanging loop. Hang the swag from a wreath hanger, hook, or ribbon loop. Step back several feet and check the shape. If it looks flat, pull a few branches outward. If one side looks heavier, add a small pick or reposition a pinecone.
For fresh greenery, keep the swag away from direct heat and mist it lightly as needed. Fresh wreaths and swags generally last longer outdoors in cooler, shaded conditions, while direct sun and indoor heat can speed up browning.
How to Make Your Dollar Tree Christmas Swag Look More Expensive
The secret to a high-end look is not spending more money. It is making the inexpensive materials look intentional.
Use Fewer Colors
Pick two or three main colors. Green, red, and gold is classic. Green, white, and silver feels wintry. Green, cream, and bronze gives a warm rustic look. Too many colors can make a small swag look busy.
Repeat One Accent
Repeat berries, bells, ornaments, or pinecones in two or three spots. Repetition makes the arrangement feel coordinated. You do not need matching pieces everywhere, but one visual thread helps the entire design feel finished.
Hide the Mechanics
Tuck floral wire, zip ties, and cut stem ends behind greenery. Turn wired ribbon tails so the prettier side faces forward. Tiny cleanup details make a dramatic difference.
Mix Matte and Shiny Textures
Pair matte greenery with shiny berries, glittery picks, metallic bells, or satin ribbon. A little contrast adds depth. The goal is “holiday magic,” not “someone spilled a craft store on the porch.”
Where to Hang Your DIY Christmas Swag
A front door is the obvious choice, but it is not the only option. Try hanging your DIY Christmas swag in one of these places:
- On a front door or back door
- Above a mantel or mirror
- On kitchen cabinet doors
- At the end of a staircase banister
- On a porch column
- On a mailbox post
- Over a holiday bar cart
- On a bedroom door for a small seasonal touch
- Over a framed chalkboard or entryway sign
For outdoor placement, make sure the hanger is secure and avoid putting fresh greenery near candles, fireplaces, exterior heat vents, or other heat sources. The National Fire Protection Association recommends keeping Christmas trees at least three feet away from heat sources; the same common-sense caution applies to fresh greenery and decorative foliage.
Easy Variations for Your Christmas Swag
Mini Cabinet Swag
Use one small pine pick, a berry stem, and a short ribbon bow. Hang it from a kitchen cabinet knob or pantry door. This takes less than ten minutes and gives your kitchen a tiny holiday upgrade without requiring a ladder.
Mailbox Swag
Make a longer swag with weather-resistant faux greenery, wire it to the mailbox post, and add a bow at the top. Keep the decorations clear of the mailbox door and address numbers so your mail carrier does not have to solve a Christmas-themed escape room.
Winter Swag After Christmas
Remove the red ribbon, ornaments, and obvious Christmas accents after the holiday. Keep the greenery, pinecones, white berries, and neutral ribbon in place. A simple winter swag can stay up through January without looking like you forgot to take your decorations down.
Gift-Wrap Swag
Use leftover faux greenery, a small pinecone, and a narrow ribbon to make mini package toppers. Tie them onto wrapped gifts for a coordinated holiday look that feels thoughtful without requiring advanced wrapping skills or a degree in ribbon architecture.
Common DIY Christmas Swag Mistakes to Avoid
- Using only one type of greenery: The swag can look flat. Add at least one contrasting pick or branch texture.
- Making the bow too small: A tiny bow disappears on a large door. Make the bow larger than you think you need.
- Relying on hot glue for heavy decorations: Use floral wire for pinecones, bells, and anything with weight.
- Adding decorations too evenly: Cluster accents near the center rather than spacing them like a ruler was involved.
- Skipping the final fluff: Wired branches need shaping. Spend two extra minutes adjusting them.
- Ignoring the door color: Use high-contrast ribbon or accents so the swag does not disappear against the background.
Experience Notes: What Making a Simple Christmas Swag Teaches You
Making a DIY Christmas swag is one of those holiday projects that sounds almost suspiciously easy until you are standing at the table with three glittery berry picks, a roll of ribbon that suddenly seems six miles long, and one pinecone rolling onto the floor every thirty seconds. Still, that is part of the charm. The project feels relaxed because it does not demand perfection.
The first useful lesson is that the greenery does most of the heavy lifting. When the base is full and shaped well, almost any ribbon and accent combination can look good. This is especially helpful when shopping at Dollar Tree, where you may find plenty of red berry picks but only one package of the exact ribbon you imagined. Instead of abandoning the project, start with the green base and let the available accents guide the design.
A second lesson is that a swag becomes prettier after you stop trying to make it perfectly symmetrical. A traditional wreath often needs balance all the way around, but a swag looks best when it has a little personality. One side can have a longer cedar branch. A pinecone can sit slightly off-center. The berries can fan out instead of forming a neat little parade. Those small differences create movement and make the finished piece look more natural.
Many first-time crafters also discover that floral wire is the quiet hero of holiday decorating. It is not glamorous. Nobody has ever gasped, “What gorgeous wire work!” But it keeps the project together. Once you learn to twist wire around greenery stems, tuck it behind branches, and use it to attach pinecones or bows, you can make all kinds of inexpensive decorations look sturdier. A bow that is wired on properly stays where it belongs. A pinecone that is secured with wire does not leap off the door during the first breezy afternoon.
The most satisfying part usually comes at the end, when you hang the swag and see how much warmer the entry looks. A front door can feel plain all year, but a bit of greenery, ribbon, and texture makes it feel welcoming almost instantly. It is a small change, yet it creates that “someone lives here and probably has cookies” feeling that holiday décor does so well.
Another experience worth remembering is that a simple swag encourages creative reuse. Leftover ribbon can become gift-wrap trim. Extra greenery can decorate a mantel or shelf. A spare berry pick can brighten a package, napkin ring, or table centerpiece. Holiday crafting gets much easier when you stop treating every leftover piece as random clutter and start seeing it as a future decoration waiting for a job.
Most importantly, this project proves that festive décor does not need to be complicated or expensive to feel special. A DIY Christmas swag can be finished in an afternoon, customized to match your home, and adjusted whenever your taste changes. It is a small craft with a big payoff: a happier entryway, a more festive mood, and the quiet satisfaction of saying, “Yes, I made that,” while pretending the ribbon behaved perfectly the first time.
Final Thoughts
A Dollar Tree DIY Christmas swag is proof that holiday decorating does not require a massive budget, a giant craft stash, or the patience of a professional florist. Start with a simple greenery bundle, layer in a few festive accents, add a ribbon bow, and give yourself permission to fluff until it looks right.
Whether your style is rustic, traditional, elegant, whimsical, or somewhere between “farmhouse chic” and “Santa’s favorite aunt,” this five-step project gives you a budget-friendly way to make your home feel warm and welcoming. The best part is that once you make one swag, you will probably want to make several. Consider that your official warning.