
Brick homes age with dignity, but mortar joints do not always get the memo. One year your brick wall looks charming and historic; the next, it starts shedding sandy crumbs like a beach towel in the laundry room. That is where tuckpointing comes in. This masonry repair technique restores deteriorated mortar joints, improves curb appeal, helps block water intrusion, and can make tired brickwork look crisp again.
Tuckpointing is often discussed alongside repointing, brick repair, chimney restoration, mortar replacement, and historic masonry maintenance. The terms are sometimes used interchangeably, but they are not exactly the same. Repointing is mainly about replacing damaged mortar. Traditional tuckpointing goes a step further by adding a fine contrasting line that creates the illusion of narrow, elegant joints. In plain homeowner language: repointing fixes the “bones,” while tuckpointing fixes the bones and gives the wall a tailored suit.
What Is Tuckpointing?
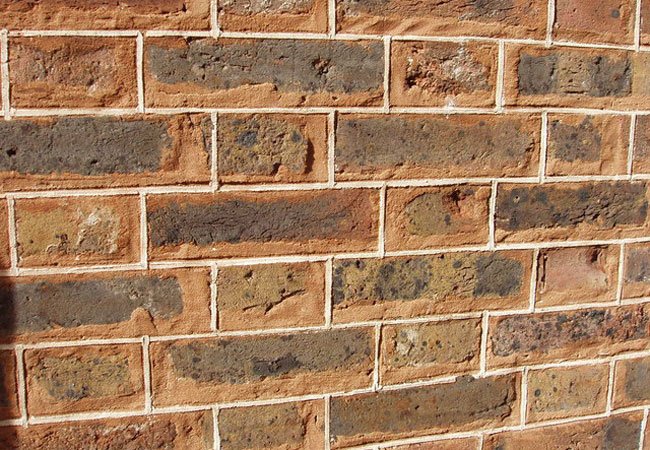
Tuckpointing is a masonry repair and finishing process used on brick, stone, and sometimes concrete block walls. The mason removes loose, cracked, or deteriorated mortar from the joints, fills those joints with fresh mortar that closely matches the brick or surrounding masonry, and then applies a thin contrasting line of lime putty or mortar along the center of the joint.
The result is both practical and attractive. The new mortar helps protect the wall from water and weather, while the fine line gives the brickwork a sharp, uniform appearance. On older brick homes, especially historic properties with irregular handmade bricks, tuckpointing can create a cleaner look without replacing the original masonry.
Tuckpointing vs. Repointing
Repointing means removing failed mortar and replacing it with new mortar. Tuckpointing includes that repair work but adds a decorative contrasting line. Many contractors and homeowners use the word “tuckpointing” to describe any mortar joint repair, especially in the United States. Before hiring a mason, clarify whether the quote includes simple repointing or true traditional tuckpointing with a finished tuck line.
Why Mortar Joints Fail
Brick can last for generations, but mortar is the softer, more sacrificial material between the units. That is not a design flaw; it is the whole idea. Mortar absorbs movement, weathering, and moisture stress so the brick does not have to. Over time, sun, rain, freeze-thaw cycles, pollution, poor drainage, leaking gutters, and old repairs can break it down.
Once mortar begins to recede or crack, water can enter the wall. In cold climates, trapped moisture can freeze, expand, and push against brick faces. That can lead to spalling, which is when brick surfaces flake, pop, or crumble. Around chimneys, failing mortar can allow water to enter the flue area, damage flashing, and eventually create interior leaks. Nobody wants a living room ceiling stain shaped like Florida.
Signs Your Brick Needs Tuckpointing
You do not need to be a master mason to spot early warning signs. Walk around your home after a dry day and look closely at the mortar joints. Healthy mortar should be firm, reasonably even, and well bonded to the brick edges. Damaged mortar often looks sandy, cracked, hollow, recessed, or missing.
Common Warning Signs
- Mortar crumbles when scraped lightly with a key or screwdriver.
- Horizontal or vertical joints show visible gaps.
- Bricks feel loose or shift slightly when touched.
- Mortar has receded noticeably from the face of the brick.
- White powdery efflorescence appears on the wall surface.
- Interior walls show damp spots near exterior masonry.
- Chimney brickwork has cracks, missing joints, or leaning sections.
- Plants or moss are growing in mortar joints.
If the damage is limited to a small, accessible section, a careful DIYer may be able to handle basic repointing. If the wall is historic, tall, structural, or badly deteriorated, call a professional mason. Brick walls are wonderfully sturdy until they are not, and gravity has terrible customer service.
The Benefits of Tuckpointing
Tuckpointing is more than cosmetic. Yes, it can make a brick wall look refreshed, but the real value is protection. Fresh, compatible mortar helps seal joints against water, stabilizes masonry units, and slows future deterioration.
Improved Water Resistance
Open mortar joints are one of the most common paths for water entry in masonry. Tuckpointing fills those gaps and helps the wall shed moisture as intended. It is not a substitute for fixing roof leaks, failed flashing, clogged gutters, or poor grading, but it is an important part of a dry exterior envelope.
Better Curb Appeal
Brick with clean, straight mortar lines looks cared for. That matters whether you plan to sell your home or simply want to stop giving your front elevation the “abandoned carriage house” aesthetic. Traditional tuckpointing can visually tighten wide or uneven joints, making older brickwork appear more refined.
Longer Masonry Life
When mortar fails, brick begins to take the punishment. Proper tuckpointing gives the wall back its protective cushion. Done well, a tuckpointing or repointing job can last decades, though lifespan depends on climate, exposure, workmanship, drainage, and the compatibility of the mortar mix.
Choosing the Right Mortar Matters
The most important rule of mortar repair is simple: the new mortar should be compatible with the old masonry. Stronger is not always better. In fact, using very hard modern cement mortar on soft historic brick can cause serious damage because moisture and stress may be forced into the brick instead of the mortar joint.
Older homes, especially those built before the widespread use of modern Portland cement mortars, may require lime-based mortar. Lime mortar is more breathable and flexible than many hard cement-heavy mixes. Modern brick walls may use Type N or Type S mortar depending on location and load. Historic masonry may need softer Type O or specialty lime mortar. When in doubt, have a qualified mason or preservation professional evaluate the wall.
Color and Texture Matching
Good tuckpointing should blend with the original masonry. That means matching more than color. Sand grain size, sand color, mortar texture, joint depth, and tooling style all affect the final look. A repair that is technically strong but visually blotchy can make a brick wall look like it lost a fight with a patchwork quilt.
Tools Used for Tuckpointing
The exact toolkit depends on the job, but most tuckpointing and repointing projects use a combination of removal tools, cleaning tools, application tools, and safety gear.
Typical Tools and Supplies
- Masonry hammer and cold chisel
- Joint rake or mortar removal tool
- Angle grinder with a masonry blade for appropriate modern joints
- Pointing trowel and hawk
- Tuck pointer or narrow jointer
- Stiff nylon brush
- Spray bottle or hose with gentle mist setting
- Mortar mix matched to the wall
- Lime putty or contrasting mortar for traditional tuck lines
- Gloves, eye protection, dust mask or respirator, and hearing protection
Power tools can speed up mortar removal, but they can also scar brick edges in seconds. For historic or soft brick, hand tools are often safer. The goal is to remove bad mortar, not create a modern art installation titled “Oops.”
How Tuckpointing Is Done
The best tuckpointing jobs begin before any mortar is mixed. A mason first identifies why the mortar failed. If a leaking gutter is pouring water down the wall, repairing the joints without fixing the gutter is like mopping the floor while the sink is still overflowing.
Step 1: Inspect and Solve Moisture Problems
Look for roof leaks, bad flashing, clogged gutters, broken downspouts, soil sloping toward the foundation, and sprinkler heads hitting the wall. Masonry repairs last longer when the wall is not constantly soaked.
Step 2: Remove Deteriorated Mortar
The damaged mortar is cut or raked out to a proper depth, usually until sound mortar is reached. Many masonry guides recommend removing enough material so the new mortar has room to bond. Shallow smears over old mortar rarely last and often fail quickly.
Step 3: Clean the Joints
Dust and debris prevent good bonding. The joints should be brushed clean and lightly dampened before new mortar is packed in. Dampening helps prevent dry brick from sucking moisture out of the fresh mortar too quickly.
Step 4: Pack in New Mortar
Fresh mortar is pressed firmly into the joint in layers if needed. It should fill the space completely without voids. The mason then tools the joint to match the existing profile, such as concave, flush, weather-struck, or slightly recessed.
Step 5: Add the Tuck Line
For traditional tuckpointing, a narrow groove is formed in the fresh mortar and filled with a contrasting lime putty or mortar line. This fine line creates the crisp visual effect that gives tuckpointing its distinctive look.
Step 6: Cure and Protect the Work
Fresh mortar needs time to cure. The wall may need protection from direct sun, heavy rain, freezing temperatures, and rapid drying. Proper curing is not glamorous, but it is where durability is born. Think of it as the spa day your brick wall did not know it needed.
How Much Does Tuckpointing Cost?
Tuckpointing costs vary widely, but many U.S. homeowners can expect a professional project to fall somewhere around $5 to $25 per square foot for typical walls, with chimneys and high or difficult-access areas often costing more. Small repairs may carry minimum service charges, while full-wall or historic restoration projects can become significantly more expensive.
Factors That Affect Price
- Height of the wall and need for scaffolding
- Condition of the existing mortar
- Brick softness and risk of damage
- Whether the project is a chimney, foundation, wall, porch, or patio
- Historic preservation requirements
- Mortar color matching and custom mixing
- Labor rates in your region
- Whether true decorative tuckpointing is requested
A chimney may cost more per square foot than a simple low garden wall because access is harder, safety risks are greater, and the work may involve flashing, crown, cap, or flue issues. Always ask for an itemized estimate that explains removal depth, mortar type, joint profile, cleanup, access equipment, and warranty.
Can You DIY Tuckpointing?
Basic mortar repair can be a DIY project for a patient homeowner working on a small, low, non-structural area. True tuckpointing, however, is more demanding. The decorative line requires precision, and mortar matching takes experience. If your first attempt looks like frosting squeezed by a raccoon, you are not alone.
Good DIY Candidates
- Small areas of missing mortar on a low wall
- Non-historic brickwork with standard modern mortar
- Minor repairs away from structural cracks
- Projects where cosmetic perfection is not critical
Call a Pro When
- The home is historic or has soft handmade brick
- The chimney is damaged, tall, leaning, or leaking
- Bricks are loose, bulging, or severely spalling
- Large sections of wall need repair
- You need scaffolding or roof access
- You are unsure which mortar type to use
Common Tuckpointing Mistakes to Avoid
The biggest mistake is using the wrong mortar. A hard mortar on soft brick can accelerate brick damage. Another common problem is removing too little old mortar, which leaves the new mortar with a weak bond. Smearing mortar over the face of brick, working in bad weather, adding too much water to the mix, and skipping curing protection can also shorten the life of the repair.
Painting brick before repairing mortar is another trap. Paint can highlight cracks, trap moisture, and make future repairs more complicated. If you plan to paint brick, repair and repoint the masonry first. Better yet, think carefully before painting exterior brick at all, because once brick is painted, maintenance becomes a long-term commitment.
Maintenance After Tuckpointing
Once the work is complete, inspect your masonry at least once a year. Check after winter, after major storms, and before selling or refinancing a home. Keep gutters clear, extend downspouts away from the foundation, trim vines away from brick, and avoid aggressive pressure washing. Water is the villain in most masonry stories, and your job is to deny it a dramatic entrance.
For chimneys, schedule regular inspections. Chimneys are exposed to rain, wind, heat, freeze-thaw cycles, and acidic combustion byproducts. Even excellent tuckpointing will not protect a chimney forever if the crown is cracked or the cap is missing.
Real-World Experience: What Homeowners Learn From Tuckpointing
Homeowners often discover tuckpointing during what begins as a harmless weekend inspection. Maybe they notice a few sandy crumbs on the porch. Maybe a brick wall looks a little “tired.” Maybe a chimney has a gap that was definitely not there last fall. At first, mortar repair seems like a small cosmetic issue. Then someone taps a joint with a screwdriver and half a teaspoon of wall falls out. That is usually the moment the internet search begins.
One practical lesson is that tuckpointing rewards patience. Rushing the job almost always shows. Mortar needs to be removed carefully, joints need to be cleaned thoroughly, and fresh mortar needs the right consistency. Too dry, and it will not pack properly. Too wet, and it weakens, stains the brick, and slumps like a sad pancake. The best masons work steadily, not dramatically. Their rhythm is scrape, brush, dampen, pack, tool, clean, and protect.
Another experience homeowners report is sticker shock. Tuckpointing can look simple from the ground, but the cost reflects labor, setup, skill, dust control, safety, and time. A mason is not merely filling gaps; they are preserving the wall’s ability to handle moisture and movement. On older homes, the mason may also be matching historic mortar color and texture, which is more like restoration than ordinary patching.
It is also common to learn that the visible damage is only a symptom. A wall below a leaking gutter may need tuckpointing, but the gutter must be repaired first. A chimney with failing joints may also need a new crown, cap, or flashing repair. A foundation wall with recurring dampness may require grading improvements outside. Good masonry work often starts with detective work. The mortar is the clue; moisture is frequently the culprit.
For DIYers, a small test area is invaluable. Start somewhere inconspicuous, such as behind a shrub or along a side wall. Practice removing mortar without chipping brick edges. Try tooling the joint to match the existing profile. Let it cure and look at it in morning light, afternoon light, and after rain. Mortar color can change as it dries, which is why “close enough” in the bucket may become “oh no” on the wall.
Homeowners who hire professionals should ask to see previous work, especially on buildings similar in age and brick type. A good contractor should be able to explain the mortar choice, removal depth, joint profile, curing plan, and cleanup process. The best conversations are specific. “We use Type N for everything” is not as reassuring as “Your brick is relatively soft, so we will use a compatible mortar and match the existing concave joint.” Specifics are where confidence lives.
The most satisfying part comes at the end. Fresh tuckpointing can transform a wall without changing its character. The brick still looks original, but cleaner, tighter, and more intentional. It is the masonry equivalent of getting a sharp haircut before a family photo. Done properly, tuckpointing does not shout. It quietly makes the whole house look better while protecting it from future damage.
Conclusion
Tuckpointing is one of those home repairs that sits at the intersection of beauty and building science. It improves the look of brickwork, but more importantly, it restores the mortar joints that help protect masonry from water, weather, and structural stress. Whether you are maintaining a historic brick home, repairing a chimney, or freshening up a garden wall, the keys are the same: diagnose moisture problems first, choose compatible mortar, remove damaged material properly, and give the new work time to cure.
For small modern repairs, a careful DIY approach may be reasonable. For historic brick, widespread deterioration, tall walls, or chimneys, professional masonry help is usually money well spent. Brick may be tough, but it still appreciates respect. Give your mortar joints the attention they deserve, and your home will thank you by standing there handsomely for many more years.
SEO Tags
Note: This article is an original, fully rewritten informational guide inspired by the requested topic and is not affiliated with or endorsed by Bob Vila.