
An old wood armoire can be many things: a bulky relic, a heroic storage machine, or the household object everyone quietly hopes someone else will move. With thoughtful preparation, the right paint, and a few creative details, however, that tired cabinet can become a custom statement piece that looks collected rather than forgotten.
Painting a wood armoire is not simply a matter of opening a can and attacking the doors with a brush. A successful furniture makeover depends on evaluating the piece, repairing damage, preparing the finish, choosing compatible products, and allowing enough drying and curing time. The glamorous color is only one part of the transformation. The less glamorous stepscleaning sticky corners and sanding mysterious scratchesare what keep that glamorous color attached.
Why a Painted Wood Armoire Is Worth Saving
Armoires were designed before closets became the room-sized real estate listings they are today. Their tall frames, deep shelves, drawers, and doors still make them useful for storing clothing, linens, dishes, office equipment, art supplies, or entertainment gear. Even an outdated armoire may have stronger construction and more character than a new flat-pack cabinet.
Paint can visually lighten a heavy piece, coordinate it with a redesigned room, and emphasize carved trim that disappeared beneath a dark finish. It also gives you control over the final style. The same wooden cabinet can become a crisp coastal wardrobe, a moody navy bar, a botanical linen cupboard, or a cheerful children’s-room storage station.
The environmental benefit is a bonus. Reusing a structurally sound cabinet keeps a large piece of furniture in service and reduces the need to buy a replacement. It can also be considerably less expensive, provided the armoire does not require major structural rebuilding.
Inspect the Armoire Before Choosing a Paint Color
Before dreaming about sage green or dramatic charcoal, examine the cabinet in good light. Open every door and drawer. Check the back, base, shelves, hinges, and feet. A cosmetic makeover cannot compensate for a cabinet that leans like it has had a difficult week.
Determine What the Armoire Is Made From
Many older armoires combine materials. The frame may be solid wood, while door panels, shelves, or decorative sections may be wood veneer, plywood, medium-density fiberboard, or laminate. Solid wood can usually tolerate more sanding. Thin veneer requires a lighter touch because aggressive sanding can cut through the decorative wood layer.
Look along unfinished edges, inside drawers, and behind the cabinet. Repeating grain patterns may indicate veneer, while a plastic-like glossy surface may be laminate. The material affects the primer and preparation method, so identify it before switching on a power sander with the confidence of a television renovation host.
Check for Structural Problems
Tighten loose screws and inspect joints for movement. Make sure the shelves are supported, the doors close reasonably well, and the back panel is secure. Small dents, nail holes, and chipped corners can often be repaired with a paintable wood filler. After the filler hardens, it can be shaped and sanded before painting.
Extensive rot, active insect damage, strong musty odors, or severely warped doors may require professional repair. Painting over those problems is not restoration; it is simply giving the problem a nicer outfit.
Consider Old-Paint Safety
If the armoire has an unknown painted finish, especially one that may date from before 1978, do not immediately scrape or dry-sand it. The U.S. Environmental Protection Agency warns that disturbing lead-based paint can create hazardous dust. Test questionable coatings and follow lead-safe practices before beginning surface preparation.
Design the Makeover Before Starting
A clear design plan prevents the project from becoming a parade of impulsive decisions. Decide where the armoire will live, what it will store, and whether it should blend into the room or become its focal point.
Choose a Color That Suits the Piece
Large furniture occupies significant visual space. Pale neutrals, muted blues, soft greens, and warm whites can make a tall armoire feel less imposing. Black, forest green, burgundy, and deep navy create a dramatic, furniture-as-architecture effect.
Test several colors on sample boards and position them beside the armoire at different times of day. Paint can look surprisingly different under warm lamps, cool daylight, and the unforgiving ceiling fixture everyone avoids turning on.
Plan the Interior
The inside does not have to match the exterior. A contrasting interior can turn an ordinary cabinet into a delightful surprise. Consider a dusty rose interior behind navy doors, pale blue shelves inside a white armoire, or patterned wallpaper on the back panel.
If the cabinet will store dishes or frequently handled objects, prioritize a smooth, washable finish. For clothing and linens, make sure the interior is clean, fully cured, and free of lingering odors before loading it.
Select New or Restored Hardware
Hardware has an outsized effect on the finished look. Vintage brass pulls can support a traditional design, while simple black handles create a modern silhouette. Ceramic knobs add color, and brushed nickel feels clean and understated.
Original hardware may only need cleaning and polishing. If you replace it, measure the distance between existing screw holes before shopping. Filling and redrilling holes is possible, but discovering that your beautiful new handles are half an inch too short is a special form of DIY character development.
Tools and Materials for an Armoire Makeover
Gathering supplies before starting keeps dust-covered trips through the house to a minimum. A typical project may require:
- Drop cloths or protective floor covering
- Screwdrivers and labeled bags for hardware
- Degreasing cleaner and lint-free cloths
- Wood filler and a putty knife
- Sanding sponges and fine- to medium-grit sandpaper
- A vacuum with a brush attachment
- Tack cloths or clean microfiber cloths
- Bonding or stain-blocking primer
- Furniture, cabinet, trim, acrylic, or alkyd paint
- A high-quality angled brush and mini roller
- Painter’s tape
- A compatible wax or clear topcoat, if needed
- Protective eyewear, gloves, and suitable respiratory protection
Read the labels for every cleaner, primer, paint, and protective finish. Products from the same category are not automatically compatible, and manufacturer instructions should determine application methods and recoat times.
How to Transform the Wood Armoire Step by Step
1. Empty and Disassemble the Cabinet
Remove clothing, shelves, drawers, hanging rods, knobs, pulls, and any removable doors. Photograph complicated hinge arrangements before taking them apart. Label each door, hinge, and screw set so reassembly does not become an experimental puzzle.
Move the armoire away from walls and protect the floor. Good ventilation is essential, but avoid working where wind can blow dust, insects, or yard debris into wet paint.
2. Clean Every Surface Thoroughly
Furniture collects skin oils, cooking residue, polish, wax, dust, and grime. These contaminants can interfere with adhesion, so clean the armoire before sanding. Pay special attention to door edges, handles, molding, and the area near the floor.
Use a cleaner appropriate for the existing finish, then remove any residue according to the product directions. Allow the cabinet to dry completely. Major paint manufacturers consistently place cleaning, hardware removal, and surface preparation ahead of priming and painting.
3. Repair Damage
Fill dents, gouges, unused hardware holes, and chipped edges with a paintable filler suited to the repair. Use thin applications when possible, since one enormous blob of filler tends to create more sanding than progress.
Once the repair has hardened, sand it flush with the surrounding surface. Reglue loose trim, replace missing shelf supports, and correct door alignment before paint makes every gap more noticeable.
4. Sand or Degloss the Finish
The goal is usually to dull the existing sheen and create a surface the primer can gripnot to grind the armoire back into a tree. Lightly sand in the direction of the grain where practical, using a sanding sponge around curves, trim, and carvings. Vacuum thoroughly and remove the remaining dust with a clean cloth.
If the old finish is peeling or badly damaged, more substantial removal may be necessary. Common removal methods include sanding, chemical stripping, and controlled heat, but each requires appropriate safety precautions. On sound glossy finishes, a compatible liquid deglosser may be useful for ornate areas that are difficult to sand.
5. Apply the Correct Primer
Primer improves adhesion, creates a more uniform base, and can help block stains or discoloration. A bonding primer is useful on slick or previously finished surfaces. A stain-blocking primer may be needed when knots, tannins, smoke residue, or dark stains could bleed through a light paint color.
Apply primer in thin, even layers with a brush, mini roller, or sprayer appropriate for the product. Avoid heavy buildup in corners and decorative grooves. Once dry, inspect the surface. A very light sanding can remove raised grain, dust nibs, or rough roller texture before the first paint coat.
6. Paint in Thin, Controlled Coats
Furniture and cabinet paints are generally better suited to regular handling than ordinary flat wall paint. Acrylic enamel, waterborne alkyd, trim paint, chalk-style paint, and mineral-style furniture paint can all work, but they produce different appearances and may require different primers or protective finishes.
Use a brush for corners, molding, and recessed panels. Follow with a mini roller on broad flat areas when the product permits. Work along the form of the cabinet, maintain a wet edge, and resist the urge to repeatedly brush paint that has begun to set.
Two thin coats usually look smoother and cure more reliably than one thick coat. Allow each layer to dry for the full recommended interval. Paint that feels dry on the surface may still be soft underneath, so rushing the second coat can create dragging, wrinkling, or fingerprints worthy of a small crime scene.
7. Add Decorative Character
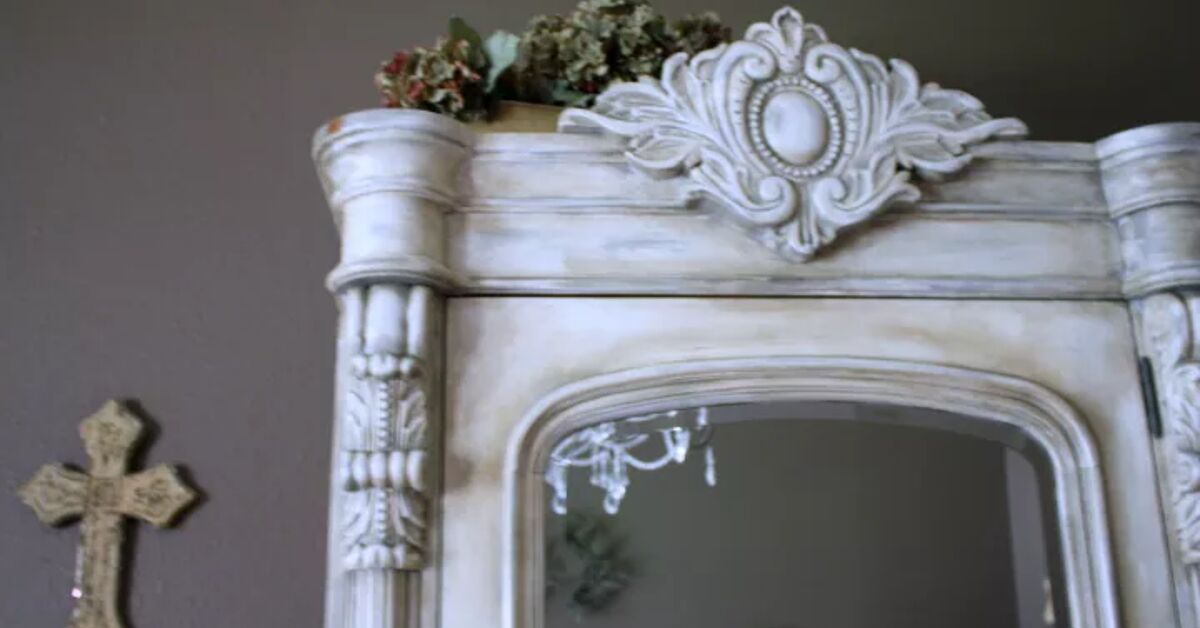
Once the base color is established, personalize the armoire with details that respect its shape. Highlight carved trim with a slightly lighter or darker tone. Add a hand-painted border, geometric pattern, botanical motif, or subtle stencil.
For an aged finish, distress only the areas that would naturally receive wear, such as corners, door edges, raised molding, and the space around handles. Randomly sanding the center of a door can look less like authentic age and more like the cabinet lost an argument with a belt sander. Natural-looking distressing is gradual and restrained.
Wallpaper, fabric, or removable peel-and-stick material can decorate the back panel. Painter’s tape can create stripes or color-blocked panels, while metallic wax can emphasize carved details without turning the entire armoire into a palace prop.
8. Protect the Finish When Necessary
Some furniture and cabinet paints are designed to cure into a durable finish without a separate topcoat. Chalk-style finishes, decorative effects, and surfaces that receive frequent wear may benefit from a compatible wax, polyurethane, or water-based clear coat.
Always test a protective finish in an inconspicuous area. Clear coats can alter color, sheen, or texture, especially over very dark paint. Use thin applications and avoid overworking the product. Choose a finish based on how the armoire will be used rather than assuming that maximum gloss equals maximum sophistication.
9. Allow the Paint to Cure
Drying and curing are not the same. A surface may be dry enough to touch while still being vulnerable to dents, sticking doors, and scratches. Follow the paint manufacturer’s curing guidance and handle the cabinet gently during the early days.
Wait before placing heavy objects on shelves or closing freshly painted doors tightly. Temporary felt pads can prevent contact points from sticking while the coating hardens.
10. Reassemble and Secure the Armoire
Reinstall the shelves, hardware, drawers, and doors after the finish has hardened sufficiently. Adjust hinges carefully and add felt bumpers where doors contact the frame.
Because an armoire is tall and potentially top-heavy, secure it to a suitable wall structure with an appropriate furniture restraint, especially in a home with children or pets. Follow the armoire manufacturer’s instructions and the restraint-hardware directions rather than relying on a decorative drywall anchor and optimism.
Common Armoire-Painting Mistakes
Skipping the Cleaning Stage
Sanding greasy furniture can spread residue rather than remove it. Clean first, then prepare the surface.
Using the Wrong Primer
A general primer may not bond well to slick laminate or block tannin stains. Match the primer to both the substrate and the problem you need it to solve.
Applying Paint Too Thickly
Heavy coats are prone to drips, soft edges, slow curing, and visible brush marks. Thin coats require more patience but far less repair.
Painting Over Moving Hardware
Painted hinges can become stiff, chip quickly, and make future adjustments difficult. Remove them whenever practical.
Reassembling Too Soon
Freshly painted doors may stick to the frame, while hardware can sink into soft paint. Give the finish time to harden before putting the cabinet back into full service.
Painted Armoire Ideas for Different Rooms
- Bedroom wardrobe: Use a soft neutral exterior, cedar accessories, labeled storage baskets, and a contrasting interior.
- Home office: Add adjustable shelves, a pullout work surface, cable openings, and a dark, professional color.
- Craft cabinet: Paint the doors brightly and install pegboard, bins, ribbon rods, and removable organizers.
- Dining-room bar: Choose a deep lacquer-like color, metallic hardware, stemware racks, and washable shelf liners.
- Children’s storage: Use a durable low-sheen finish, rounded hardware, cheerful colors, and secure wall anchoring.
- Linen cupboard: Try warm white, pale gray, or muted blue with breathable baskets and neatly labeled shelves.
A successful conversion balances beauty with function. The most impressive painted armoire is not necessarily the one with the fanciest finish; it is the one that serves its new purpose every day without making its owner regret opening the doors.
Conclusion: Give the Armoire a Second Act
Transforming a wood armoire into a painted treasure is a manageable project when the work is divided into sensible stages. Inspect the structure, clean thoroughly, repair damage, prepare the existing finish, apply the correct primer, and build the color with thin coats. Decorative details can add personality, but durability comes from the unglamorous preparation underneath them.
The finished armoire will not merely look newer. It will feel intentionala piece designed for your room, your storage needs, and your style. That is the real pleasure of painted furniture: you are not hiding the past. You are editing it with better hardware and significantly more attractive colors.
Project Experience: What You Learn While Transforming an Armoire
A realistic armoire makeover rarely unfolds as a flawless before-and-after montage. The first stage is usually excitement. You see carved doors, sturdy shelves, and excellent potential. You imagine the final color, order elegant handles, and briefly believe the project will be completed before lunch.
Then the cleaning begins. This is when the armoire reveals its history through dust in the molding, wax around the handles, and at least one small object trapped beneath a drawer. Cleaning may feel slow, but it is also when you begin to understand the cabinet. You notice where hands repeatedly touched the doors, which hinge has loosened, and which scratch is deep enough to require filler.
The next lesson is that surface preparation changes the mood of the project. Sanding a large cabinet is repetitive, and ornate trim demands patience. Progress may look unimpressive because the armoire becomes duller rather than prettier. Yet this stage creates the foundation for everything that follows. The best strategy is to work in sections: one door, one side panel, one drawer front. Small completed areas make a large piece feel less overwhelming.
Primer creates the first emotional reward. The mismatched stains, repairs, and faded finish suddenly become one unified surface. It may not be beautiful yet, but the transformation finally becomes visible. Primer also exposes flaws. A dent that seemed invisible in dark wood can become obvious against white. Correcting it now is frustrating, but much easier than pretending you will stop noticing it later.
The first color coat can be alarming. It may look streaky, uneven, or unexpectedly bright. This is normal for many finishes. The mistake is trying to force perfect coverage by applying more wet paint. Let the coat dry, evaluate it calmly, and trust the process. The second thin coat is often where the color gains depth and the brushwork begins to disappear.
Hardware installation provides another turning point. A plain painted cabinet can suddenly look custom once the hinges, knobs, or handles return. This is also where careful labeling pays off. A bag marked “upper left door” is far more helpful than a container labeled “metal things.”
The final lesson is patience. Newly painted furniture invites immediate styling, but loading shelves too soon can mark a finish that has not fully cured. Giving the armoire extra time before heavy use protects days of work. When it is finally ready, style it thoughtfully rather than stuffing every shelf on the first evening.
The experience is satisfying because the finished piece retains evidence of both its original craftsmanship and your choices. A slight imperfection in a corner may remain, but it becomes part of the story rather than a failure. The armoire now has a useful purpose, a distinctive personality, and a future that looked unlikely when it was sitting dusty and unwanted.
Most important, the project changes how you see old furniture. Instead of dismissing a dated finish, you begin noticing proportions, construction, storage, and possibility. That shift may lead to another makeover. Then another. Eventually, family members may begin hiding their furniture when you arrive carrying paint samples.