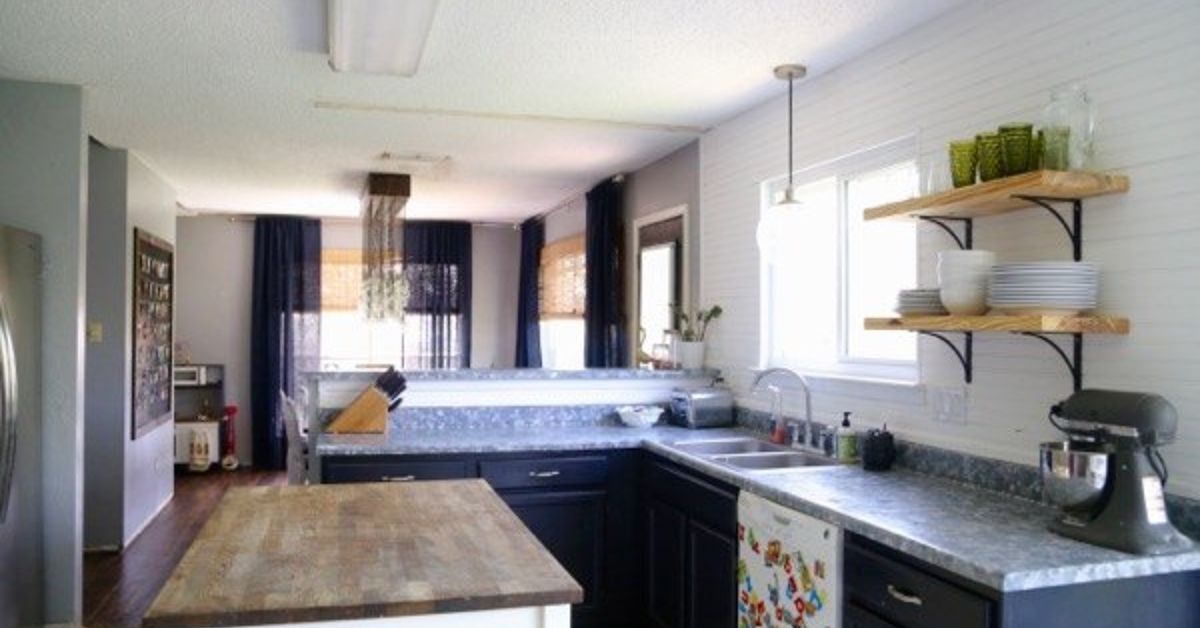

DIY open shelving is one of those home projects that looks simple enough to inspire confidence and just tricky enough to make you respect your level, stud finder, and future self. Done well, open shelves can make a kitchen, laundry room, bathroom, office, or living area feel brighter, more personal, and more functional. Done badly, they can become a wall-mounted museum of leaning mugs, dusty cereal boxes, and one suspiciously heavy appliance that should never have been invited to the party.
The good news? Building open shelving does not require a professional workshop or a heroic amount of carpentry experience. With smart planning, sturdy supports, the right shelf depth, and a little patience, you can create shelves that look custom, hold real everyday items, and make your space feel intentionally designed instead of “I ran out of cabinets and got creative.”
This in-depth guide walks through how to plan, build, install, finish, style, and maintain DIY open shelving. It also covers common mistakes, material choices, shelf spacing, safety considerations, and real-world lessons that make the difference between shelves you love and shelves you quietly avoid making eye contact with.
Note: This guide is for general DIY education. Always follow manufacturer instructions for brackets and anchors, check local building requirements when relevant, and use proper safety gear when cutting, sanding, drilling, staining, or installing shelves.
Why DIY Open Shelving Is Worth Considering
Open shelving has remained popular because it solves several problems at once. It creates storage without the visual bulk of upper cabinets, puts everyday items within easy reach, and gives you a place to display dishes, plants, jars, art, cookbooks, baskets, or decorative objects. In small kitchens, open shelves can help the wall feel lighter because they do not project as heavily into the room as traditional closed cabinets.
DIY open shelving is also flexible. You can make one short shelf above a coffee bar, a pair of wood shelves beside a range hood, wall-to-wall shelves in a pantry, or a dramatic floating shelf system in a living room. You can choose rustic pine, oak, maple, walnut, painted wood, reclaimed boards, butcher-block-style planks, metal brackets, hidden supports, or a built-in look with trim and corbels.
The biggest advantage is customization. Store-bought shelves are convenient, but they often come in fixed sizes, finishes, and weight limits. A DIY approach lets you match the exact width of your wall, choose the depth that fits your dishes or books, and finish the wood to coordinate with your flooring, cabinets, countertops, or furniture.
Before You Build: Decide What Kind of Open Shelving You Want
There are several ways to approach DIY open shelving, and each style has a different level of difficulty, cost, and strength.
1. Bracketed Open Shelves
Bracketed shelves are the most beginner-friendly option. A board rests on visible brackets, usually metal, wood, or decorative corbels. This style is strong, easy to install, and forgiving if your wall is not perfectly flat. Brackets can also add character. Matte black brackets feel modern farmhouse, brass brackets feel polished, and simple white brackets nearly disappear against a white wall.
2. Floating Shelves
Floating shelves hide their supports inside the shelf or behind it, creating a clean, modern look. They can be built as hollow boxes that slide over a cleat, or they can use heavy-duty hidden rods or specialty hardware. Floating shelves look elegant, but they require more precision. Your holes, cleats, and supports must line up correctly, or the shelf can tilt, sag, or develop that unfortunate “tired bookshelf” posture.
3. Built-In Open Shelving
Built-in shelves use side walls, trim, cleats, dowels, or cabinet-style construction to create a more permanent architectural feature. They work beautifully in alcoves, pantry walls, laundry rooms, and office nooks. Built-ins usually take more measuring and finishing, but they can look expensive when done carefully.
Best Places to Use DIY Open Shelving
Open shelves work in more rooms than people realize. In the kitchen, they can hold plates, bowls, coffee mugs, spices, glass jars, cookbooks, and serving pieces. In a bathroom, they can store towels, baskets, soap, jars, and small plants. In a laundry room, they can keep detergent, dryer balls, stain removers, and folded linens close by. In a home office, open shelves can organize books, files, framed photos, and supplies. In a living room, they can become a display wall for art, ceramics, books, and collected objects.
The key is choosing the right location. Open shelving is best for items that are either used often or look good enough to live in public. If an item is bulky, greasy, oddly shaped, or visually chaotic, it probably belongs behind a cabinet door. Nobody needs to see a family-sized box of pancake mix performing interpretive dance on a beautiful oak shelf.
Planning Shelf Size, Depth, and Spacing
Good open shelving starts with measurements. Before buying wood, decide what the shelves need to hold. Dinner plates usually need deeper shelves than coffee mugs. Books need sturdy support and enough vertical clearance. Decorative shelves can be shallower and lighter.
For kitchen shelving, a depth of 8 to 12 inches is common. An 8-inch shelf works well for mugs, glasses, small bowls, spice jars, and decorative pieces. A 10- to 12-inch shelf is better for dinner plates, mixing bowls, pantry jars, and stacked dishes. Anything much deeper can be useful in a pantry or laundry room, but deep open shelves can quickly become messy because items hide behind other items.
Spacing depends on what you plan to store. For everyday dishes, leave enough room to lift items without scraping the shelf above. A spacing of 12 to 16 inches between shelves works well for many kitchen setups. If you are installing open shelves above a countertop, leave comfortable clearance so appliances, coffee makers, faucets, and hands can move freely below.
Length matters too. Longer shelves need stronger support. Wall studs are often spaced 16 inches apart on center in many U.S. homes, so designing your shelf length around stud locations can make installation stronger and easier. If you cannot hit studs in the right places, use appropriate wall anchors rated for the wall type and expected load, but remember: anchors are not magic. They are helpful, not invincible.
Tools and Materials for DIY Open Shelving
The exact tools depend on your shelf style, but most DIY open shelving projects use a similar core kit.
- Wood boards, plywood, butcher block, or shelf blanks
- Stud finder
- Tape measure
- Level
- Pencil or painter’s tape for marking
- Drill and drill bits
- Screws suited to your brackets and wall type
- Wall anchors if studs are not available
- Saw, or a hardware store cutting service
- Sandpaper or orbital sander
- Wood stain, paint, polyurethane, oil, or clear sealer
- Brushes, rags, drop cloth, and gloves
- Brackets, corbels, cleats, or floating shelf hardware
- Safety glasses and a dust mask
If you are drilling through tile, you will also need the correct tile or masonry bit, patience, and a steady hand. Tile backsplashes are not the place to “wing it with confidence.” Use painter’s tape to help prevent bit wandering, drill slowly, and avoid hammer mode unless the bit and surface call for it.
Choosing the Right Wood
Wood selection affects both appearance and durability. Pine is budget-friendly, easy to cut, and great for rustic or painted shelves, though it dents more easily than hardwood. Poplar is smooth and often used for painted projects. Oak is strong, classic, and shows beautiful grain. Maple is hard, clean-looking, and modern. Walnut is rich and dramatic, but it costs more. Plywood can work well for floating shelf boxes, especially when trimmed with a solid wood front edge.
For kitchens and bathrooms, sealing is important. Wood near cooking steam, sink splashes, or bathroom humidity needs protection. A clear polyurethane, water-based finish, oil finish, or durable paint can help prevent staining and make the shelf easier to wipe down. If the shelf will hold dishes, let finishes cure fully before stacking plates, bowls, or cups on top.
Step-by-Step: How to Build DIY Open Shelving
Step 1: Plan the Layout
Use painter’s tape to mark the shelf length and location on the wall. Step back and look at the proportions. Check how the shelves relate to windows, cabinets, outlets, range hoods, doors, and light fixtures. This is the moment to catch awkward placement before screws enter the wall and everyone gets emotionally involved.
Step 2: Find and Mark the Studs
Use a stud finder to locate the wall studs. Mark them lightly with pencil or tape. Whenever possible, attach brackets, cleats, or floating shelf hardware directly into studs. This gives your shelving the strongest support, especially for heavy dishes, books, or pantry items.
Step 3: Cut the Shelves to Size
Measure twice and cut once. Actually, measure three times if you are tired, hungry, or emotionally attached to expensive walnut. Cut each board to length. If the edges will be visible, sand them smooth and slightly ease the corners so they are comfortable to touch.
Step 4: Sand the Wood
Start with a medium grit sandpaper and finish with a finer grit for a smooth surface. Sand the top, bottom, edges, and corners. Wipe away dust with a tack cloth or slightly damp rag before applying stain or paint.
Step 5: Stain, Paint, or Seal
Apply your chosen finish before installation when possible. It is easier to finish shelves on a work surface than to paint upside down against a wall while questioning your life choices. Follow the product’s drying and curing times. For a natural look, choose a clear coat or oil. For a bold design moment, paint shelves the same color as the wall or cabinets.
Step 6: Install Brackets or Supports
Hold the bracket or cleat in place, check for level, mark the holes, drill pilot holes, and drive screws into studs or appropriate anchors. For multiple shelves, use a level and measuring tape to keep everything aligned. Even a slight tilt becomes more noticeable once plates, books, or jars are sitting on the shelf.
Step 7: Attach the Shelf
Place the board on the brackets or slide the floating shelf over its support. Secure it with screws from below or according to the hardware instructions. For bracketed shelves, use screws shorter than the shelf thickness so they do not poke through the top. Surprise screw tips are not a charming design detail.
Step 8: Test the Strength
Before loading the shelf with your entire ceramic collection, test it gradually. Add a few items, check for movement, and make sure nothing shifts. If the shelf flexes, leans, or pulls away from the wall, remove the weight and correct the support.
Styling DIY Open Shelving Without Creating Clutter
Open shelving works best when it is practical and edited. Start with the items you use every day: bowls, plates, glasses, mugs, coffee supplies, spices, or towels. Then add a few decorative pieces for warmth, such as a small plant, framed art, a vase, a cutting board, or a stack of cookbooks.
Use repetition to create calm. Matching dishes, similar jars, baskets, or a limited color palette can make shelves feel intentional. Mix heights and textures so the shelves do not look flat. Try stacking bowls, leaning cutting boards, placing a pitcher beside mugs, or using a tray to group smaller objects.
Negative space is your friend. You do not need to fill every inch. In fact, the fastest way to make open shelves look expensive is to leave breathing room. A shelf with five beautiful, useful items often looks better than a shelf with twenty-seven tiny objects all screaming for attention.
What Not to Store on Open Shelves
Open shelves are not ideal for everything. Avoid storing very heavy appliances unless the shelf is specifically built and rated for that weight. Skip messy packaging unless you decant pantry goods into jars or baskets. Avoid placing fragile items too high, especially if you need a stool to reach them. In kitchens, think carefully before putting rarely used glassware near cooking zones because grease and dust can build up over time.
Open shelving is also not the best home for things you do not want to clean often. If you dislike dusting, choose fewer shelves, place them away from the stove, or use open shelving as a small accent instead of replacing every upper cabinet.
Common DIY Open Shelving Mistakes
Using Weak Supports
The most serious mistake is underestimating weight. A shelf may look light, but dishes, jars, books, and decor add up quickly. Choose brackets or hidden hardware rated for the load, attach supports to studs whenever possible, and do not rely on drywall alone for heavy storage.
Installing Shelves Too High
If you need a ladder every time you want a cereal bowl, the shelf is not functional. Keep daily-use items within comfortable reach and reserve higher shelves for decor or less-used pieces.
Skipping the Level
Your eyes may lie. Your level will not. Use it during marking, bracket installation, and final placement.
Choosing the Wrong Depth
Too shallow, and plates hang over the edge. Too deep, and items get lost in the back. Match shelf depth to the items you actually own, not the fantasy kitchen you saw in a magazine where nobody apparently eats cereal.
Forgetting Maintenance
Open shelves need occasional dusting and wiping. In kitchens, shelves near the stove may collect grease faster. A washable finish makes cleaning easier and protects the wood.
Budget-Friendly DIY Open Shelving Ideas
You do not need luxury materials to get a high-end look. Simple pine boards can look beautiful with a warm stain and clean black brackets. Plywood shelves can look custom when finished with edge banding or a solid wood face frame. Reclaimed wood adds texture and character, though it should be cleaned, sanded, and sealed properly. Painted shelves can blend into the wall for a built-in look or contrast with cabinetry for a bolder design.
Another budget trick is to install fewer shelves but make them count. Two well-placed shelves over a coffee station can transform a blank wall. One long shelf in a laundry room can add serious function. A short shelf near the stove can hold oils, salt, and everyday spices. Small projects can make a big difference without turning your weekend into a lumber-based marathon.
Maintenance Tips for Open Shelving
Keep maintenance simple. Wipe shelves weekly or biweekly depending on the room. In kitchens, use a damp cloth and mild cleaner suitable for the finish. Avoid soaking wood. Rotate items occasionally so dust does not build around them. Wash rarely used dishes before using them, especially if they have been displayed for a while.
Check screws and brackets every so often, especially during the first few months. Wood can shift slightly, walls can be imperfect, and shelves carrying heavy loads deserve a quick inspection. If anything feels loose, fix it early.
DIY Open Shelving Experiences: Real-World Lessons That Make the Project Easier
The biggest lesson from DIY open shelving projects is that planning saves more time than any power tool. Many people start by shopping for beautiful boards, but the smarter first step is deciding what the shelves will hold. A shelf meant for coffee mugs does not need the same depth or support as one holding stacks of dinner plates. Before cutting wood, place your actual items on a table and measure the space they take up. This simple test prevents shelves that look gorgeous but fail at their one job: holding your stuff.
Another common experience is discovering that walls are not as straight, square, or cooperative as they appear. A wall can bow slightly, corners may not be perfect, and stud locations may not line up with your dream layout. That does not mean the project is doomed. It means you need flexibility. Sometimes the best solution is shifting a shelf a few inches, choosing a slightly longer board to reach studs, or using a support style that gives you more installation options.
Finishing the wood also takes longer than expected. Stain needs testing because the same color can look different on pine, oak, maple, or plywood. A warm walnut stain on one board can look rich and cozy, while on another it may look blotchy or orange. Always test stain on scrap wood or the underside of the shelf. If using pine, a pre-stain conditioner can help create a more even finish. Paint is more forgiving, but it still needs sanding, primer in many cases, and enough drying time before installation.
One of the most satisfying parts of DIY open shelving is the first styling session. This is where the project suddenly feels finished. However, the first arrangement is rarely the best one. Shelves usually look better after editing. Start with practical items, add one or two decorative elements, then remove a few things. Step back, take a photo, and look at the shelves through the camera. Photos make clutter easier to spot. If the shelf looks busy in a picture, it will likely look busy in real life too.
Dust and grease are also honest teachers. In a kitchen, shelves near a range need more cleaning than shelves near a breakfast nook. If you cook often, place everyday dishes on lower shelves because frequent use naturally keeps them cleaner. Use upper shelves for items that are decorative but easy to wipe. Avoid placing delicate glassware next to the stove unless you enjoy washing things before using them.
Finally, DIY open shelving teaches patience. The project is not difficult, but it rewards careful measuring, careful drilling, and careful loading. The best shelves are not just pretty; they feel secure, suit the room, and make daily life easier. When you reach for a mug in the morning and it is exactly where you need it, the whole project feels worth it. That is the quiet magic of good DIY: it improves your home without shouting about itself.
Conclusion
DIY open shelving is a practical, stylish, and rewarding project when it is planned with real-life use in mind. The best shelves start with strong supports, smart measurements, suitable materials, and a finish that can handle everyday wear. Whether you choose visible brackets, floating shelves, or a built-in style, the goal is the same: create storage that looks good, works hard, and fits your home.
Open shelving is not for every item or every household, and that is perfectly fine. You do not need to replace all your cabinets to enjoy the look. Even one or two well-placed shelves can make a kitchen brighter, a bathroom more organized, a laundry room more useful, or a living room more personal. Build carefully, style lightly, clean regularly, and your DIY open shelves can become one of those home upgrades that feels both beautiful and genuinely useful.