
Learning how to blow dry your hair at home is one of those beauty skills that looks suspiciously easy until you are holding a round brush in one hand, a dryer in the other, and wondering whether you need a third arm or a small salon assistant named Marco. The good news: a smooth, bouncy, frizz-controlled blowout is absolutely possible without leaving your bathroom, tipping anyone, or pretending you understand what your stylist means by “just bevel the ends.”
The secret is not blasting your hair with maximum heat and hoping for the best. A great at-home blow dry is a system: remove excess water gently, apply the right products, work in sections, direct the airflow properly, and finish with cool air so the style actually stays. Done correctly, blow drying can make hair look polished, add volume, reduce frizz, and help your haircut sit the way it was meant to sit.
This guide breaks down the entire process in standard, practical steps for straight, wavy, curly, fine, thick, and natural hair textures. Grab your dryer, some clips, a brush, and a little patience. Your hair is about to stop looking like it lost an argument with a pillow.
Why Blow Drying Technique Matters
Blow drying is not just “drying hair faster.” It is controlled styling. Wet hair is more fragile than dry hair, so rubbing it aggressively, brushing through knots like you are raking leaves, or holding high heat too close to the same spot can lead to frizz, roughness, breakage, and dull ends. On the other hand, using smart heat, good airflow, and gentle tension can smooth the cuticle and create a finish that looks shinier and healthier.
The goal is simple: dry the hair efficiently while shaping it. Think of your blow dryer as a tiny wind machine with responsibilities. It should move moisture out, guide the hair into place, and avoid turning your ends into decorative straw.
What You Need for a Good At-Home Blow Dry
1. A Blow Dryer With Attachments
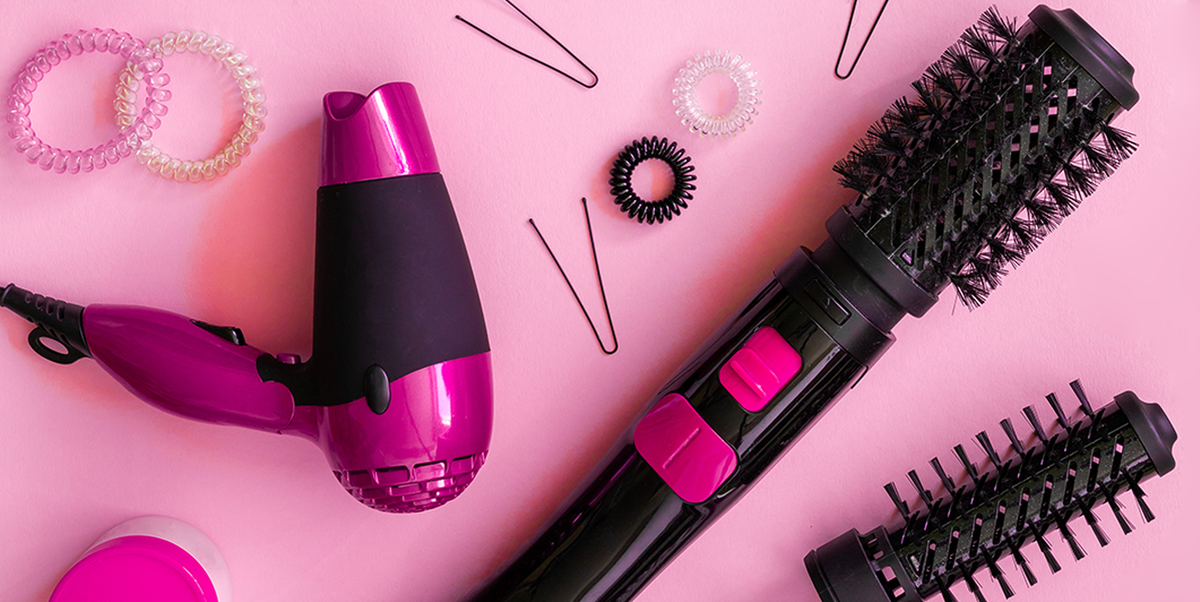
A basic dryer can work, but attachments make a major difference. A concentrator nozzle focuses airflow so you can smooth hair in one direction instead of puffing it out from every angle. A diffuser spreads air more gently, making it useful for waves, curls, and coils. A comb attachment can help stretch textured or natural hair with more control.
2. A Microfiber Towel or Cotton T-Shirt
Traditional terry towels can rough up the hair cuticle, especially if you rub hard. Instead, gently squeeze water out with a microfiber towel or soft cotton T-shirt. This one change can reduce frizz before the dryer even enters the chat.
3. Heat Protectant
A heat protectant is non-negotiable. Use a spray for fine or oily hair, a cream for medium to thick hair, and a richer leave-in or serum layered carefully for coarse, dry, or textured hair. Apply it evenly from mid-lengths to ends, and lightly near the roots only if your hair needs it.
4. Clips for Sectioning
Hair clips are not glamorous, but neither is trying to blow dry your whole head as one giant damp curtain. Sectioning gives you control and helps each area dry more smoothly.
5. The Right Brush
A paddle brush is good for a straighter, smoother result. A round brush adds bend, lift, and bounce. A wide-tooth comb helps detangle curls and waves gently. For natural hair, a comb attachment or paddle brush can help stretch hair while minimizing tangles.
Step-by-Step: How to Blow Dry Your Hair at Home
Step 1: Start With Clean, Conditioned Hair
A great blowout starts in the shower. Use shampoo mainly at the scalp, where oil and buildup collect. Let the lather run through the lengths rather than scrubbing your ends like a dirty pan. Then apply conditioner from mid-lengths to ends. Fine hair usually needs lightweight conditioner; thick, curly, dry, or color-treated hair may need something more moisturizing.
Rinse well. Leftover conditioner can make hair look flat, greasy, or strangely heavy, like it gave up before styling began.
Step 2: Remove Excess Water Gently
Do not start blow drying when your hair is dripping wet. That makes the process longer and increases heat exposure. Instead, squeeze out water with your hands, then wrap or blot hair with a microfiber towel or cotton T-shirt. Avoid rough rubbing because friction can encourage frizz and breakage.
Your target is damp hair, not soaking wet hair. For many hair types, letting hair air dry until it is about 50 to 70 percent dry makes styling easier and safer. Very thick hair may need more rough drying, while curls may benefit from styling products applied earlier while the hair is still wetter.
Step 3: Detangle From the Ends Up
Use a wide-tooth comb, wet brush, or your fingers to detangle. Start at the ends, then move upward slowly. This prevents knots from tightening into tiny hair disasters. For curls and coils, detangle while conditioner or leave-in product gives slip.
Step 4: Apply Heat Protectant and Styling Products
Apply heat protectant evenly. Then add styling products based on your goal. Want volume? Try a mousse or root-lifting spray. Want sleekness? Use a smoothing cream. Want curl definition? Use curl cream or gel before diffusing. Want your hair to survive humidity? A lightweight anti-frizz serum can help, but use less than you think. Too much product can make a fresh blowout look like day-four hair by lunchtime.
Step 5: Rough Dry First
Before using a brush, rough dry your hair with your fingers on low or medium heat. Keep the dryer moving and aim the airflow downward, from roots toward ends. This helps the cuticle lie flatter. If you blow upward randomly, you may create volume, but you may also create the emotional support cloud known as frizz.
Rough dry until your hair is about 70 percent dry for smooth styles. For a blow-dry brush, hair should usually be mostly dry before styling so the tool does not tug through wet, fragile strands.
Step 6: Section Your Hair
Divide your hair into manageable sections. A common method is to clip the top half up and start at the bottom near the nape. Then work upward in layers. If your hair is very thick, create smaller sections. If your hair is fine, larger sections may work.
The rule is simple: each section should fit comfortably on your brush. If the section is too big, the outside dries while the inside stays damp and chaotic. That is how you get hair that looks finished in the front and mysterious in the back.
Step 7: Use the Nozzle Correctly
Attach the concentrator nozzle for straight, smooth, or bouncy blowouts. Point it downward along the hair shaft. Keep it close enough to direct air, but not pressed directly against the hair. Move slowly from roots to ends while keeping steady tension with your brush.
For volume, lift the roots up and away from the scalp while drying. For sleekness, pull the brush downward and keep the airflow following the brush. For flipped ends, roll the brush under or outward at the last few inches and hold for a moment before releasing.
Step 8: Finish Each Section Before Moving On
A common at-home mistake is half-drying every section and hoping it all comes together later. It will not. Each section should be fully dry before you move to the next. Damp roots collapse volume, and damp ends frizz faster. Hair changes shape while it dries, so the final look depends on finishing the section properly.
Step 9: Use the Cool Shot
Once a section is dry and shaped, press the cool-shot button for a few seconds. Cool air helps set the style, especially if you used a round brush to create bend or volume. Think of heat as the part that shapes the hair and cool air as the part that tells it, “Please remember this behavior.”
Step 10: Add Finishing Product Carefully
When your hair is completely dry, finish with a small amount of serum, cream, texture spray, or flexible hairspray. Focus smoothing products on the ends and outer layer. Avoid dumping oil near the roots unless you enjoy the “accidentally slept in a helmet” look.
How to Blow Dry Different Hair Types
Fine Hair
Fine hair needs lift without weight. Use lightweight shampoo and conditioner, apply mousse at the roots, and avoid heavy oils. Blow dry roots first by lifting sections upward with your fingers or a round brush. Use medium heat and medium airflow. Too much heat can make fine hair limp, while too much product can flatten it.
Thick Hair
Thick hair requires patience and smaller sections. Start with towel drying, then rough dry until it is mostly dry before using a brush. A strong dryer with controlled heat settings helps. Focus on drying the roots thoroughly because thick hair can hide moisture underneath, then surprise you with frizz later.
Curly and Wavy Hair
For curls and waves, decide whether you want to enhance texture or smooth it. To enhance texture, apply curl cream or gel while hair is damp, then use a diffuser on low to medium heat. Cup curls gently in the diffuser and avoid touching them too much. To smooth curls into a blowout, work in small sections with a brush or comb attachment and use heat protectant generously.
Natural, Coily, and Afro-Textured Hair
Natural hair often benefits from deep conditioning, leave-in conditioner, heat protectant, and careful sectioning. Work in small sections to prevent tangling. A comb attachment can stretch the hair, while a paddle brush or tension method can create a fuller blowout. Keep heat controlled and avoid repeated passes over the same section. To maintain the style, sleep with a silk or satin scarf or pillowcase and avoid moisture-heavy products after styling.
Color-Treated or Damaged Hair
If your hair is bleached, color-treated, dry, or damaged, use the lowest effective heat setting. Apply a moisturizing leave-in and heat protectant, and avoid daily blow drying. Your goal is not maximum drama; your goal is shiny hair that does not file a complaint.
Common Blow Drying Mistakes to Avoid
Using High Heat the Whole Time
High heat may dry hair faster, but it can also leave hair rough, brittle, or frizzy over time. Use low to medium heat whenever possible and save higher heat for brief moments on resistant sections.
Skipping Heat Protectant
Heat protectant helps reduce damage and improve smoothness. Skipping it is like putting toast in the toaster and being shocked when it gets crispy.
Drying Hair Without a Nozzle
Without a nozzle, airflow spreads everywhere. This can rough up the cuticle and make hair look puffy. Use the concentrator nozzle when smoothing or round-brushing.
Holding the Dryer Too Close
Direct heat too close to the hair can cause dryness and damage. Keep the dryer moving and avoid parking it on one spot.
Using Sections That Are Too Large
Large sections are tempting when you are tired, late, or both. Unfortunately, they often dry unevenly. Smaller sections create better control, smoother results, and less rework.
How to Make Your Blowout Last Longer
Once you have done the work, protect it. Let hair cool completely before tying it up or going outside into humid air. Sleep on a silk or satin pillowcase to reduce friction. Use dry shampoo at the roots before your hair gets oily, not after it has already formed a small oil-based committee. In the morning, refresh volume with your fingers, a cool blast from the dryer, or a light pass with a round brush on low heat.
Avoid water-based products after your blowout because moisture can make hair revert, swell, or frizz. If your ends look dry, use a tiny amount of lightweight serum. Tiny means tiny. Not “oops, my hand slipped.”
At-Home Blow Dry Experience: What Actually Helps in Real Life
One of the biggest lessons from everyday at-home blow drying is that rushing almost always takes longer. It sounds backward, but it is true. When someone tries to dry all their hair at once, the front may look decent while the underneath sections stay damp. Then, ten minutes later, the smooth style expands into a shape best described as “weather balloon.” Working in sections feels slower at first, but it prevents the annoying redo.
Another practical discovery: the bathroom is not always the best place to blow dry hair. After a hot shower, the room is humid, and humidity is basically frizz’s personal trainer. If possible, step into a cooler, drier room with a mirror. Even opening the bathroom door or running a fan can make the process easier.
Product amount matters more than product price. A pea-sized amount of smoothing cream can make hair soft and polished. A palmful can make it flat and sticky. The same goes for mousse, serum, leave-in conditioner, and hairspray. Start small. You can always add more, but removing too much product usually means washing your hair again, which is a tragic plot twist nobody asked for.
For beginners, a paddle brush is often easier than a round brush. A round brush creates beautiful movement, but it can also trap hair if you roll too enthusiastically. Start by mastering a smooth blow dry with a paddle brush and nozzle. Once that feels comfortable, use a round brush only on the front pieces, crown, and ends. This gives the look of a salon blowout without requiring Olympic-level wrist coordination.
People with bangs or face-framing layers usually get better results by drying those areas first. Shorter pieces dry quickly and set into whatever direction they choose. If you let bangs air dry while styling the rest, they may form a tiny rebellion across your forehead. Blow dry them side to side, then downward, using a small brush or your fingers.
For thick or textured hair, the experience is often easier when hair is divided into more sections than you think you need. Four sections may not be enough; six, eight, or more can make the process smoother. For curls and coils, keeping each section moisturized, detangled, and protected helps reduce breakage and makes the final style more even.
The final real-life tip is to lower your expectations for the first attempt. A salon blowout looks effortless because a professional is standing behind your head with years of practice and a better angle. At home, your first try may be good in the front, questionable on the left side, and philosophical in the back. That is normal. With practice, you learn your hair’s drying time, the right brush size, how much product you need, and which sections demand extra attention. The goal is not perfection. The goal is hair that looks polished, feels healthy, and does not make you cancel plans.
Conclusion
Mastering how to blow dry your hair at home comes down to technique, not magic. Start with clean, conditioned hair. Remove water gently. Apply heat protectant. Rough dry before styling. Work in sections. Aim airflow downward. Use the right attachment for your hair type. Finish with cool air and a light touch of product.
Once you understand the process, blow drying becomes less intimidating and more like a useful beauty routine you can adjust. Want volume? Lift the roots. Want sleekness? Use tension and downward airflow. Want curls? Diffuse gently. Want your blowout to last? Keep it dry, cool, and protected while you sleep.
The best at-home blowout is not the one that copies a salon perfectly. It is the one that works for your real hair, your real schedule, and your real arms, which may need a snack break halfway through. Be patient, be gentle, and let your dryer do its job without turning it into a leaf blower for your scalp.