
There comes a moment in every cyclist’s life when a backpack is no longer enough. Maybe it is the grocery run that includes a watermelon, a bag of dog food, and a suspiciously large houseplant. Maybe you want to carry camping gear without looking like a two-wheeled pack mule. That is where a DIY bicycle cargo trailer earns its keep.
A homemade bicycle cargo trailer can turn an ordinary bike into a practical hauling machine for groceries, tools, picnic supplies, garden materials, or weekend adventure gear. The key word is practical: this project should focus on a stable frame, a dependable hitch, visible safety features, and cautious testingnot on creating a tiny wooden spaceship behind your bike.
Why Build a DIY Bicycle Cargo Trailer?
A bicycle cargo trailer gives you carrying capacity without loading every pound directly onto your back, rear rack, or handlebars. Commercial cargo trailers often use two wheels because that layout is easy to load, naturally stable, and less fussy about perfectly balancing every item. Single-wheel trailers can be narrower and more nimble, but a two-wheel design is generally more beginner-friendly for errands and everyday cargo.
This 14-step build uses a simple rectangular cargo deck, a reinforced wooden frame, two trailer wheels, and a commercially made hitch-and-tow-arm kit. That approach keeps the project achievable while avoiding the riskiest part of a homemade trailer: inventing your own connection system between bike and trailer.
Before You Start: Choose a Sensible Trailer Design
For most riders, a compact two-wheel trailer with a deck around 24 inches wide by 36 inches long is a smart starting point. It is large enough for groceries, bins, camping gear, or a folded cooler, but not so wide that it feels like you are towing a parade float through the bike lane.
Use a low deck whenever possible. A lower center of gravity makes the trailer calmer in corners, reduces the chance of cargo shifting, and makes loading easier. Many commercial cargo trailers use 16-inch wheels because they balance compact storage with better bump absorption than very small wheels.
Materials and Tools for a Bicycle Cargo Trailer
Suggested Materials
- One sheet of 1/2-inch exterior-grade plywood for the trailer deck
- 1×3 or 1×4 straight lumber for the perimeter frame and cross braces
- Two purpose-built bicycle trailer wheels with compatible axle hardware
- Two steel axle mounting plates or wheel brackets rated for trailer use
- A commercial bicycle trailer hitch and tow-arm kit
- Carriage bolts, washers, lock nuts, and exterior wood screws
- Four metal corner braces or steel gusset plates
- Exterior wood sealer, marine varnish, or weather-resistant paint
- D-rings or recessed tie-down anchors
- Reflective tape, red rear reflector, amber side reflectors, and a safety flag
- Bungee cords, cam straps, or ratchet straps sized for light cargo
Suggested Tools
- Tape measure and carpenter’s square
- Circular saw, jigsaw, or handsaw
- Drill and drill bits
- Socket set and adjustable wrench
- Sandpaper or orbital sander
- Clamps
- Safety glasses, hearing protection, and work gloves
How to Build a Bicycle Cargo Trailer in 14 Steps
Step 1: Define What You Actually Plan to Haul
Start with a realistic mission. Are you hauling groceries twice a week, bringing tools to a community garden, or carrying camping gear to a trailhead? Your answer determines the trailer’s dimensions, sidewall height, tie-down needs, and wheel choice.
For a first build, keep the plan modest. A flatbed trailer for groceries and lightweight gear is much easier to build than a fully enclosed trailer with suspension, brakes, foldable sides, cup holders, and a built-in espresso machine.
Step 2: Check Your Bicycle and Hitch Compatibility
Before cutting wood, confirm that your bicycle can safely accept the hitch system you plan to use. Trailer hitches commonly connect near the rear axle or seat post, but different bikes may require adapters. Thru-axle bikes, internal-gear hubs, disc-brake frames, cargo bikes, and bikes with unusual dropout shapes may need a specific hitch adapter.
Do not clamp a trailer hitch to carbon fiber tubing unless the bicycle manufacturer explicitly approves it. Do not guess about axle compatibility. The hitch is the handshake between bike and trailer, and you do not want that handshake to become a dramatic farewell wave at 18 mph.
Step 3: Sketch the Trailer and Make a Cut List
Draw a simple top-down plan before buying materials. For a 24-by-36-inch deck, create a rectangular perimeter frame with two or three cross braces underneath. Mark the approximate axle line around 55% to 60% of the deck length from the front edge.
This placement helps keep the cargo center slightly forward of the axle, creating gentle downward force at the hitch rather than making the trailer feel tail-heavy. Test your layout with boxes before final assembly. A trailer that looks balanced while empty can become a rebellious shopping cart once loaded.
Step 4: Cut the Plywood Cargo Deck
Cut the exterior plywood into your chosen deck size. A 24-by-36-inch platform works well for many DIY cargo trailer builds, but you can reduce the size if you mainly carry small grocery bags or increase it slightly for camping bins.
Sand every edge thoroughly. Rounded, sealed edges hold up better outdoors and are much kinder to your ankles, shins, and favorite cargo bag.
Step 5: Build the Perimeter Frame
Cut the lumber for the outer frame and lay it beneath the plywood deck. Use exterior wood screws and waterproof wood glue to secure the frame. Add at least two cross braces between the long rails to stiffen the floor.
For extra durability, install steel corner braces or gusset plates at each frame corner. The frame should feel rigid when you stand gently on the deck. If it flexes like a diving board, add reinforcement before moving on.
Step 6: Reinforce the Front Hitch Area
The front of the trailer receives pulling force, turning force, vibration, and every rude pothole your neighborhood has been saving for you. Reinforce this area with an extra cross brace beneath the deck and steel plates on both sides of the tow-arm mounting zone.
Use through-bolts with washers and lock nuts instead of relying on screws. Screws are excellent for assembling wood. They are less excellent when asked to hold together a moving trailer attached to a bicycle.
Step 7: Install the Axle Brackets
Position the axle brackets evenly on both sides of the frame. Measure from the front edge of the trailer to each bracket several times. If one wheel sits even slightly farther forward than the other, the trailer may pull sideways, track poorly, and make every ride feel like you are negotiating with a stubborn lawn mower.
Use a carpenter’s square to ensure the brackets are perpendicular to the frame. Bolt them through reinforced wood sections using washers and lock nuts. Never mount the wheel hardware only to thin plywood.
Step 8: Mount the Wheels and Check Alignment
Install the wheels according to the manufacturer’s instructions. Spin each wheel and check that it clears the deck, frame, and fasteners. Both wheels should sit level and parallel with each other.
Place the trailer on a flat surface and measure from the ground to the deck on both sides. Uneven height can cause drifting and uneven tire wear. Secure wheels are not optional: manufacturers specifically recommend checking trailer wheels and attachment components before every ride.
Step 9: Attach the Tow Arm
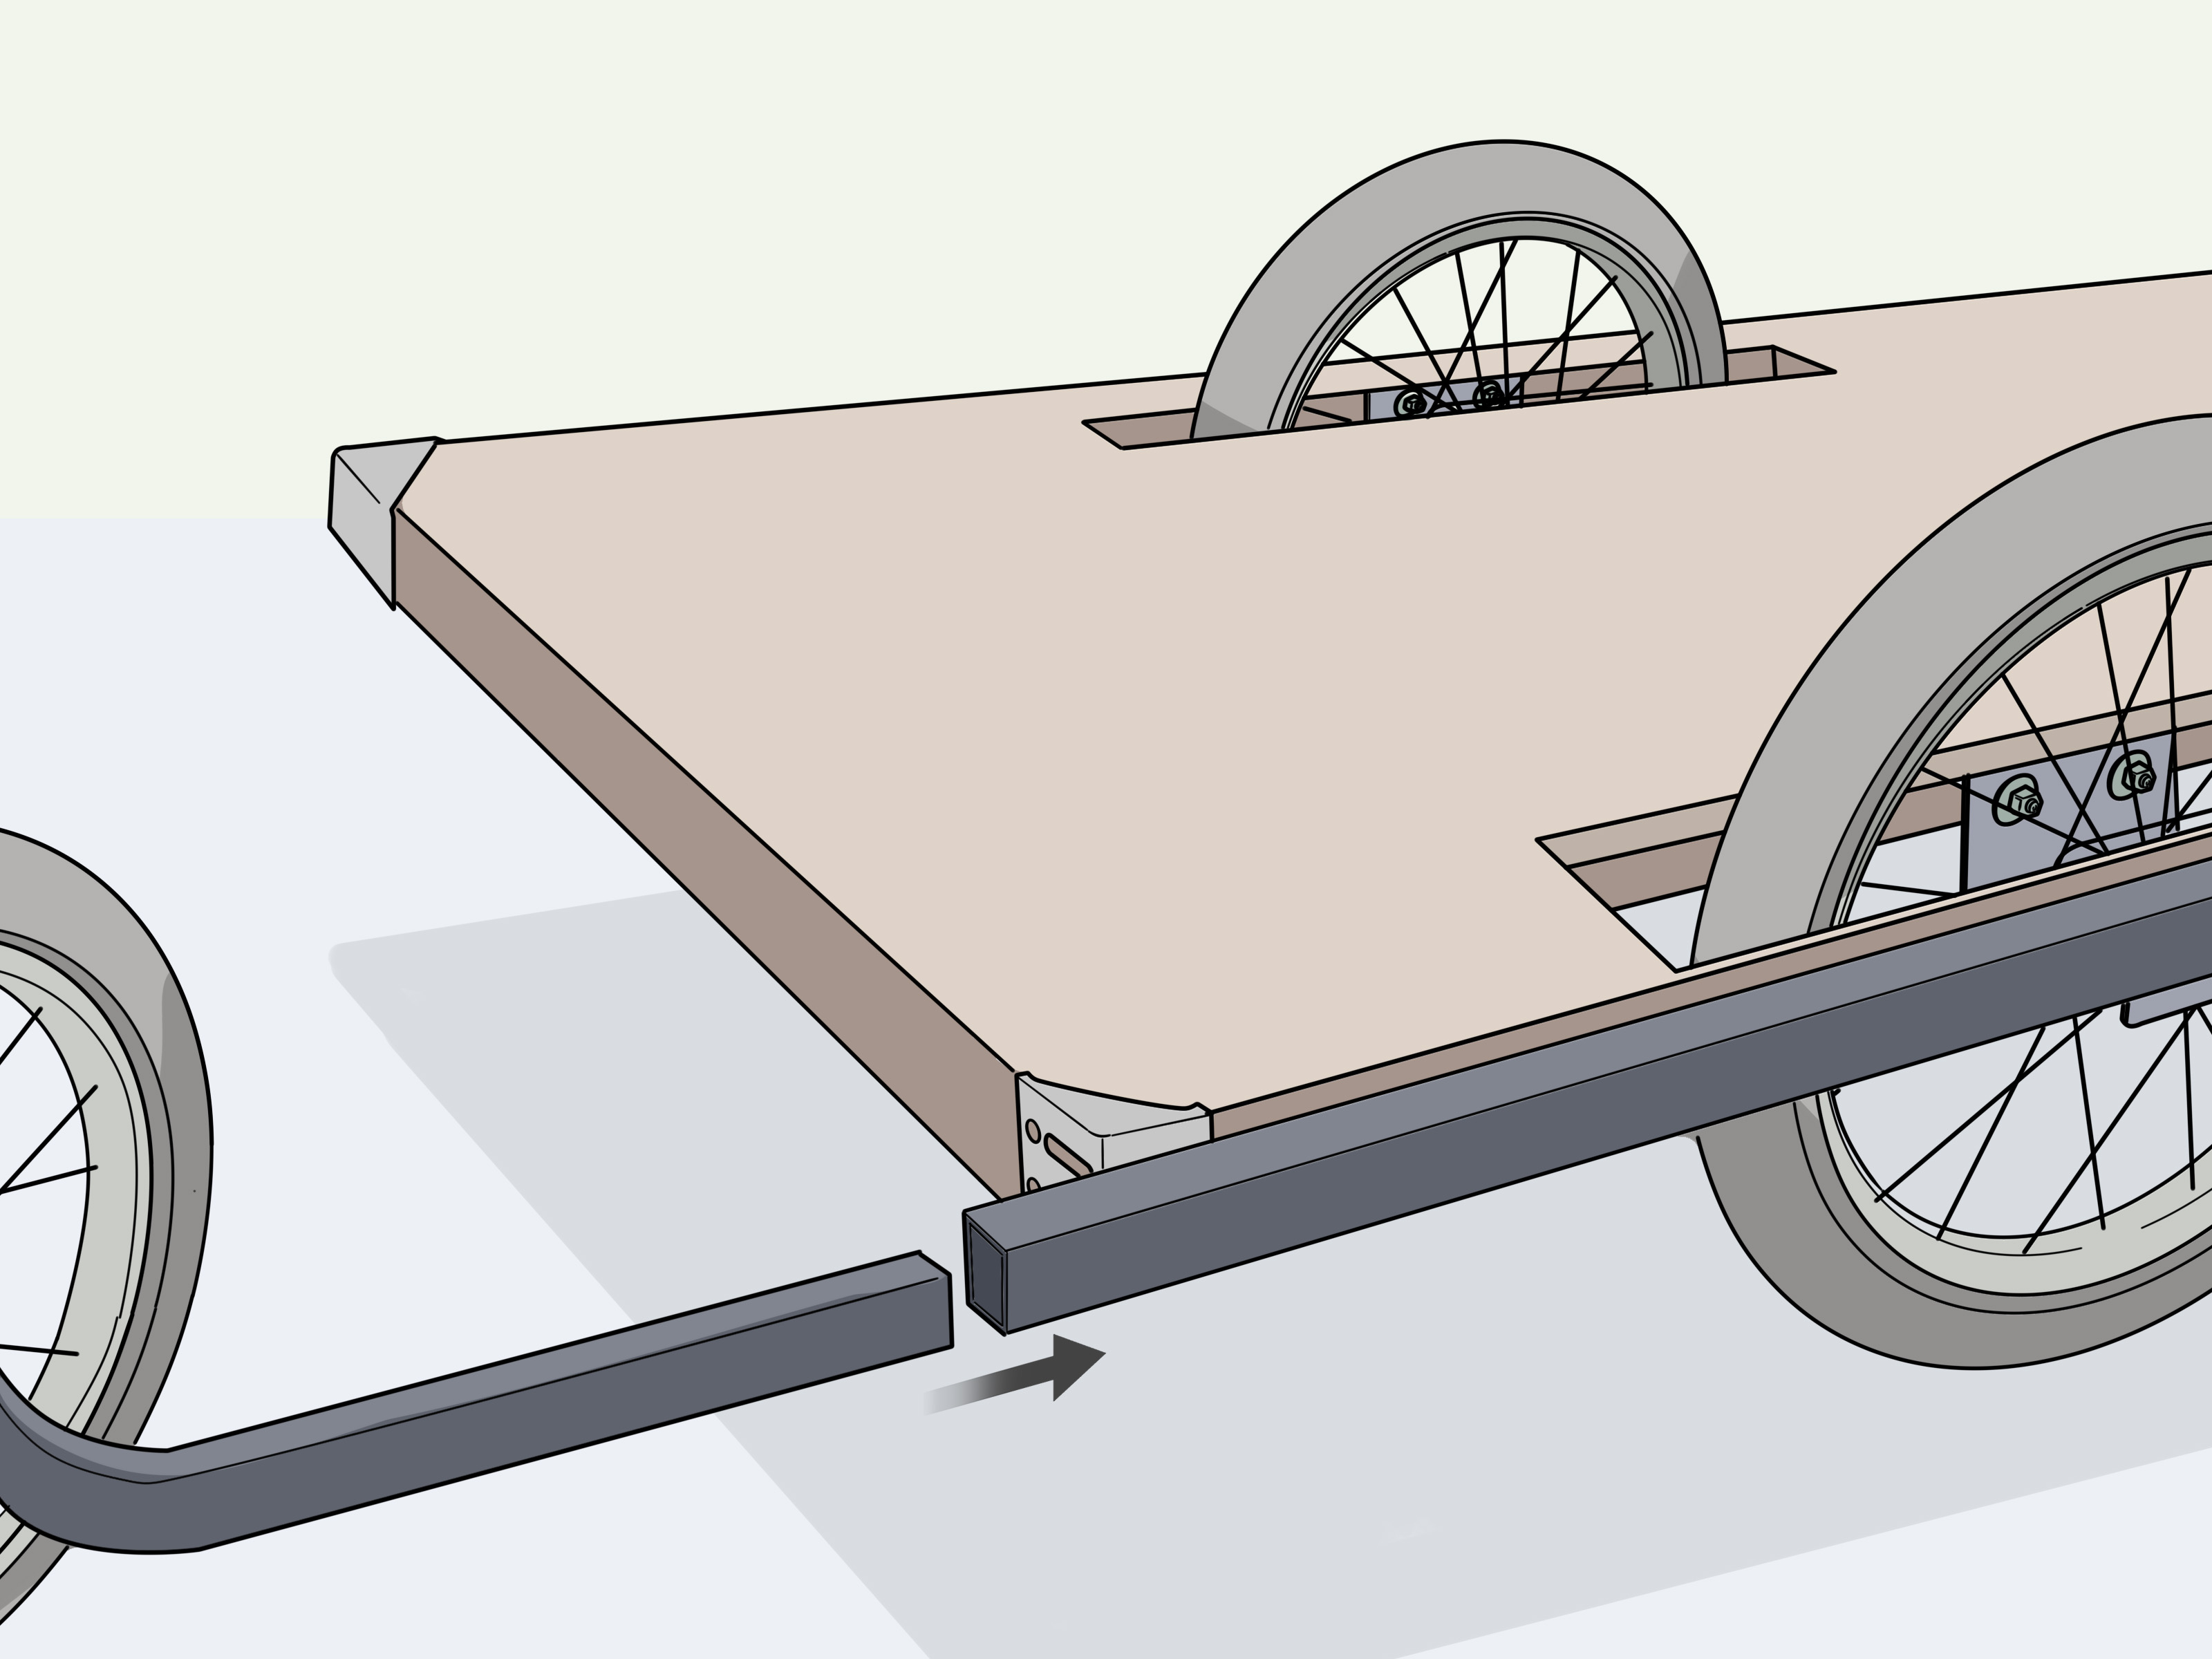
Install the tow arm from your commercial hitch kit at the reinforced front of the trailer. Follow the kit’s instructions for bolt size, washers, pivot hardware, and safety retention components.
The tow arm should have enough clearance to turn with the bicycle without hitting the rear wheel, pedals, rack, fenders, or brake components. Slowly lean the bicycle from side to side while the trailer is attached and unloaded. Check the full steering range before riding.
Step 10: Connect the Trailer Hitch and Safety Strap
Attach the trailer hitch to the bike exactly as instructed by the hitch manufacturer. Most quality trailer systems include a secondary safety strap, pin, or retention loop. Use it every time.
A second retention connection is not decoration. It is there to help keep the trailer connected if the primary hitch component loosens or fails. Commercial trailer designs often include flexible connectors that allow the bicycle to tip while helping the trailer remain upright.
Step 11: Add Side Rails or a Removable Cargo Box
A flat deck is useful for oversized objects, but low side rails make everyday hauling easier. Add 4- to 8-inch wooden rails around the sides and rear, leaving the front open or lower for long cargo.
Another option is a removable plastic storage tote or wooden box secured with bolts and quick-release straps. A removable box keeps groceries from rolling away and lets you use the trailer as a flatbed when you need to carry awkward items such as lumber, folding chairs, or a suspiciously heavy bag of potting soil.
Step 12: Install Tie-Down Points and Protect the Deck
Add D-rings or recessed tie-down anchors near the corners of the trailer. Use through-bolts and backing washers so the anchors cannot pull through the plywood under load.
Seal the wood with exterior paint, marine varnish, or a waterproof deck coating. Pay extra attention to plywood edges, bolt holes, and the underside of the deck. Rainwater has a talent for finding the one untreated edge you forgot.
Step 13: Add Visibility and Weather-Ready Details
Install a tall safety flag, red reflective material on the rear, amber reflectors on the sides, and reflective tape along the frame. A small battery-powered rear light is also a wise addition for dawn, dusk, rain, and gloomy “I thought I would be home before dark” situations.
Commercial cargo trailers commonly include safety flags and reflective components because a low trailer is easier for drivers to overlook than the cyclist pulling it.
For wet-weather use, keep a fitted tarp, waterproof tote, or cargo cover handy. Secure loose fabric so it cannot flap into the wheels, axle, or hitch.
Step 14: Test the Trailer Before Trusting It
Your first ride should be empty, slow, and somewhere free of traffic. Ride in a large parking lot or quiet paved area. Practice starts, stops, wide turns, backing up, and looking behind you.
Next, add a light load such as a few towels or empty boxes. Then test with 10 to 15 pounds of evenly distributed cargo. Increase weight gradually only after checking the hitch, wheel mounts, bolts, tire pressure, and cargo straps.
Never assume that a homemade trailer has the same capacity as a commercial model. For perspective, some professionally engineered cargo trailers are rated for around 100 pounds, but they use purpose-designed aluminum frames, hitch systems, wheels, and testing standards. Your DIY trailer’s safe limit is determined by its weakest component, not by optimism.
How to Load a Bicycle Cargo Trailer Safely
Load the heaviest items low and close to the axle. Keep the cargo centered from side to side, and place dense items slightly forward of the axle rather than all the way at the rear. Secure every object that can roll, bounce, slide, rattle, leak, or develop ambitions of independence.
For example, if you are carrying groceries, place canned goods and bottles in the center, soft bags around them, and lightweight bread or produce on top. If you are carrying a cooler, strap it down at four points instead of trusting one bungee cord that has already survived three summers in a garage drawer.
When riding, brake earlier than usual, take turns wider, and avoid sudden steering movements. Remember that the trailer tracks inside your bicycle’s path in turns. Curbs, bollards, parked cars, and narrow gates suddenly become more interesting.
Common DIY Bicycle Trailer Mistakes to Avoid
- Using an unrated hitch: The hitch is not the place to improvise with rope, hose clamps, or a mystery bracket found in a coffee can.
- Mounting wheels to plywood only: Wheel brackets need reinforced framing and through-bolts.
- Skipping a safety strap: Always use the secondary retention system supplied with the hitch.
- Ignoring trailer width: Measure your trailer before riding through narrow gates, bollards, and crowded bike paths.
- Loading cargo too high: Tall loads raise the center of gravity and make turns less predictable.
- Testing with a heavy load first: Start empty, then light, then gradually heavier.
- Forgetting visibility: A low trailer needs flags, reflectors, and lights to stand out in traffic.
Experience Notes: What You Learn After Actually Using a Cargo Trailer
The first lesson most DIY cargo trailer owners learn is that towing is less difficult than expected, but stopping is more serious than expected. On flat ground, a well-balanced trailer often disappears behind you after a few minutes. Then you approach a downhill section, squeeze the brakes, and suddenly remember that the trailer has opinions.
A bicycle cargo trailer changes how you ride. You start looking farther ahead because stopping distances increase. You begin taking corners wider because the inside wheel of the trailer cuts closer to curbs and obstacles. You become strangely aware of every pothole, drainage grate, speed bump, and badly parked scooter in the city. That awareness is not a downside. It simply turns you into a more deliberate rider.
Grocery runs are where a trailer shines. A backpack can carry a few items, but a trailer can handle a full week’s worth of food, reusable bags, cleaning supplies, and the kind of oversized paper-towel package that seems designed specifically to embarrass cyclists. The important habit is packing heavy objects first and keeping them low. Glass jars, bottles, and canned goods belong near the deck. Chips, bread, and anything fragile should ride on top like royalty.
Another useful discovery is that tie-down points matter more than fancy sidewalls. A plain flatbed trailer with four strong anchors can carry surprisingly awkward items: camping bins, a folding table, a cooler, a toolbox, or a stack of flat-packed boxes. A beautiful cargo box without solid straps, on the other hand, can become a wooden percussion instrument every time the road gets rough.
Weatherproofing also becomes less glamorous and more important over time. The first rainstorm reveals every unsealed plywood edge, every bolt hole that needs caulk, and every strap that absorbs water like a sponge. A waterproof tote, tarp, or fitted cover makes the trailer far more useful than a bare deck. It also protects your groceries from turning into a disappointing soup.
The best maintenance routine is short and boring, which is exactly what you want. Before each ride, check tire pressure, wheel attachment, hitch pins, safety strap connection, cargo straps, and loose bolts. After the first few loaded rides, recheck all fasteners because wood compresses slightly and bolts can settle into place. Make this inspection part of your departure ritual, like checking your pockets for keys and remembering whether you locked the front door.
Finally, a DIY bike trailer becomes most valuable when you stop treating it as a special project. Once it is built, tested, visible, and easy to attach, it becomes another useful tool. You may start using your bike for errands that once automatically required a car. That is the real reward: not just building a trailer, but discovering that a bicycle can carry more of everyday life than you thought.
Final Thoughts
Building a bicycle cargo trailer is a satisfying project because it combines practical woodworking, bicycle utility, and just enough engineering to make you respect measurements. Keep the design low, simple, visible, and conservative. Use a rated hitch system, reinforce every load-bearing connection, secure cargo carefully, and test gradually.
When done well, a DIY cargo trailer can make grocery trips, camping rides, garden projects, and everyday errands much easier. It may not be glamorous, but neither is carrying a 20-pound bag of pet food on your handlebars. Choose the trailer.