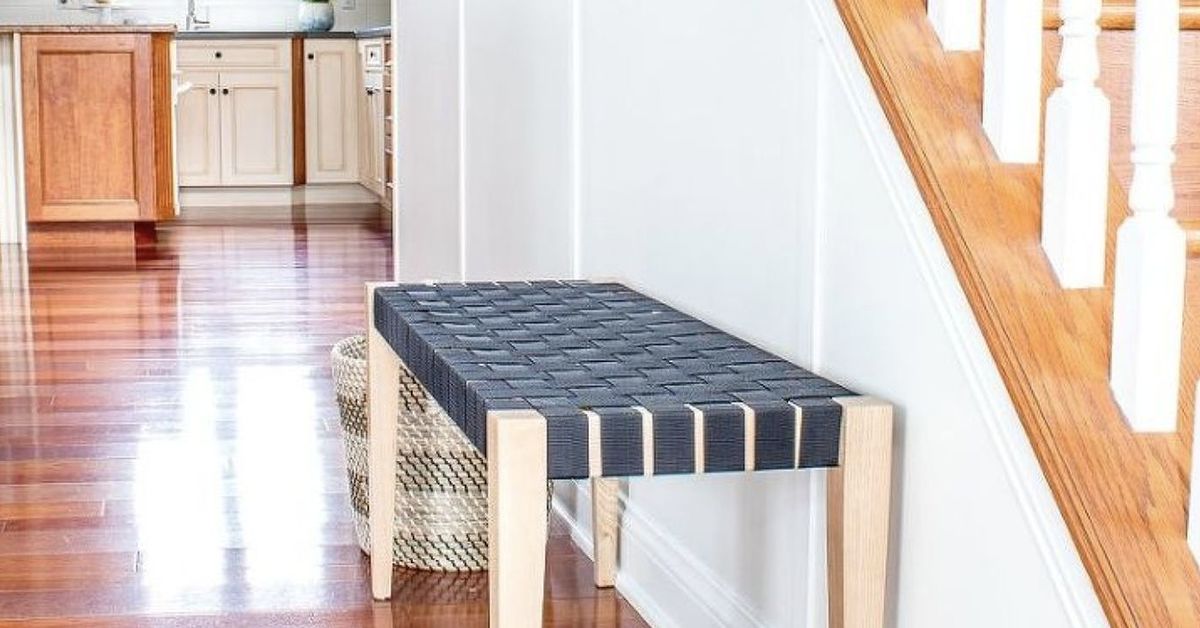

Few home upgrades deliver the same “Wait, did we hire a designer?” effect as a DIY board and batten wall. It adds architecture where there was previously a blank, mildly judgmental rectangle of drywall. It works in entryways, bedrooms, dining rooms, hallways, nurseries, mudrooms, stair landings, and even that one wall you have been ignoring because furniture keeps apologetically floating in front of it.
The best part? Board and batten looks expensive, but the project is surprisingly beginner-friendly if you measure carefully, cut patiently, and resist the temptation to “eyeball it” like a cowboy with a nail gun. This guide walks you through how to DIY board and batten your walls from planning and measurements to installation, caulking, painting, and real-world lessons that can save you time, money, and possibly a dramatic conversation with your baseboards.
What Is Board and Batten?
Board and batten is a type of wall paneling that uses vertical strips of wood or MDF, called battens, to create a raised pattern on a wall. Traditionally, the “boards” were wider vertical planks with narrow battens covering the seams. In many modern interior DIY projects, the existing drywall acts as the flat board surface, while trim pieces create the batten pattern. The result is a clean, dimensional wall treatment that can lean farmhouse, coastal, traditional, modern, cottage, or moody and dramatic depending on the layout and paint color.
Unlike shiplap, which usually emphasizes horizontal lines, board and batten draws the eye upward. That makes it especially useful in small rooms, low-ceiling spaces, and narrow hallways. It adds texture without visual clutter and gives plain walls the confidence of a custom-built feature.
Before You Start: Decide the Look You Want
Before buying boards, think about the style of board and batten wall you want. This is the stage where you save yourself from returning three bundles of trim while wearing sawdust in your hair.
Full Wall or Partial Wall?
A full-height board and batten accent wall runs from baseboard to ceiling and creates a bold focal point behind a bed, sofa, console table, or dining area. A partial-height version, often called board and batten wainscoting, covers the lower portion of the wall and usually ends with a top rail or small ledge. Partial-height walls are great for entryways, staircases, dining rooms, and mudrooms because they add character without overwhelming the space.
Simple Vertical Battens or a Grid?
The most beginner-friendly design uses vertical battens spaced evenly across the wall, with a horizontal board at the top and sometimes one at the bottom. A square grid pattern adds more drama but requires more math, more cuts, and more patience. If this is your first DIY board and batten project, simple vertical battens are the friend who brings snacks and does not create unnecessary chaos.
Paint Color Matters
White board and batten feels crisp and classic. Soft gray, beige, taupe, or greige creates a relaxed transitional look. Deep green, navy, charcoal, burgundy, or black makes the wall feel custom and expensive. Satin or semi-gloss paint is often a smart choice for trim because it is easier to wipe clean, while eggshell can work well if you want a softer finish with less shine.
Tools and Materials You Will Need
Your exact shopping list depends on the wall size and design, but most DIY board and batten walls require the following:
- Pre-primed MDF boards, pine boards, lattice strips, or trim boards
- Tape measure
- Pencil
- Level or laser level
- Stud finder
- Miter saw, circular saw, or miter box for small projects
- Brad nailer or finish nailer
- Construction adhesive, optional depending on wall and board choice
- 2-inch brad nails or finish nails
- Paintable caulk
- Wood filler or lightweight spackle
- Sandpaper or sanding sponge
- Primer, especially if boards are raw wood or MDF edges are exposed
- Interior paint
- Paint brush and roller
- Drop cloth
- Painter’s tape
- Safety glasses and hearing protection
MDF is popular for interior board and batten because it is smooth, affordable, and paints beautifully. Pine is more durable and can be a better option in areas where moisture or impact is a concern. For bathrooms, laundry rooms, or damp spaces, choose moisture-resistant materials and make sure the room is properly ventilated.
How to Measure for Board and Batten
Accurate measurement is the difference between a professional-looking board and batten wall and a wall that whispers, “Something happened here.” Start by measuring the total width and height of the wall. Then decide whether you want outer border boards on the left and right sides. Many projects look more finished when the vertical battens begin and end with trim at the corners.
A common method is to work from the center of the wall outward. This helps the pattern look balanced, especially if your wall width does not divide perfectly into equal spaces. Another method is to subtract the width of the side boards from the total wall width, then divide the remaining space by the number of openings you want.
Example Measurement
Let’s say your wall is 120 inches wide. You want a vertical board on each end, and each board is 2.5 inches wide. Subtract 5 inches from 120 inches, leaving 115 inches of open wall space. If you want seven open spaces, divide 115 by 7. That gives you about 16.4 inches per space. From there, you can mark each batten placement so the open areas look even.
Always draw a quick sketch before cutting anything. It does not need to be museum-quality. A rectangle with numbers is enough. Add about 10 percent extra material for mistakes, warped boards, awkward cuts, and the mysterious way trim disappears when you are sure you bought enough.
Step-by-Step: How to DIY Board and Batten Your Walls
1. Prep the Wall
Remove artwork, outlet covers, hooks, floating shelves, and anything else attached to the wall. Clean the surface so dust, grease, and old residue do not interfere with paint or adhesive. If the wall has holes or dents, patch them first and sand smooth. A flat wall gives the final project a much cleaner finish.
If your wall is heavily textured, you have three options. You can install thin hardboard panels first for a smooth “board” surface, skim coat the wall, or accept the texture as part of the look. For the most polished result, smoothing the wall or adding panels is usually worth the extra effort.
2. Find and Mark the Studs
Use a stud finder to locate studs across the wall. Mark them lightly with pencil or painter’s tape. Attaching horizontal boards to studs gives the project strength. Vertical battens may not always land on studs, so nails plus construction adhesive can help hold them securely. If you use adhesive, remember it can damage drywall if you ever remove the boards later.
3. Decide What to Do With the Baseboard
Baseboards can make or break the finished look. If your existing baseboard is thinner than your batten boards, the battens may stick out awkwardly at the bottom. You can solve this by replacing the baseboard with a thicker board, adding a new flat base rail above the existing baseboard, or cutting the bottom of each batten at a slight angle so it transitions more gracefully.
For the cleanest finish, many DIYers remove the existing baseboard and install a flat 1×4 or 1×6 board as the new base. This creates a sturdy visual foundation and makes the wall treatment look intentional rather than “trim pieces had a meeting and invited the drywall.”
4. Install the Horizontal Boards
Install the bottom rail first if you are replacing the baseboard or creating a partial wall treatment. Use a level to make sure it is straight, then nail it into the studs. Next, install the top horizontal board at your chosen height. For partial-height board and batten, common heights range from about one-third to two-thirds of the wall, depending on the room and furniture. In dining rooms, entryways, and hallways, a height between 48 and 60 inches often looks balanced. For a full-wall treatment, your top board may sit just below the ceiling or crown molding.
Use a level every time. Walls and floors are often not perfectly straight, especially in older homes. Trust the level more than the floor. The floor has been lying to people for generations.
5. Cut and Dry-Fit the Vertical Battens
Measure the distance between your bottom and top horizontal boards. Cut your battens to fit. Before fastening them, dry-fit a few pieces on the wall with painter’s tape. Step back and check the spacing from across the room. This is your chance to adjust the layout before nails enter the chat.
If you are working around outlets, switches, windows, or vents, plan those cuts carefully. Sometimes shifting the spacing slightly can prevent a batten from landing directly on an outlet. If a board must go near an electrical box, turn off power when removing covers or making adjustments, and keep trim clear of the functional parts of the outlet or switch.
6. Attach the Battens
Start with the center batten or one of the side battens, depending on your layout method. Hold each piece in place, check it with a level, and nail it to the wall. If you are using adhesive, apply a small amount to the back of the board before positioning it. Do not overdo the adhesive; more glue does not equal more skill. It mostly equals more regret if you need to remove the board later.
Continue installing each batten according to your marks. Check for plumb as you go. A tiny slant at the beginning can become very obvious across a whole wall, like a row of soldiers slowly losing interest.
7. Add a Cap or Ledge, If Desired
For partial-height board and batten, a small cap rail or ledge can create a finished top edge. A 1×2 board installed horizontally on top of the upper rail works well. This ledge can hold small framed art, seasonal decor, or nothing at all, which is often the safest choice if you live with cats, toddlers, or enthusiastic door slammers.
8. Fill Nail Holes and Sand
Use wood filler or lightweight spackle to fill nail holes and seams where boards meet. Let it dry completely, then sand smooth. Run your hand over the surface. If you can feel a bump, you will probably see it after painting. Paint is many things, but it is not a magician.
9. Caulk the Gaps
Caulk is the secret sauce of DIY trim work. Apply paintable caulk where boards meet the wall and where trim pieces meet each other. Smooth the bead with a damp finger or caulk tool. This step hides small gaps and makes the board and batten look built-in instead of stuck-on.
Do not use caulk to fill nail holes; use filler for those. Caulk stays flexible and can leave visible spots under paint when used incorrectly. Use caulk for seams, filler for holes, and coffee for emotional support.
10. Prime and Paint
If your boards are pre-primed, you may only need to prime cut edges, raw spots, and filled areas. If you are using raw wood or MDF, prime everything before painting. MDF edges absorb paint quickly, so primer helps create an even finish.
Use an angled brush for corners, seams, and edges. Use a small roller for the flat wall sections and board faces. Two coats of paint usually create the best finish. Let the first coat dry fully before applying the second. If you rush, the paint may drag, streak, or peel. Waiting is not glamorous, but neither is repainting because impatience won.
Common Board and Batten Mistakes to Avoid
Choosing Boards That Are Too Thick
Interior board and batten does not need bulky lumber. In fact, boards that are too thick can look clunky, especially in small rooms. Thin pre-primed MDF or lattice trim often gives a cleaner result for interior accent walls.
Ignoring Outlets and Switches
Plan your spacing around outlets whenever possible. A batten that lands half on an outlet cover can make the final wall look awkward and create extra cutting work. Sketching the wall first helps prevent this.
Skipping the Level
Your eyes can trick you, especially when floors or ceilings are uneven. Use a level for every vertical board. This one habit instantly makes the project look more professional.
Painting Before Caulking
Paint will not hide shadow lines where boards meet the wall. Caulk first, let it dry, then paint. This gives the wall that seamless custom-carpentry look.
Forgetting to Account for Board Width
When calculating spacing, remember that battens have width. Do not divide the entire wall into spaces without subtracting the boards. That is how you end up with one tiny sad space at the corner, and nobody wants the corner to look like it lost a bet.
Best Rooms for DIY Board and Batten
Board and batten is flexible enough to work almost anywhere, but it shines in certain rooms. In an entryway, it adds structure and pairs beautifully with hooks, benches, and baskets. In a bedroom, it creates a hotel-style focal wall behind the bed. In a dining room, partial-height board and batten adds classic charm without requiring expensive millwork. In a hallway, it breaks up long blank walls and makes the space feel more finished. In a mudroom, it looks practical and stylish, especially when painted in a durable finish.
For bathrooms, choose moisture-resistant materials and paint. Avoid raw MDF in areas with frequent humidity unless it is properly sealed. Wood, PVC trim, or moisture-resistant MDF may be better choices depending on the room.
Budget Tips for Board and Batten Walls
DIY board and batten can be budget-friendly, but costs vary based on wall size, material, and tools. If you already own a saw and nailer, your main expenses are boards, caulk, filler, primer, and paint. If you need to buy or rent tools, factor that into the project cost.
To save money, use the existing drywall as the flat board surface if it is smooth enough. Choose pre-primed MDF strips instead of premium hardwood. Keep the design simple. A vertical batten layout uses fewer pieces than a full grid. Buy longer boards when possible to reduce seams. Also, check each board in the store for warping before bringing it home. A banana-shaped trim board is funny until it is your problem.
Design Ideas to Make Your Wall Stand Out
Once you understand the basic installation, you can customize the look. Paint the board and batten the same color as the upper wall for subtle texture, or use a contrasting color for drama. Add wallpaper above partial board and batten for a charming layered look. Install hooks between battens in an entryway for function. Use a deep color in a small powder room for a jewel-box effect. Pair white board and batten with warm wood furniture for a timeless cottage feel.
You can also adjust spacing to change the mood. Wider spacing feels modern and relaxed. Narrow spacing feels more traditional and detailed. A square grid looks formal and architectural. Tall vertical battens feel clean and simple. The right design depends on your room, your furniture, and how much math you are emotionally available for.
Real DIY Experiences: What This Project Teaches You
One of the biggest experiences people have when learning how to DIY board and batten your walls is discovering that the actual installation is not the hardest part. The hardest part is planning. Measuring the wall, choosing the right spacing, deciding what to do with the baseboard, and figuring out how the battens interact with outlets can take longer than nailing up the boards. That is normal. In fact, a slow planning stage usually leads to a faster, cleaner installation.
A common first-time experience is realizing that walls are not perfectly square. You may measure the height on the left side of the wall and get one number, then measure the right side and get a slightly different number. This does not mean your house is haunted, although older homes do enjoy being dramatic. It simply means you should measure each batten individually before cutting. Cutting every vertical piece to the same length can work on a newer, very straight wall, but custom measuring each section gives a better fit.
Another lesson is that caulk is both your best friend and your tattletale. Good caulking makes small gaps disappear and gives trim a built-in look. Messy caulking, however, creates ridges that show after paint. The trick is to cut a small opening in the caulk tube, apply a thin bead, and smooth it immediately. Keep a damp rag nearby. Do not wait until the caulk starts drying and then try to fix it. That path leads to frustration and possibly snacks eaten aggressively over the sink.
Many DIYers also learn that paint color looks different on a dimensional wall than it does on a flat paint swatch. Battens create shadows, so deep colors can look richer and lighter colors can look more textured. Testing a paint sample directly on the wall is worth it. Look at it in morning light, afternoon light, and evening light before committing. A color that looks calm at noon may turn moody by dinner, and sometimes that is wonderful. Sometimes it is “why is the hallway wearing eyeliner?”
The most satisfying part of the project is usually the moment after the second coat of paint dries. Before paint, the wall may look like a confusing collection of boards, nail holes, filler, and mild panic. After paint, everything unifies. The seams disappear, the shadows sharpen, and the wall suddenly looks intentional. This is why patience matters. Board and batten is not just carpentry; it is the art of trusting the process while your room temporarily looks worse than when you started.
Finally, this project teaches confidence. Once you complete one board and batten wall, you start looking at every blank wall in your home differently. The hallway becomes a candidate. The guest room begins making eye contact. The laundry room suddenly seems underdressed. That is the magic of a successful DIY wall treatment: it proves that a room can feel custom without a massive renovation budget. With careful planning, basic tools, and a willingness to sand one more time than you wanted, you can create a wall that looks polished, personal, and far more expensive than it really was.
Conclusion
DIY board and batten walls are one of the most rewarding ways to add architectural character to your home. The project is approachable for beginners, flexible for different design styles, and impressive enough to make guests ask who installed it. The key is to slow down before you speed up: plan the layout, measure carefully, mark studs, choose the right boards, and take your time with filling, caulking, sanding, priming, and painting.
Whether you create a full accent wall behind a bed or a partial-height treatment in an entryway, board and batten can make an ordinary wall feel custom. It is not just a trim project; it is a room personality upgrade. And yes, you may find yourself staring proudly at the finished wall for several days. That is not weird. That is called quality control.
Note: This article is based on widely used U.S. home-improvement practices for interior board and batten projects. Always follow tool safety instructions, paint and adhesive manufacturer directions, and local building or electrical guidance when working near outlets, switches, plumbing, or wiring.