
Note: Dollar Tree inventory can vary by store, season, and online availability, so treat this guide as a flexible blueprint. If one item is sold out, swap in a similar mini house, wood cutout, ornament, cardboard box, or craft supply. Holiday crafting is not a courtroom; substitutions are allowed.
Introduction: A Sweet Holiday Village Without the Fancy Price Tag
A DIY gingerbread village has all the cozy charm of a Christmas bakery window, minus the pressure of baking walls that must somehow obey gravity. Instead of rolling dough, trimming edges, and silently negotiating with royal icing at midnight, you can create a faux gingerbread village using affordable Dollar Tree items, basic craft supplies, and a little imagination.
This project is perfect if you love the look of gingerbread house decor but want something reusable, budget-friendly, and not vulnerable to curious pets, hungry children, or one adult who “just wants to taste the roof.” With the right base pieces, brown paint, white dimensional “icing,” faux snow, mini trees, ribbon, and LED lights, you can build a charming Christmas village that looks handcrafted, festive, and far more expensive than it actually is.
The best part? You do not need to be a professional crafter. If you can paint a small house brown and squeeze white paint in a wiggly line, you are already dangerously qualified. This guide walks you through supplies, planning, painting, decorating, arranging, troubleshooting, and real-world tips for making a DIY gingerbread village with Dollar Tree items that looks polished enough for a mantel, entry table, coffee bar, kitchen shelf, or holiday centerpiece.
Why Make a Faux Gingerbread Village?
Traditional gingerbread houses are wonderful, but they can also be fragile, messy, and temporary. A faux gingerbread village gives you the same warm, nostalgic look while solving several common holiday problems. You can make it earlier in the season, store it for next year, customize the color palette, and skip the sticky cleanup.
Faux gingerbread decor has become popular because it blends several favorite Christmas styles: cozy cottage, candyland, farmhouse, vintage holiday, and handmade charm. It works beautifully with bottle brush trees, red-and-white ribbon, peppermint accents, warm fairy lights, and snowy tabletop displays. It also gives you complete control over the finished look. Want neutral gingerbread houses with cream icing? Easy. Want pink gumdrop trim and glitter roofs? Also easy. Want a tiny village that looks like Santa’s real estate portfolio? Absolutely encouraged.
Best Dollar Tree Items for a DIY Gingerbread Village
Before you start crafting, walk through the seasonal, craft, toy, floral, and party sections. Dollar Tree often carries small items that can be transformed into gingerbread-style houses and village accessories. Availability changes, especially around Christmas, so shop early if you want the widest selection.
Great Base Pieces
- Mini Christmas village houses
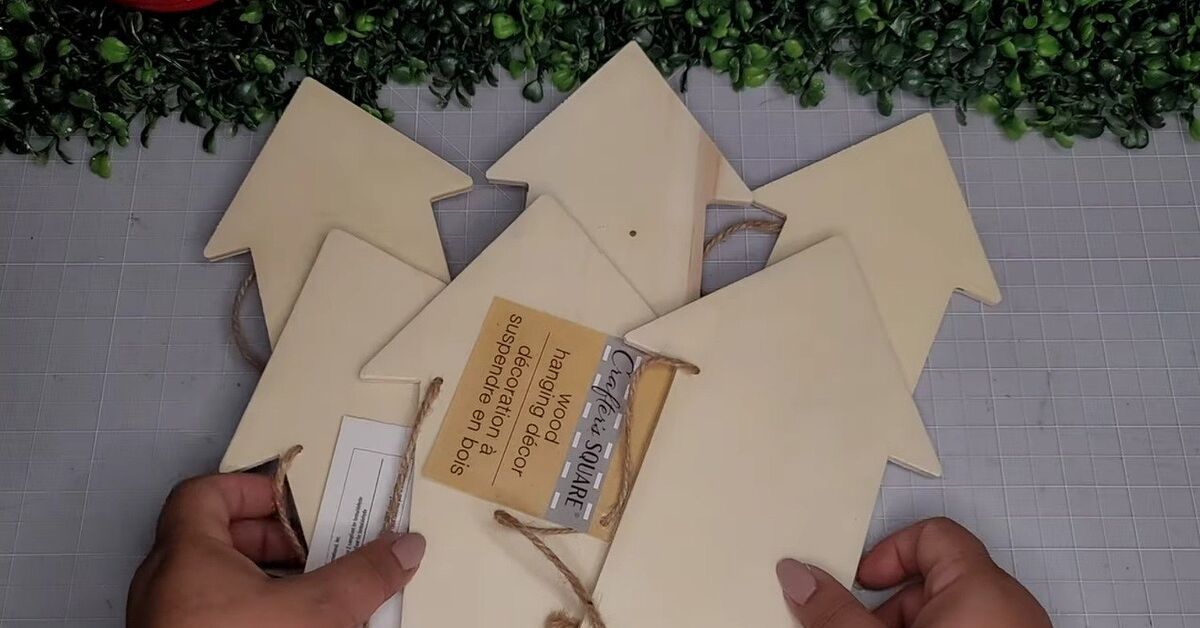
- Wooden house cutouts or plaques
- Small toy houses or plastic playhouse pieces
- Cardboard boxes from gift packaging
- Foam board for custom house fronts
- Paper mache boxes or small gift boxes
- Wood craft signs shaped like houses, churches, barns, or shops
Paint and Surface Supplies
- Brown acrylic paint in gingerbread, caramel, mocha, or cinnamon tones
- White acrylic paint or dimensional fabric paint for icing details
- Paint brushes and foam brushes
- Sandpaper or nail files for smoothing rough edges
- Matte Mod Podge or clear sealer, if available
Decorating Supplies
- Mini bottle brush trees
- Faux snow or cotton batting
- Red-and-white ribbon
- Mini ornaments
- Pom-poms for gumdrops
- Craft gems, beads, buttons, or stickers
- Candy cane ornaments
- Pipe cleaners for wreaths and garland
- Glitter, if your holiday decorating philosophy is “more sparkle, fewer regrets”
Tools You May Need
- Hot glue gun and glue sticks
- Craft knife or scissors
- Ruler
- Pencil
- Parchment paper or newspaper to protect your table
- Battery-operated fairy lights or tea lights
Step 1: Choose a Theme Before You Buy Everything in Sight
Dollar Tree can make even the most disciplined person say, “It’s only a dollar-ish,” twelve times in one aisle. Before your cart turns into a holiday craft avalanche, choose a theme for your gingerbread village. A clear theme helps your final display look intentional instead of like a craft drawer sneezed.
Classic Candy Village
Use warm brown houses, bright white icing, red-and-white peppermint accents, colorful pom-poms, and candy cane details. This is the most traditional gingerbread house look and works well in family spaces, kitchens, and kids’ rooms.
Neutral Farmhouse Village
Choose deeper brown paint, cream icing, natural twine, wood beads, white bottle brush trees, and matte finishes. This style looks beautiful on a mantel, console table, or dining room buffet.
Pink Gingerbread Village
Add pastel pink paint, blush ribbon, pearl beads, and soft white glitter. This is a fun choice for a bedroom, vanity area, or whimsical holiday display.
Vintage Christmas Village
Use muted reds, greens, cream paint, tiny wreaths, faux snow, and warm lights. The goal is “grandma’s cookie tin became a neighborhood,” which is always a compliment.
Step 2: Prepare the House Bases
Once you have your houses or base shapes, remove stickers, tags, price labels, and anything that does not belong in a gingerbread fantasy. If your pieces are glossy plastic or ceramic, lightly scuff the surface with fine sandpaper so the paint sticks better. Wipe away dust before painting.
If you are using cardboard or foam board, draw your house shapes with a ruler first. Make a mix of tall houses, short cottages, churches, bakeries, and little shops. Variety makes the village more interesting. Cut the shapes carefully, then glue support pieces behind them if they need to stand upright.
For a 3D house, you can use small boxes as the structure and add a roof made from cardboard. For a flat mantel village, cut house silhouettes from foam board or cardboard and decorate only the front. Flat villages are easier, faster, and perfect for shelves where depth is limited.
Step 3: Paint Everything Gingerbread Brown
Paint is where the magic begins. Choose a brown shade that looks like gingerbread rather than mud. Warm caramel, cinnamon, cocoa, and medium chocolate tones work best. If your brown paint looks too dark, mix in a little white or tan. If it looks too orange, add a tiny amount of darker brown.
Apply one thin coat and let it dry. Then add a second coat for even coverage. Thin coats are better than one thick coat because thick paint can leave streaks, drips, and mysterious blobs that resemble holiday pudding. If you are painting plastic village houses, you may need three coats or a primer layer.
Do not worry if the first coat looks unimpressive. Most craft projects go through an awkward stage. Somewhere between “brown plastic sadness” and “adorable gingerbread cottage,” you may question your choices. Keep going. The white icing details will transform everything.
Step 4: Add White “Icing” Details
The icing details are the star of a DIY gingerbread village. For faux icing, dimensional fabric paint, puff paint, white acrylic paint in a fine-tip bottle, or hot glue painted white can all work. Dimensional paint is especially useful because it creates raised lines that mimic piped frosting.
Easy Icing Ideas
- Outline doors and windows with white paint.
- Add scalloped lines along the roof edges.
- Pipe dots around windows like sugar pearls.
- Draw snow drips from rooflines.
- Add hearts, stars, swirls, and candy shapes.
- Create roof shingles with repeated curved lines.
- Make a wreath with a small green circle and red bead accents.
If you feel nervous, practice on scrap cardboard first. Straight lines are nice, but gingerbread houses are supposed to look handmade. A slightly wobbly icing line says “charming.” A wildly wobbly line says “the elf had coffee.” Either way, it still belongs in the village.
Step 5: Add Candy-Inspired Embellishments
Now it is time to decorate. Use pom-poms as gumdrops, beads as candy buttons, pipe cleaners as peppermint trim, and small ornaments as oversized sweets. You can also cut red-and-white ribbon into tiny strips and glue them around doors or rooflines.
For a more realistic gingerbread look, keep most of the house brown and white, then add color in small doses. Too many bright decorations can hide the gingerbread effect. Think of color as sprinkles: delightful in moderation, suspicious by the handful.
Decorating Combinations That Work
- Classic: White icing, red pom-poms, green wreaths, candy cane ribbon.
- Rustic: Cream icing, twine bows, mini pinecones, white trees.
- Whimsical: Pink trim, glitter roofs, pastel pom-poms, pearl beads.
- Snowy: Heavy white roof details, faux snow, silver accents, warm lights.
Step 6: Build a Base for the Village
A village looks more finished when it sits on a defined base. You can use a wood tray, charger plate, foam board, cardboard wrapped in white paper, a cutting board, or even a shallow basket. Paint the base white, cover it with faux snow, or use a white table runner for a soft winter look.
Arrange the tallest houses in the back and smaller pieces in front. Add mini trees between the buildings so the display feels layered. Leave small paths between the houses, then create walkways with beads, faux snow, tiny stones, or white paint dots.
If you want a glowing village, weave battery-operated fairy lights behind the houses. For hollow houses, place small LED tea lights inside. Never use real candles with foam, cardboard, plastic, faux snow, or hot glue. A gingerbread village should look warm and cozy, not file a report with the fire department.
Step 7: Create Mini Village Details
Small details make the project feel special. Add a tiny bakery sign, a peppermint lane marker, a snowy fence, or a miniature mailbox. Craft sticks can become signs, fences, sleds, or window boxes. Cotton balls can become snow piles. Buttons can become stepping stones. A broken ornament can become a shiny candy sculpture if you are brave and careful.
Simple Dollar Tree Detail Ideas
- Use craft sticks to make a fence around the village.
- Cut paper straws into candy cane posts.
- Glue mini bows above doors.
- Use white pom-poms as snowballs.
- Turn small gift tags into shop signs.
- Add tiny wreaths made from pipe cleaners.
- Use faux snow to soften the base and hide glue spots.
Step 8: Display Your DIY Gingerbread Village
A Dollar Tree gingerbread village can work almost anywhere indoors. The most popular spots include mantels, kitchen counters, coffee bars, bookshelves, entry tables, dining buffets, and window ledges. If you have cats, choose a high or protected area unless your theme is “gingerbread village after a mild earthquake.”
For a kitchen display, add a small tray with mugs, cocoa packets, peppermint spoons, and a mini gingerbread house. For a mantel, stretch the village horizontally with trees and lights. For a dining table, place the village on a long runner and keep the tallest pieces low enough that guests can still see each other.
Lighting makes a major difference. Warm white lights give the village a bakery-window glow. Cool white lights create a snowy winter effect. Colored lights make the display playful and retro. If your houses are not hollow, simply tuck lights behind them so the glow outlines the rooftops.
Common Mistakes to Avoid
Using Too Much Glue
Hot glue is helpful, but giant glue blobs can make decorations look messy. Use small dots, press pieces into place, and cover any visible glue with faux snow or paint.
Skipping Dry Time
Paint and dimensional icing need time to dry. If you rush, you may smear the details and accidentally give your house a frosting landslide. Let each layer dry before moving to the next step.
Choosing the Wrong Brown
A cool, grayish brown can look flat. Choose warm browns with caramel or cinnamon undertones. Test the color on scrap material before painting every house.
Overcrowding the Village
Leave breathing room between houses. A little space makes each cottage easier to see and gives the display a realistic village layout.
Forgetting Scale
Try to keep accessories roughly proportional. A huge ornament beside a tiny house can look funny unless you are intentionally creating a North Pole candy explosion.
Budget-Friendly Variations
If you want the lowest-cost version, use recycled cardboard boxes instead of buying house forms. Break down cereal boxes, shipping boxes, or gift boxes, then cut house fronts from the cardboard. Paint them brown and decorate with white paint. This flat village style is lightweight, easy to store, and nearly free if you already have paint and glue.
If you want a sturdier version, use wooden cutouts or plastic village houses. These cost a little more but last longer and can be packed away after Christmas. For a high-end look, keep the color palette simple: brown, white, cream, red, and green. Add warm lights and a few trees, and your Dollar Tree project can look like boutique holiday decor.
If you want a kid-friendly version, skip hot glue and use tacky glue, glue dots, stickers, pom-poms, washable paint, and foam shapes. Let each child decorate one house, then combine them into a family village. The final result may not be perfectly coordinated, but it will have personality, which is better than perfection and usually much funnier.
How to Store Your Gingerbread Village
After the holidays, dust off loose faux snow and remove batteries from any lights. Wrap each house in tissue paper, paper towels, or bubble wrap. Store them upright in a sturdy box with dividers if possible. Keep delicate pieces away from heavy ornaments, metal hooks, and anything that could crush raised icing details.
Label the box clearly so you do not accidentally bury your village under outdoor lights and tangled garland. Store it in a dry place away from extreme heat, especially if you used hot glue or dimensional paint. With careful storage, your DIY gingerbread village can return year after year like a tiny, adorable holiday landlord.
Extra Experience: What I Learned Making a Dollar Tree Gingerbread Village
The biggest lesson from making a DIY gingerbread village with Dollar Tree items is that the project looks much better when you slow down. At first, it is tempting to paint everything, glue everything, sprinkle everything, and declare victory before the first coat dries. That is also how you end up with fingerprints in the roofline and a gumdrop stuck to your sleeve. Giving each stage a little breathing room makes the finished village cleaner and more durable.
Another helpful experience is to buy more white paint than you think you need. The white icing details use a surprising amount, especially if you are decorating several houses. A fine-tip bottle is easier than a brush for rooflines, dots, and window trim. However, a small brush is useful for fixing mistakes. Keep a damp paper towel nearby so you can wipe away a line before it dries. This one trick saves many tiny doors from looking like they were installed during a snowstorm.
I also learned that mixing house sizes makes the display look more expensive. If every building is the same height, the village can feel flat. A taller church shape, a squat cottage, a narrow townhouse, and a small candy shop create rhythm. Even if the houses are made from simple cardboard, the variety gives the scene depth. Add trees in different heights and the whole display suddenly feels planned instead of improvised.
Lighting is another game changer. The first version of a gingerbread village may look cute in daylight, but once warm fairy lights are tucked behind the houses, it becomes magical. The glow hides small imperfections and makes the white icing details stand out. If you are placing the village on a mantel, run the lights behind the buildings instead of in front. That way, the viewer sees a soft glow rather than wires having a holiday identity crisis.
One mistake worth avoiding is adding faux snow too early. It sticks to wet paint, wet glue, wet fingers, and sometimes the family dog if the dog is too helpful. Finish the houses first, let everything dry, arrange the village, then add snow last. Use it like a finishing touch, not a blizzard warning.
Finally, do not chase perfection. The charm of a handmade gingerbread village is that each little house has its own personality. One roof may have extra dots. One window may lean slightly. One door may look like a cookie elf lives there and refuses to follow building codes. That is part of the fun. A DIY gingerbread village should feel warm, playful, and personal. Dollar Tree supplies simply make it affordable enough to experiment, mess up, laugh, fix it, and keep crafting.
Conclusion: A Budget Christmas Craft That Looks Sweet All Season
Learning how to make a DIY gingerbread village with Dollar Tree items is a simple way to create holiday decor that feels cozy, custom, and wonderfully festive without spending a fortune. Start with small houses, cardboard, wood cutouts, or mini village pieces. Paint them warm gingerbread brown, add white icing details, decorate with candy-inspired accents, and arrange everything with trees, snow, and lights.
This project works for beginners, families, serious crafters, and anyone who wants Christmas decorations with handmade charm. You can make the village classic, neutral, colorful, vintage, or completely whimsical. Best of all, your faux gingerbread houses can be stored and reused, which means next year’s holiday decorating starts with a village already waiting to shine.
So grab your paint, plug in the glue gun, and prepare to turn budget finds into a sweet little Christmas scene. No oven required. No collapsing cookie walls. No royal icing panic. Just a charming gingerbread village that looks like it belongs in a holiday movie, preferably the kind where everyone drinks cocoa and nobody checks their email.