
If you have ever looked at a beautifully wrapped gift, a festive wreath, or a party backdrop and thought, “That bow is doing all the heavy lifting here,” you were absolutely correct. A large bow has a special talent for making ordinary things look polished, expensive, and suspiciously Pinterest-worthy. The good news is that learning how to make a large bow is much easier than it looks. You do not need a craft room that looks like a ribbon tornado hit it, and you definitely do not need magical bow-making powers passed down through generations.
In this fun and simple DIY tutorial, you will learn how to make a large bow step by step using ribbon, a little patience, and the willingness to fluff loops like your decorating reputation depends on it. Whether you want to top a giant gift box, decorate a holiday wreath, style a wedding sign, or add drama to home decor, this guide will help you create a full, beautiful oversized bow without turning your dining table into a craft emergency zone.
Why a Large Bow Is Such a Great DIY Project
A big bow is one of the easiest ways to make decorations look intentional. It adds shape, color, texture, and a “Yes, I planned this” feeling to almost anything. Large bows work beautifully on front door wreaths, stair railings, Christmas trees, wedding decor, nursery walls, gift baskets, chair backs, and oversized presents. They can look elegant, playful, rustic, classic, or downright dramatic depending on the ribbon you choose.
Another reason this DIY is so popular is flexibility. You can make a formal oversized bow with velvet ribbon, a cheerful giant bow with gingham or grosgrain, or a soft and airy version with tulle. Once you understand the basic structure, you can adjust the size, number of loops, tail length, and ribbon style to match the project. In other words, one tutorial unlocks a lot of decorating options.
What You Need to Make a Large Bow
- Wide ribbon, preferably 2.5 to 4 inches wide for a dramatic bow
- Sharp scissors
- Floral wire, craft wire, or a pipe cleaner
- Measuring tape or ruler
- Hot glue gun, if you want to attach the bow permanently
- Optional: a second ribbon for layering, zip ties, twist ties, or bow-making tool
If you are wondering what ribbon works best for a large bow, wired ribbon is usually the easiest choice. It holds its shape better, makes fluffing much less frustrating, and gives your bow that full, sculpted look. If you want something softer and drapier, satin or velvet can work beautifully too, but expect to spend a little more time shaping the loops.
How to Choose the Best Ribbon for an Oversized Bow
1. Pick the Right Width
If your goal is a bow that actually looks large and not just mildly optimistic, go with wider ribbon. Narrow ribbon can make a cute bow, but it will not give you the same volume or presence. For wreaths, gifts, and decor, ribbon between 2.5 and 4 inches wide is usually the sweet spot.
2. Decide on the Style
Velvet ribbon creates an elegant large bow. Grosgrain gives a crisp, classic finish. Burlap or linen creates a rustic look. Satin feels festive and polished. Tulle creates a softer, romantic effect. If you want extra fullness, you can even layer two ribbons together for more dimension.
3. Think About Structure
Wire-edged ribbon is a gift from the crafting universe. It helps each loop stay open and rounded, which is especially helpful when you are making a giant bow for a wreath, tree topper, or front door display. If your ribbon has no wire, you can still make a beautiful bow, but the loops may relax more quickly and need more adjusting.
Step-by-Step: How to Make a Large Bow
Now for the main event. This is a simple looped method that works well for gifts, wreaths, decor accents, and party styling.
Step 1: Cut Your Ribbon
Start by pulling out a generous length of ribbon. For a truly large bow, you usually want much more ribbon than you think. That is one of the oldest crafting surprises. A bow that looks grand on a door or gift box may require several feet of ribbon. If you are making a statement bow, begin with at least 8 to 12 feet of ribbon so you have enough for tails and multiple loops.
Cut two long tails first if you want neat, dramatic ends hanging down. Tails between 18 and 30 inches each often look balanced on a large bow, depending on where you plan to use it.
Step 2: Find the Center
Pinch the ribbon at the center point where the bow will be cinched. Hold that point between your thumb and forefinger. This is the control center of the whole project. Every loop will be built around this pinch point.
Step 3: Make the First Loops
Create one loop on the left side, then one on the right side. Try to make them roughly the same size. For a large bow, each loop might be 6 to 10 inches across, depending on the final scale you want.
Pinch the base of each loop into the center as you go. If you are using one-sided ribbon, twist the ribbon at the center after each loop so the pretty side faces outward. This tiny move makes a big difference and keeps your bow from looking confused.
Step 4: Keep Building Layers
Repeat the loop-making process, alternating left and right. Add four, five, or even six loops per side for a fuller oversized bow. You can keep all loops the same size for a structured look, or make the inner loops slightly smaller than the outer loops for a more dimensional, florist-style bow.
This is where the magic starts. What looked like a pile of ribbon suddenly begins turning into an actual bow. It is a very satisfying transformation, a little like pancake batter becoming breakfast.
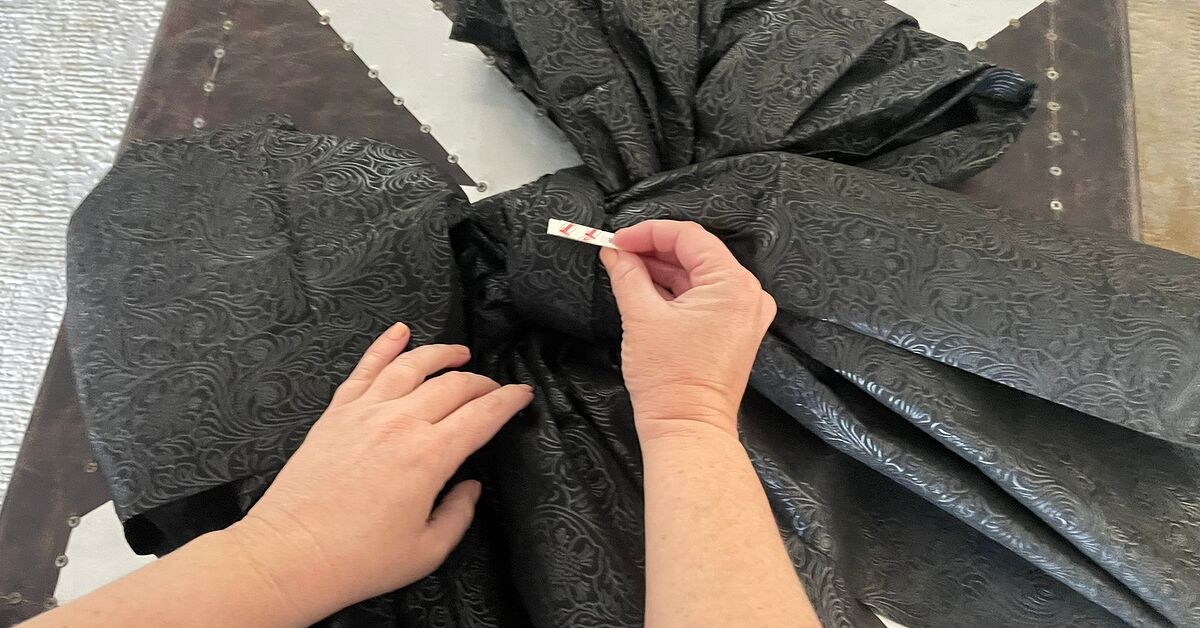
Step 5: Secure the Center
Once all your loops are pinched together at the center, wrap floral wire, craft wire, or a pipe cleaner tightly around the middle. Twist firmly to hold everything in place. Do not be shy here. A loose center is one of the quickest ways for a large bow to flop, sag, or slowly fall apart when you least need drama.
Leave extra wire if you plan to attach the bow to a wreath, chair, banister, or package. That makes mounting much easier later.
Step 6: Fluff the Loops
Now separate and fluff the loops one by one. Pull some slightly upward, some outward, and some a bit forward. Spread them evenly so the bow looks round and full. If you are using wired ribbon, shape the edges gently with your fingers to create a balanced, professional-looking silhouette.
This is the stage where patience pays off. A bow can go from “homemade” to “wait, did you buy that?” with a few minutes of careful fluffing.
Step 7: Trim the Tails
Cut the tails to your preferred length. For a polished finish, dovetail the ends by folding the ribbon lengthwise and cutting diagonally from the folded edge toward the open corners. This creates that classic V-shaped tail you often see on gift bows and wreath bows.
Step 8: Attach the Bow
Use the extra wire to secure your large bow to a wreath, gift box, backdrop, or decor piece. For permanent placement, add a small amount of hot glue after wiring it in place. If you are attaching it to fabric or furniture, test the method first so you do not damage the surface.
How to Make a Large Bow Look Fuller
If your bow looks a little flat, do not panic. It does not mean you failed. It usually means it needs one of the following:
- More loops
- Wider ribbon
- Tighter center fastening
- Better fluffing and shaping
- Longer ribbon overall
A common mistake is underestimating how much ribbon a large bow needs. Oversized bows are generous creatures. They want volume. They want airflow. They want enough ribbon to feel important.
Common Mistakes to Avoid
Using Ribbon That Is Too Narrow
If you want a statement bow, very narrow ribbon usually will not get you there. Save that for smaller gift toppers or delicate accents.
Skipping the Twist
When working with single-sided ribbon, forgetting to twist between loops can leave the dull side facing out. It is a small issue that creates a surprisingly big visual difference.
Leaving the Center Too Loose
The center needs to be tightly secured or the loops may shift, twist, and flatten over time.
Not Fluffing Enough
Freshly tied bows often look compressed. Fluffing is not optional. It is the final styling step that gives the bow its shape and personality.
Creative Ways to Use a Large DIY Bow
- Top an oversized gift box for birthdays or holidays
- Add one to a front door wreath
- Use it as a Christmas tree topper
- Decorate wedding signs, chairs, or pew ends
- Tie one onto a porch lantern or mailbox
- Use giant bows in party backdrops or balloon displays
- Dress up a nursery wall, mirror, or seasonal mantel
Once you master this simple DIY tutorial, you will start seeing places for large bows everywhere. Possibly too many places. Suddenly baskets need bows. Pillows need bows. Your dog may become mildly concerned.
Experience and Real-Life Tips From Making Large Bows
One thing people quickly learn from experience is that making a large bow is part technique and part attitude. The first time I made one for a giant gift box, I assumed it would take about five minutes. It did not. It took longer because I made all the classic beginner mistakes: I used too little ribbon, made uneven loops, and cinched the center too loosely. The final result looked less like a glamorous oversized bow and more like a ribbon that had given up on itself. After a few tries, though, the process became surprisingly intuitive.
The biggest lesson is that scale changes everything. A regular bow can get away with minor imperfections, but a giant bow is basically a spotlight-seeking actor. Every uneven loop, twisted tail, or floppy side becomes more noticeable. That sounds intimidating, but it actually makes the craft more fun, because small adjustments create big improvements. Straightening one tail, fluffing one side, or tightening the center just a little can completely transform the finished look.
I have also found that the setting matters. A large bow for a wreath needs more structure than a large bow for a gift basket. A bow used outdoors should be made from sturdier ribbon that can hold up to wind and moisture better than delicate satin. A bow for indoor party decor can be softer and more dramatic because it does not need to survive weather or gravity in the same way. When people say a bow “didn’t work,” the issue is often not the technique. It is usually the material choice.
Another real-life tip is to stop judging the bow too early. In the middle of the process, almost every big bow looks a little ridiculous. The loops bunch together, the tails seem awkward, and the whole thing can feel suspiciously unpromising. That is normal. The bow often looks its best only after the center is secured, the loops are spread apart, and the tails are trimmed. If you quit at the ugly-middle stage, you never reach the “Oh wow, that actually looks great” moment.
I have also learned that large bows are fantastic for rescuing decor that feels incomplete. A plain wreath can look significantly more finished with one well-made bow. A simple wrapped box becomes more festive. A backdrop for a shower or birthday party suddenly reads as styled instead of assembled at the last minute. It is one of those rare DIY details that offers a lot of visual payoff without requiring advanced crafting skills.
Finally, making bows gets easier with repetition. The first bow may take you a while. The second one feels smoother. By the third, you start making little creative decisions, like mixing textures or adjusting loop sizes on purpose. That is when the project becomes genuinely fun. You stop following steps nervously and start designing. And that is the real charm of learning how to make a large bow: it begins as a simple craft, but it quickly turns into a useful decorating skill you can return to for holidays, celebrations, gifts, and everyday home styling.
Final Thoughts
Learning how to make a large bow is one of those DIY skills that feels fancy but is actually very approachable. With the right ribbon, a secure center, and a little fluffing, you can create a bow that looks polished, full, and delightfully dramatic. Whether you are decorating for the holidays, wrapping a memorable gift, styling an event, or just trying to make your front door look like it has its life together, a well-made oversized bow is a smart and charming finishing touch.
So grab your ribbon, clear a little workspace, and let your inner bow artist get to work. Worst case, you make a slightly lopsided bow and learn something. Best case, you create a showstopper that makes everything around it look better. Honestly, that is a pretty strong return on a roll of ribbon.