
Paper mosaics are proof that great art does not always require expensive supplies, a studio full of mysterious tools, or a dramatic artist’s scarf. Sometimes, all you need is paper, glue, patience, and the willingness to let tiny squares take over your table like colorful confetti with a mission.
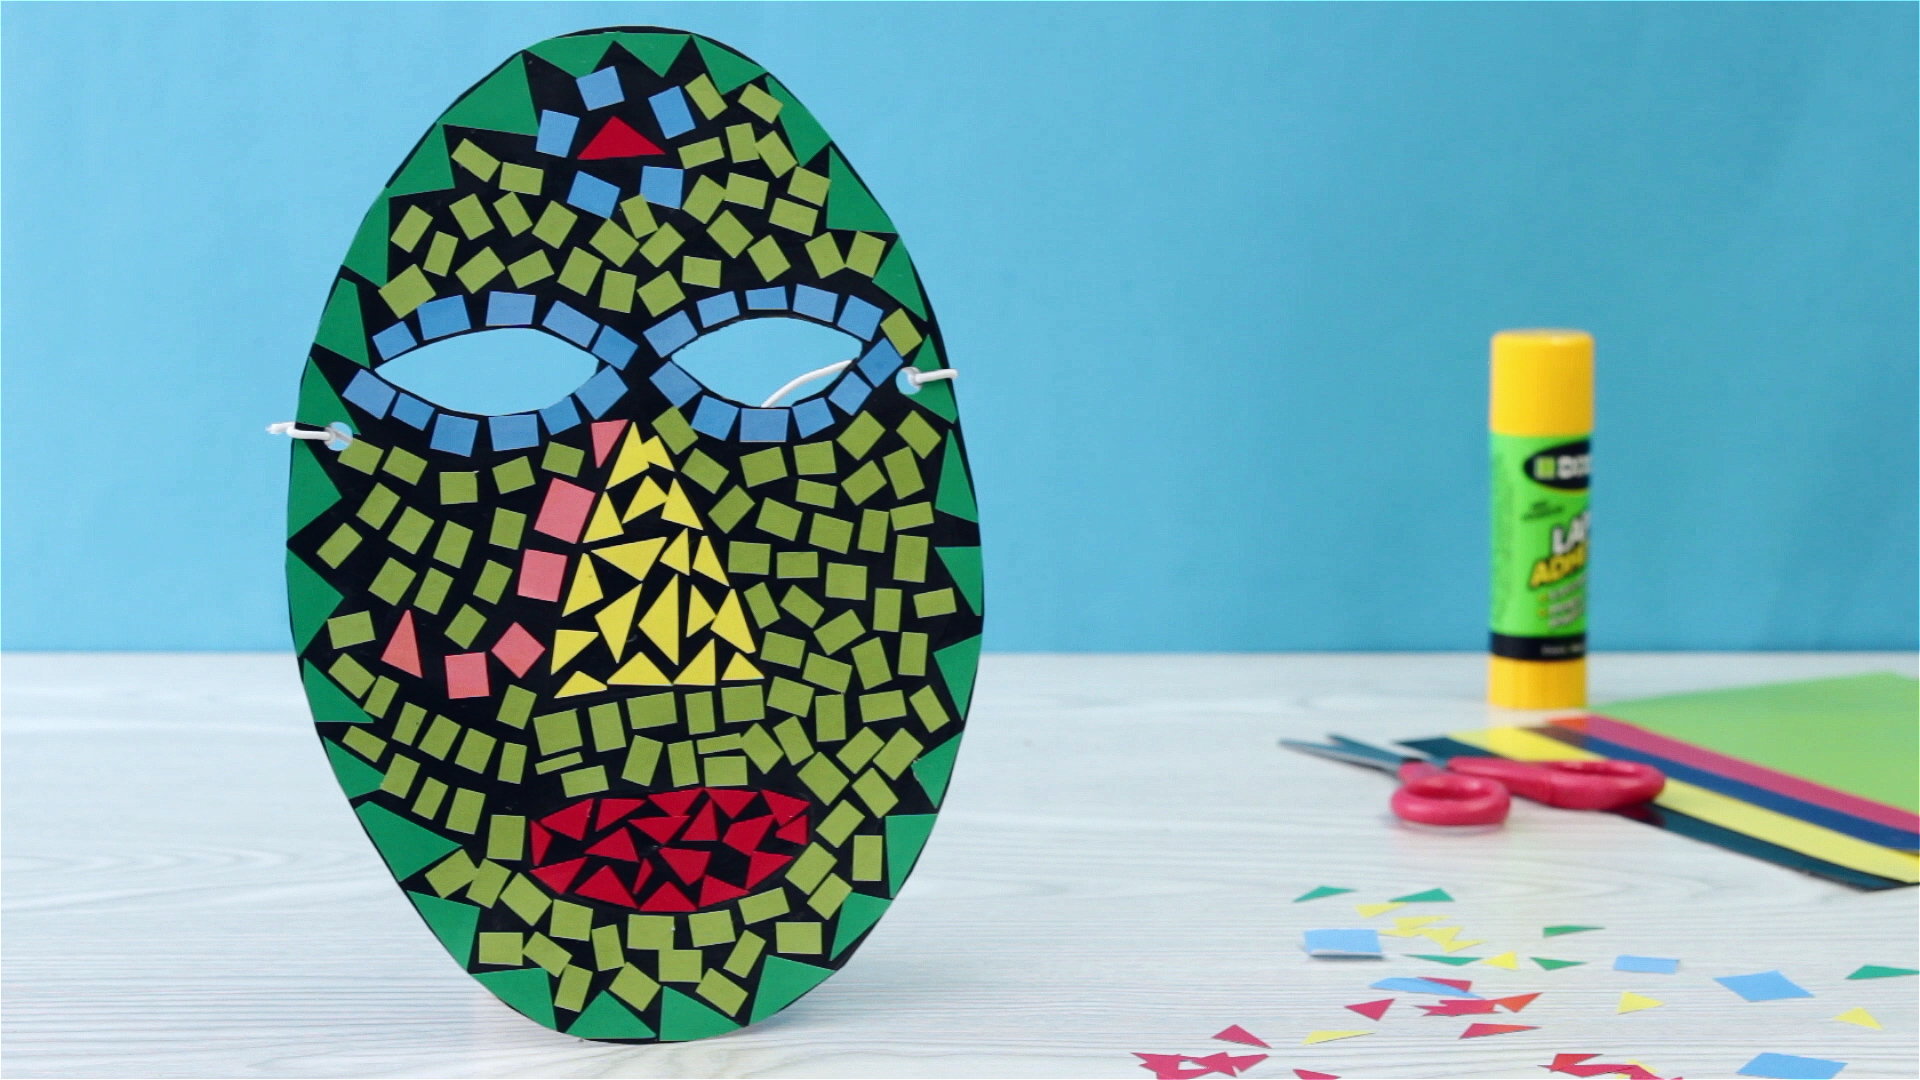
A paper mosaic is an artwork made by arranging small pieces of paperoften called paper “tiles”into a larger image or pattern. Traditional mosaics use stone, glass, ceramic, or tile pieces called tesserae, but paper mosaics offer a lighter, safer, cheaper, and more beginner-friendly version of the same idea. They are perfect for kids, classroom projects, home décor, handmade cards, art journals, recycled crafts, and relaxing weekend creativity.
In this guide, you will learn how to make a paper mosaic from start to finish, including what materials to use, how to choose a design, how to cut and arrange your pieces, and how to finish your artwork so it looks neat instead of accidentally attacked by a craft drawer. Whether you are making a flower, animal, landscape, abstract pattern, or simple geometric design, the process is easy to customize and surprisingly satisfying.
What Is a Paper Mosaic?
A paper mosaic is a collage-style artwork created from many small pieces of paper arranged close together to form an image, pattern, or decorative surface. The magic comes from spacing, color choice, and direction. Each small piece may look ordinary on its own, but together they create movement, texture, and visual depth.
Think of it like building a picture with puzzle pieces, except you are allowed to invent the puzzle as you go. The pieces do not have to fit perfectly. In fact, a little irregularity often makes the final design more charming. Paper mosaics can be made with construction paper, scrapbook paper, magazine pages, wrapping paper, cardstock, tissue paper, old calendars, junk mail, or painted paper scraps.
Why Paper Mosaics Are Worth Trying
Paper mosaic art is popular because it is accessible for almost any age or skill level. Younger children can tear paper into simple shapes and glue them onto a large outline. Older kids and adults can create detailed portraits, landscapes, mandalas, or decorative wall art. It is also a smart recycled craft because leftover paper scraps become the star of the show instead of living forever in the “maybe useful someday” pile.
This project also helps develop creativity, fine motor skills, color awareness, planning, patience, and visual problem-solving. For adults, it can be a calming, screen-free activity. For children, it can feel like a game: cut, sort, match, glue, repeat. For everyone, it offers the wonderful moment when a messy table suddenly becomes actual art.
Materials You Need
You do not need fancy supplies to make a beautiful paper mosaic. Start with the basics and upgrade only if you want a more polished finish.
Basic Supplies
- Base paper, cardstock, poster board, cardboard, canvas board, or wood panel
- Colored paper, construction paper, scrapbook paper, magazine pages, or recycled paper
- Pencil for sketching your design
- Scissors or paper cutter
- Glue stick, white school glue, craft glue, or decoupage medium
- Small bowl, tray, or envelope for sorting paper pieces
- Eraser
- Optional tweezers for placing tiny pieces
- Optional ruler for geometric designs
- Optional sealant such as decoupage medium for a finished surface
Best Paper Choices
Construction paper is easy to cut and works well for children’s projects. Cardstock gives a stronger, cleaner tile effect and is better for artwork you want to frame. Magazine pages are excellent for subtle shading because they contain many tones and textures. Scrapbook paper adds patterns, metallic touches, and decorative flair. Tissue paper creates a soft translucent look, though it wrinkles more easily and needs gentle gluing.
If you want a bold mosaic, use solid-colored paper. If you want a painterly mosaic, use magazines, painted papers, or paper scraps with mixed colors. A sunset made from magazine oranges, reds, and yellows can look surprisingly rich. A blue ocean made from old catalog pages may make you feel like a recycling genius, which is one of life’s underrated joys.
How to Make a Paper Mosaic Step by Step
Step 1: Choose a Simple Design
Begin with a design that has clear shapes. Flowers, hearts, fish, butterflies, trees, mountains, suns, initials, animals, fruit, and abstract patterns are all beginner-friendly options. Avoid tiny details for your first project. A tiger’s whiskers may sound exciting, but by tile number 437, you may reconsider your life choices.
If you are new to paper mosaic art, choose a design with three to five large sections. For example, a simple flower can have petals, center, stem, leaves, and background. A landscape can have sky, sun, mountains, grass, and water. Once you understand the process, you can move on to more detailed artwork.
Step 2: Prepare the Base
Select a sturdy base that will not curl easily when glue is applied. Cardstock, poster board, cardboard, canvas board, or a thin wood panel works best. If you are using thin printer paper as a base, glue may wrinkle it, especially if you use too much liquid adhesive.
For a classic mosaic look, use black cardstock as the background. The dark space between paper pieces creates the effect of grout lines. White cardstock gives a brighter, softer look. Kraft paper or cardboard creates a rustic handmade style.
Step 3: Sketch Your Design Lightly
Use a pencil to draw your design on the base. Keep the lines light so they do not show through the finished artwork. If drawing makes you nervous, use a printed template, trace a coloring page, or draw basic shapes. A mosaic does not need perfect realism. It needs clear areas for color placement.
Divide larger sections into smaller zones if you want more movement. For example, instead of filling an entire fish with one color, divide the body into curved rows and use different shades. This makes the final mosaic look more dynamic.
Step 4: Cut or Tear the Paper Tiles
Cut colored paper into small pieces. Squares are classic, but triangles, rectangles, circles, strips, and irregular shapes all work. For beginners, pieces between 1/4 inch and 1/2 inch are easy to handle. Larger pieces work well for kids. Smaller pieces create more detail but require more patience.
Torn paper gives a softer, organic texture. Cut paper creates a cleaner, more structured look. You can also mix both. Use cut pieces for the main subject and torn pieces for backgrounds like clouds, grass, water, or hair.
Step 5: Sort Your Colors
Place each color family into a separate bowl, tray, or envelope. Sort by color, shade, or pattern. This step may seem small, but it saves time and keeps your table from turning into a paper blizzard. If you are using magazine pages, sort pieces into light, medium, and dark tones.
For a realistic look, gather several shades of each color. A leaf will look more interesting with lime, forest green, olive, and yellow-green pieces than with one flat green. A face or animal can be built with warm neutrals, shadows, and highlights.
Step 6: Plan Before You Glue
Lay a few paper pieces onto your design before gluing. This helps you test color combinations and spacing. Start with the main subject first, then work outward to the background. If you are making a flower, begin with the center and petals. If you are making a landscape, start with the sun or mountains before filling the sky.
Try leaving a thin gap between the paper pieces. These gaps create the mosaic effect. If every piece overlaps, the artwork becomes more like a collage. That is not wrong, but it changes the look. For a traditional mosaic style, let the base color peek through like grout.
Step 7: Glue in Small Sections
Apply glue to one small area at a time rather than covering the whole page at once. Glue dries quickly, and working in small sections gives you more control. Use a glue stick for light paper and simple projects. Use white craft glue for heavier cardstock, cardboard, or layered pieces. Use decoupage medium if you want to seal and glue at the same time.
Do not drown the paper in glue. A thin, even layer is enough. Too much glue can wrinkle paper, smear printed magazine pieces, or make the base curl. Press each piece gently into place and wipe away extra glue before it dries.
Step 8: Follow the Shape of the Design
One trick that makes paper mosaics look more professional is directional placement. Arrange pieces so they follow the outline of the shape. For a sun, place tiles in circular rows. For a fish, follow the curve of the body. For hair, place strips in the direction the hair would naturally flow. For waves, use curved rows of blue pieces.
This technique creates movement and helps the viewer understand the image. Random placement can be fun for abstract art, but directional placement is better for recognizable subjects.
Step 9: Add Background and Details
Once the main subject is filled, work on the background. Background pieces can be slightly larger or simpler so they do not compete with the focal point. If your main image is very colorful, choose a calmer background. If your main image is simple, a patterned background can add energy.
Add details last. Tiny paper pieces can become eyes, flower centers, stars, scales, shadows, highlights, or decorative borders. A white dot in an eye, a darker strip under a petal, or a gold accent on a border can make the whole project feel more finished.
Step 10: Let It Dry Completely
Place your mosaic flat and let it dry. Drying time depends on the glue and paper thickness, but most simple paper mosaics need at least one to two hours. Heavier glue or sealed projects may need overnight drying.
If the artwork starts to curl, place a sheet of wax paper over it and weigh it down with a flat book after the glue is no longer wet to the touch. Do not put a book directly onto wet glue unless you want your art project and your book to become emotionally attached forever.
Step 11: Seal or Frame the Artwork
Sealing is optional, but it gives the paper mosaic a cleaner finish. Brush a thin layer of decoupage medium over the surface and let it dry. For extra protection, apply a second thin coat. Always test first if you are using magazine paper or ink-heavy printed paper, because some inks may smear.
You can frame your mosaic behind glass, mount it onto a larger mat board, glue it onto a greeting card, or use it as journal cover art. Paper mosaics are best kept indoors and away from moisture unless they are sealed carefully and protected.
Easy Paper Mosaic Ideas for Beginners
Paper Mosaic Flower
Draw a large flower with simple petals. Use warm colors such as red, pink, orange, and yellow for the petals. Fill the center with small brown, gold, or black pieces. Use green paper for the stem and leaves. Add a blue or white background for contrast.
Paper Mosaic Heart
Cut or draw a heart shape on cardstock. Fill it with red, pink, purple, and patterned paper pieces. This is a great project for Valentine’s Day, handmade cards, classroom crafts, or wall décor. Try using magazine pages with interesting textures for a more grown-up look.
Paper Mosaic Landscape
Create a simple landscape with sky, sun, hills, water, and grass. Use rows of paper pieces to show direction: horizontal blues for water, curved yellows for the sun, and diagonal greens for hills. This project teaches color, composition, and movement without requiring advanced drawing skills.
Paper Mosaic Animal
Choose an animal with a strong outline, such as a fish, owl, turtle, cat, butterfly, or bird. Use different shades to create texture. A fish can have scale-like rows. An owl can have layered feathers. A turtle shell can become a wonderful geometric pattern.
Abstract Paper Mosaic
Draw simple lines, circles, waves, or geometric shapes. Fill each area with different colors or patterns. Abstract mosaics are excellent for beginners because there is no pressure to make the final piece look like a specific object. If someone asks what it is, you can confidently say, “It is an exploration of color and movement,” which is art-speak for “I had fun.”
Helpful Tips for a Better Paper Mosaic
- Use sturdy backing paper to prevent curling.
- Cut more paper pieces than you think you need.
- Keep gaps consistent for a classic mosaic look.
- Use similar-sized pieces in detailed areas.
- Use larger pieces for backgrounds to save time.
- Work from the focal point outward.
- Use color families instead of one flat color.
- Let glue dry fully before sealing or framing.
- Test sealant on scrap paper before coating the finished mosaic.
Common Mistakes to Avoid
Using Too Much Glue
Too much glue can wrinkle paper, create shiny blobs, and make the artwork look messy. Use a thin layer and apply more only when needed.
Starting With a Complicated Design
Highly detailed designs can become frustrating. Start simple, then build your skills. A bold apple will teach you more than a tiny city skyline with 900 windows.
Ignoring Color Contrast
If your subject and background are too similar, the design may disappear. Use contrast to make important shapes stand out. Dark against light, warm against cool, and solid against patterned paper all work well.
Rushing the Layout
Paper mosaics reward patience. Lay out a few pieces before gluing. Adjust colors and spacing as you go. The best part of mosaic art is that it grows slowly, piece by piece.
Paper Mosaic for Kids
Paper mosaics are excellent for children because the materials are safe, inexpensive, and easy to adapt. Younger children can tear paper instead of cutting it. They can fill a large shape, such as a heart, rainbow, fish, or tree. Older children can practice patterns, symmetry, color gradients, and storytelling through images.
For classroom use, prepare paper squares in advance and place them in color bowls. Give students a simple template and encourage them to leave small spaces between pieces. This project can connect with lessons about ancient art, recycling, geometry, color theory, cultural patterns, or seasonal themes.
Paper Mosaic for Adults
Adults can take paper mosaics far beyond basic crafts. Try creating a portrait from magazine tones, a botanical print from layered cardstock, a mandala from symmetrical shapes, or a modern abstract piece from scrapbook paper. You can also use paper mosaics for handmade greeting cards, framed wall art, bookmarks, gift tags, journal covers, and decorative boxes.
For a more refined look, keep your color palette limited. Choose three main colors plus one accent. A navy, cream, and gold mosaic can look elegant. A green, blush, and white botanical design can feel fresh and modern. A black-and-white mosaic with one red detail can look dramatic without requiring a drama degree.
How to Add Texture and Depth
Texture makes paper mosaic art more interesting. Try layering paper pieces slightly, using corrugated cardboard, mixing matte and glossy paper, or adding metallic scrapbook paper as accents. You can also shade with color: place darker pieces along edges and lighter pieces where highlights would appear.
For example, if you are making a paper mosaic apple, use deep red pieces along one side, bright red in the center, and a few pink or orange pieces near the highlight. Add a dark green leaf and a brown stem. Suddenly, your apple has dimension instead of looking like a red potato with confidence.
How to Make Your Paper Mosaic Look Professional
The difference between a casual craft and a polished paper mosaic often comes down to planning. Use a strong base, choose a clear palette, keep spacing intentional, and follow the direction of the form. Trim uneven edges when needed. Step back from the artwork every few minutes to check the overall image.
Another professional trick is to create a border. A simple border made from repeated paper pieces can frame the design and make it feel complete. Borders work especially well for mandalas, initials, signs, classroom displays, and wall art.
Personal Experiences and Practical Lessons From Making Paper Mosaics
One of the best things about making a paper mosaic is that the project teaches you as you go. At first, it may seem like a simple cut-and-glue activity. Then, somewhere between sorting the blue scraps and arguing with a tiny triangle that refuses to sit straight, you realize there is a real art process happening. Paper mosaic making is slow, thoughtful, and forgiving, which is a rare combination in a world where everything usually wants to be instant.
A useful experience is to begin with a small design before trying a large one. A postcard-sized mosaic can teach spacing, color blending, glue control, and paper choice without overwhelming you. Many beginners start too big, then discover that filling a giant poster board with quarter-inch pieces is not a craft project; it is a long-term relationship. Smaller projects help you finish successfully and build confidence for larger pieces.
Another lesson is that paper quality matters more than expected. Thin paper is easy to cut, but it may wrinkle when glue is added. Thick cardstock gives a beautiful tile-like look, but it takes more effort to cut and may need stronger glue. Magazine paper is wonderful for color variation, but glossy pages can slide around before the glue sets. The best approach is to test several paper types on a scrap base before committing to the final design.
Color sorting also makes a huge difference. When paper pieces are mixed together in one pile, the project slows down because you spend more time hunting than creating. Sorting pieces into color groups feels a little fussy at first, but it turns the process into something smoother and more relaxing. It also helps you see your palette clearly. You may notice that you have plenty of bright yellow but not enough soft yellow, or that your “green” pile contains five different moods of grass.
Patience is the secret ingredient. Paper mosaics look best when pieces are placed with intention. That does not mean every tile must be perfect. Actually, perfect pieces can make the art feel stiff. The goal is controlled variety. Let some pieces be square, some rectangular, and some irregular. Keep the spacing similar, but not robotic. This balance gives the mosaic life.
One practical habit is to rotate the artwork as you work. When filling curved areas, turning the page helps your hand place pieces more naturally. Another helpful habit is stepping back often. Up close, you may only see glue marks and uneven corners. From a few feet away, the image suddenly comes together. This is especially true for portraits, landscapes, and shaded designs.
Paper mosaics are also surprisingly good for using up leftovers. Old greeting cards, wrapping paper scraps, used envelopes, calendar pages, and packaging can all become art material. A cereal box can become a sturdy base. A magazine page can become ocean water. A gold candy wrapper can become the perfect sun. Once you start seeing paper as mosaic material, recycling gets a lot more glamorous.
The biggest lesson is to enjoy the process instead of rushing to the result. A paper mosaic grows slowly, and that is part of its charm. Each small piece is a decision. Each color shift changes the mood. Each gap adds rhythm. By the end, the artwork is more than a picture; it is a record of attention, patience, and many tiny choices that somehow decided to cooperate.
Conclusion
Learning how to make a paper mosaic is simple, creative, and rewarding. With a sturdy base, colorful paper, a clear design, and careful gluing, you can turn small scraps into eye-catching artwork. Start with an easy shape, use strong color contrast, leave small gaps between pieces, and let your design build slowly. Whether you are crafting with kids, decorating your home, making handmade gifts, or relaxing after a busy day, paper mosaic art is a low-cost project with big visual impact.
The beauty of a paper mosaic is that it welcomes imperfection. Uneven shapes, mixed textures, and surprising color combinations often make the finished piece more interesting. So gather your paper scraps, sharpen your scissors, and prepare to make something wonderful from tiny pieces. Your table may get messy, but your masterpiece will forgive you.
Note: This article is written in original, publication-ready American English and is based on widely used paper mosaic, collage, and beginner craft techniques.