
Learning how to make a tulle tutu is one of those delightfully dramatic craft projects that looks impressive but secretly asks very little from you. No architecture degree. No advanced sewing badge. No mysterious grandma-only technique involving a thimble and a sigh. With tulle, elastic, scissors, and a bit of patience, you can create a fluffy tutu for ballet class, birthday photos, Halloween costumes, fairy dress-up, dance recitals, pet costumes, party outfits, or the simple everyday emergency known as “I need more sparkle.”
The best part? A basic no-sew tulle tutu can be made by looping strips of tulle around a waistband. That is it. The process is repetitive, calming, and extremely forgiving. If one strip is a little shorter than another, the tutu will not file a complaint. It will simply become “whimsical.” In this guide, you will learn how to make a DIY tulle tutu step by step, how much tulle you need, how to measure the waistband, how to create fullness, and how to fix common tutu troubles before they turn your craft table into a fluffy crime scene.
What Is a Tulle Tutu?
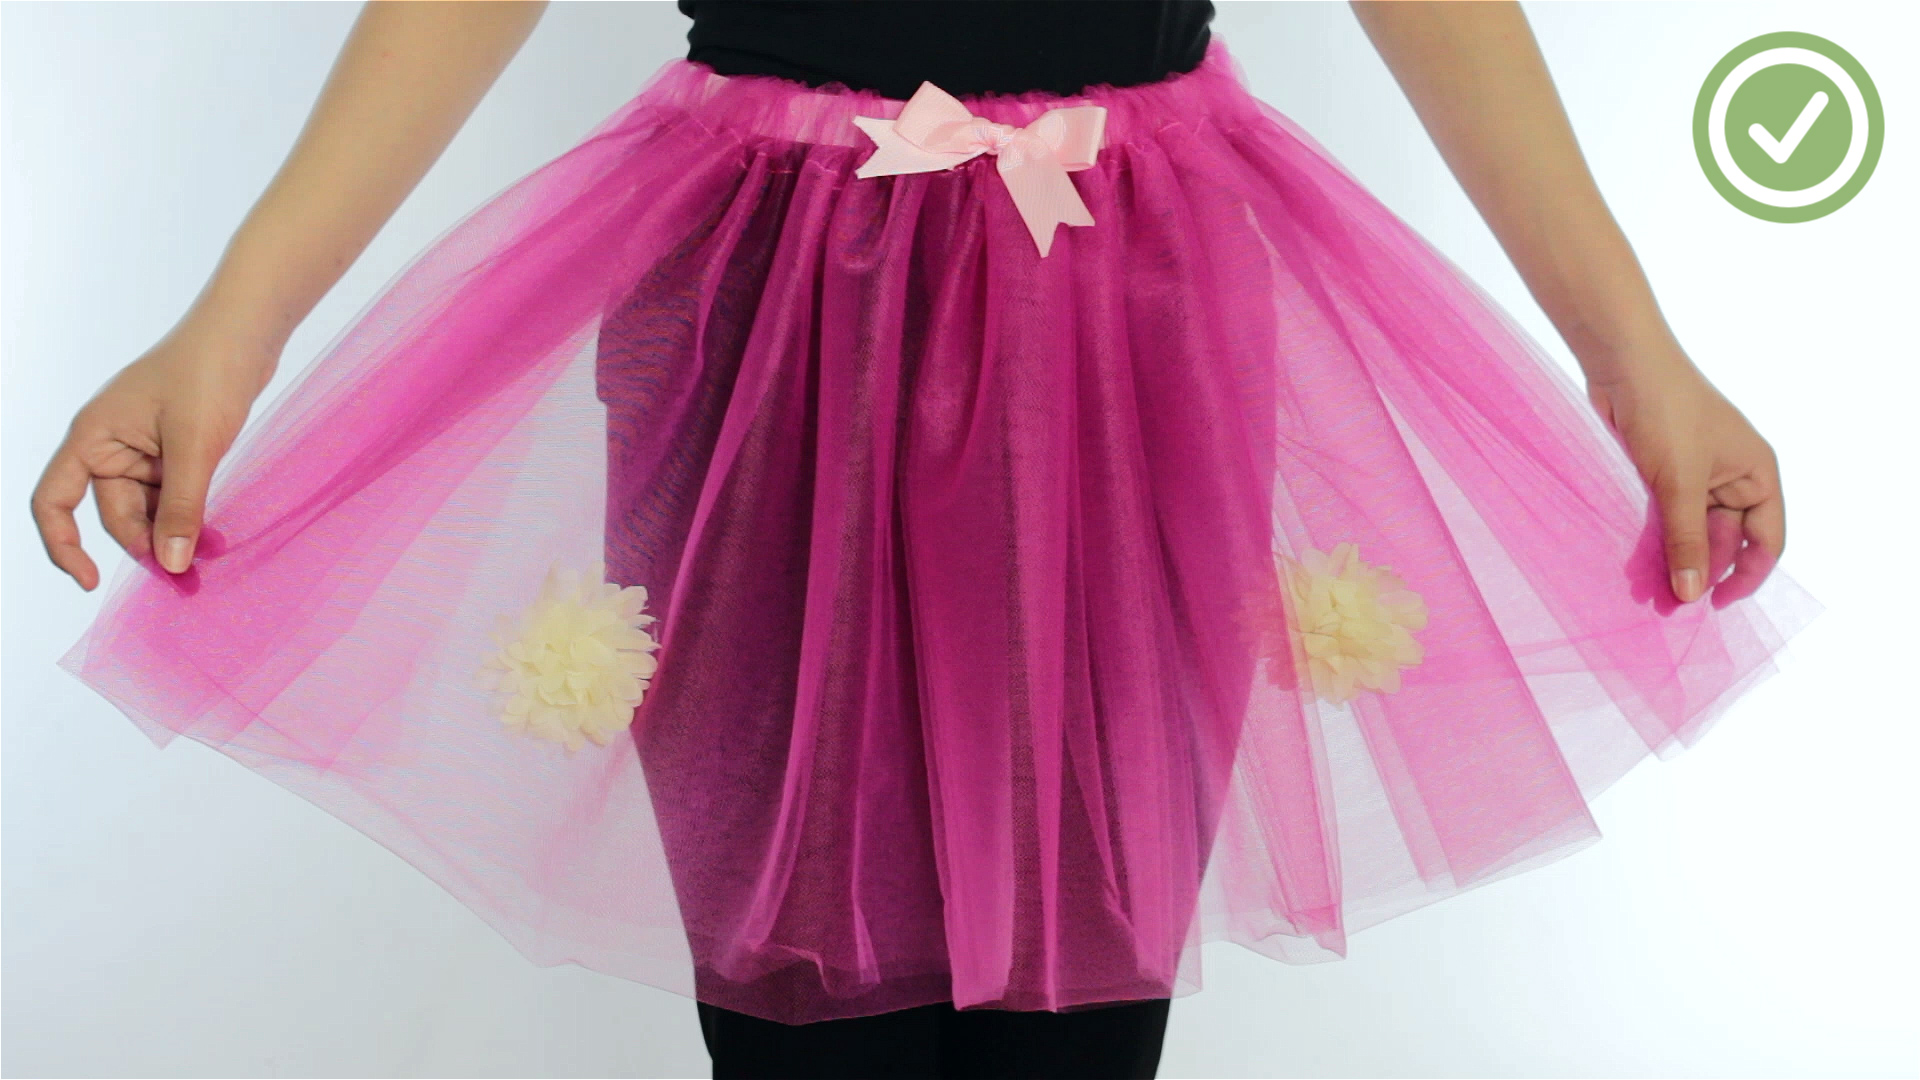
A tulle tutu is a skirt made from layers or strips of tulle, a lightweight mesh fabric commonly used for ballet costumes, veils, petticoats, party décor, and dress-up clothing. Tulle can be soft and floaty or crisp and structured, depending on the fiber and finish. For tutus, that airy stiffness is exactly what gives the skirt its puff, bounce, and “yes, I absolutely came here to twirl” personality.
There are two main ways to make a tutu at home: the no-sew method and the sewn gathered method. The no-sew tutu is perfect for beginners because it uses knots instead of machine stitching. The sewn version creates a cleaner, smoother waistband and can look more polished for older kids, adults, or costume pieces that need to survive more than one performance and one juice box incident.
Supplies You Need to Make a Tulle Tutu
Before you start, gather your materials. A little preparation makes the project faster, neater, and far less likely to end with you buried under a mountain of pink netting.
- 6-inch tulle rolls or tulle fabric by the yard
- Elastic, usually 3/4 inch to 1 inch wide
- Sharp fabric scissors or a rotary cutter
- Measuring tape
- Needle and thread or a sewing machine for closing the elastic
- Safety pin, clips, or pins
- Cardboard template for cutting even strips
- Ribbon, flowers, bows, glitter tulle, or appliqués for decoration
If you are making your first tutu, 6-inch tulle rolls are the easiest option. They are already the right width for a no-sew tutu, so you only need to cut the length. Tulle by the yard gives you more control over color blending, layering, and skirt shape, but it requires more measuring and cutting.
How Much Tulle Do You Need?
The amount of tulle depends on the waist size, skirt length, and how full you want the tutu to be. A tiny toddler tutu may use one 25-yard roll of 6-inch tulle. A fuller child-size tutu may use two or three rolls. An adult tutu may require several rolls or many yards of tulle from the bolt.
Here is a practical guide:
- Baby tutu: 25 to 50 yards of 6-inch tulle
- Toddler tutu: 50 to 75 yards
- Child tutu: 75 to 100 yards
- Teen or adult tutu: 100 to 200 yards, depending on fullness
For a fluffy tutu, plan on placing tulle strips close together all the way around the waistband. For a softer, lighter skirt, leave the knots slightly looser and use fewer strips. The universal tutu truth is simple: more tulle equals more drama. Less tulle equals a gentle flutter. Both are lovely, but only one can make a cat look personally offended from across the room.
How to Measure for a Tulle Tutu
Measure the Waist
Wrap a measuring tape around the waist where the tutu will sit. For children, this is usually the natural waist. For adults, you may prefer the natural waist or slightly lower, depending on the costume style. Cut your elastic about 1 inch shorter than the waist measurement so it fits snugly without sliding down. Overlap the elastic ends by about 1/2 inch and sew them together securely with a zigzag stitch or several strong hand stitches.
Choose the Tutu Length
Measure from the waist down to where you want the tutu to end. A toddler tutu may be 8 to 10 inches long. A child’s ballet-style tutu may be 10 to 14 inches. An adult costume tutu may range from 14 inches to knee-length or longer.
For the no-sew method, cut each tulle strip twice the finished skirt length, plus 1 to 2 extra inches for the knot. For example, if you want a 10-inch tutu, cut strips about 22 inches long. If you want a 14-inch tutu, cut strips about 30 inches long. The strip folds in half around the waistband, so doubling the length is essential.
How to Make a No-Sew Tulle Tutu
Step 1: Make the Waistband
Cut your elastic to size, overlap the ends, and sew them together. You can also tie the elastic, but sewing creates a flatter and more comfortable waistband. Place the elastic loop around the back of a chair, a large book, or a cardboard form. This keeps the waistband stretched gently while you work and makes it easier to tie the tulle evenly.
Step 2: Cut the Tulle Strips
Use a cardboard template to speed up cutting. Cut a piece of cardboard to the length you need for each strip, wrap the tulle around it several times, then cut along one end. This creates multiple strips at once and keeps them consistent. If using 6-inch rolls, keep the full width. If using tulle by the yard, cut strips about 4 to 6 inches wide.
Step 3: Fold and Loop the Tulle
Take one tulle strip and fold it in half. Place the folded loop under the elastic waistband. Pull the two loose ends over the elastic and through the loop. Gently tighten the knot. This is often called a lark’s head knot. It sounds fancy, but it is basically the craft version of saying, “You go here now.”
Step 4: Keep Adding Tulle
Continue tying strips around the entire waistband. Push each knot close to the previous one for a full tutu. For extra volume, tie two strips at once instead of one. Alternate colors for a striped look, use three shades of the same color for an ombré effect, or mix glitter tulle with matte tulle for sparkle that says “special occasion” without requiring a marching band.
Step 5: Fluff and Trim
Once the waistband is covered, shake the tutu gently and fluff the layers with your fingers. Trim uneven ends if needed. Tulle does not fray easily, so you do not need to hem it. That is one of the great joys of tulle: it looks fancy but behaves like it understands deadlines.
How to Make a Sewn Tulle Tutu
If you want a smoother, more professional finish, make a sewn tutu. Cut several wide layers of tulle, gather them along the top edge, and sew them to an elastic waistband. This method works well for older children, adults, dance costumes, and skirts that need a less knotted appearance.
Basic Sewn Method
- Cut two to six layers of tulle to the desired length.
- Stack the layers evenly.
- Sew a long gathering stitch near the top edge.
- Pull the bobbin thread to gather the tulle to the waist measurement.
- Sew the gathered tulle onto elastic using a zigzag stitch.
- Join the side seam if needed and trim the hem.
For a gathered tulle skirt, using about three times the waist measurement creates attractive fullness. Add more layers for a classic tutu effect or fewer layers for a softer fashion skirt. If the tulle is sheer, consider adding a lining made from satin, cotton, or jersey knit.
Best Tulle Types for a DIY Tutu
Not all tulle acts the same. Nylon tulle is common for craft tutus because it is light, affordable, and springy. Polyester tulle is widely available and holds shape well. Soft bridal tulle drapes more gently and works beautifully for romantic skirts, but it may not puff as dramatically. Glitter tulle is festive, but beware: glitter has ambitions. It will travel to your table, your floor, your socks, and possibly your neighbor’s dog.
For a beginner no-sew tutu, use medium-stiff tulle from a roll. For a fashion skirt, choose softer tulle by the yard. For a costume that needs big volume, use multiple layers or mix stiff tulle underneath with softer tulle on top.
Creative Tutu Ideas
Birthday Tutu
Use the birthday child’s favorite colors and add a satin ribbon bow at the back. Pink and gold, lavender and silver, or rainbow tulle all work beautifully for party photos.
Halloween Costume Tutu
A black tutu becomes a witch costume. Green becomes a fairy. Red and black become a ladybug. Orange and yellow become a pumpkin or candy corn look. Add wings, headbands, face paint, or a themed shirt, and suddenly your tutu has a career in costume design.
Ballet-Inspired Tutu
Use pale pink, white, or blush tulle with a simple elastic waistband. Keep the skirt short and full for a classic ballet look. Add a leotard and ballet flats for instant recital energy, even if the dancer’s main move is spinning until the furniture blurs.
Adult Tulle Skirt
For adults, make the tutu longer and slightly less stiff. Use soft tulle, a wide elastic waistband, and a lining. Black, champagne, navy, or dusty rose can look stylish rather than costume-like. Pair it with a fitted top, denim jacket, or simple sweater.
Common Tutu Problems and Easy Fixes
The Waistband Stretches Too Much
If you pull the knots too tightly, the elastic may stretch out while you work. Keep the knots snug but not strangled. The tulle should stay in place without squeezing the waistband into submission.
The Tutu Looks Flat
Add more strips, push the knots closer together, or tie two strips at once. You can also add a second layer by tying tulle to the lower holes of a crochet headband or adding another round over the same elastic.
The Tulle Is Uneven
Hang the tutu, fluff it, then trim the longest pieces. Do not chase perfection too aggressively. A handmade tutu should look lively, not like it was measured by a laser in a laboratory.
The Tutu Is Scratchy
Choose softer tulle, add a lining, or have the wearer use leggings or shorts underneath. This is especially important for toddlers, who are honest critics and will absolutely announce scratchiness to an entire room.
Care Tips for a Tulle Tutu
Store a tutu hanging up or loosely folded. If it gets wrinkled, use steam carefully from a distance. Do not press a hot iron directly onto tulle, because synthetic tulle can melt. Spot clean with mild soap and cool water when possible. If the tutu needs deeper cleaning, hand wash gently and air dry. Fluff it after drying to restore volume.
For glitter tulle, shake it outdoors before wearing. This will not remove all glitter, of course. Glitter is not removed; it is merely redistributed across the universe.
Real-Life Experience: What Making a Tulle Tutu Actually Feels Like
The first thing you learn when making a tulle tutu is that tulle has a personality. It is light, floaty, and beautiful, but it also likes to cling to everything. Your sweater, your chair, your scissors, your thoughts. The project usually begins with confidence: “This will take twenty minutes.” Then you cut the first ten strips and realize you are now in a committed relationship with mesh fabric.
Still, the rhythm becomes surprisingly enjoyable. Fold, loop, pull, tighten. Fold, loop, pull, tighten. After a while, the waistband starts to bloom. The flat elastic turns into something fluffy and ridiculous in the best possible way. That is the magic moment. You stop seeing strips and start seeing a tutu. It is a tiny craft miracle, like bread rising, but with more static electricity.
One helpful experience-based tip is to cut more tulle than you think you need. Running out of strips with three inches of waistband left is the crafting equivalent of a cliffhanger. If you are mixing colors, divide the strips into piles before tying them on. For example, if you want a pink, white, and gold pattern, stack the colors in repeating order. This prevents the classic “oops, all the gold is on one side” situation.
Another lesson: do not over-tighten the knots. At first, it feels responsible to pull each knot as tight as possible. Unfortunately, this can stretch the waistband and make the tutu too large. A gentle, firm tug is enough. The tulle should sit securely, but the elastic should still bounce back. Think handshake, not wrestling match.
If you are making a tutu for a child, measure while they are standing, then check the fit before you finish the entire skirt. Children grow, wiggle, snack, and change opinions quickly. A tutu that fits comfortably is more likely to be worn longer than twelve seconds. For very young kids, pair the tutu with leggings or shorts so the tulle does not bother their skin.
Color choice also matters more than expected. A single color looks clean and classic. Two colors feel playful. Three or more colors create party energy. Glitter tulle looks amazing in photos, but it sheds, so use it as an accent layer rather than the whole tutu unless you are emotionally prepared to sparkle until next Tuesday.
The final experience is the best one: watching someone put it on. A handmade tutu has instant mood-lifting power. Kids twirl. Adults laugh. Pets look confused but photogenic. And you, the maker, get the quiet satisfaction of knowing that a pile of netting became something joyful because you measured, tied, trimmed, and refused to surrender to static cling.
Conclusion
Making a tulle tutu is simple, affordable, and wonderfully customizable. With elastic, tulle strips, and a basic loop knot, you can create a no-sew tutu for birthdays, costumes, ballet play, photoshoots, or everyday dress-up. For a more polished finish, the sewn gathered method gives you a smooth waistband and elegant shape. The key is to measure carefully, cut consistent strips, use enough tulle for fullness, and keep the knots snug without stretching the elastic. Once you understand the basic technique, you can create tutus in any size, color, or theme. In other words, you are now one craft session away from becoming the household minister of fluff.