
There are home projects that look fancy, sound intimidating, and then secretly turn out to be mostly about patience, measuring twice, and not letting a nail gun make all your decisions. Learning how to trim out a cased opening and a half wall is one of those projects. It can transform a plain drywall opening into a finished architectural feature and turn a humble pony wall into something that looks intentional instead of “the framer left early.”
A cased opening is basically a doorway without a door. It may connect a dining room to a living room, a kitchen to a hallway, or a home office to the rest of the house. The casing covers the gap between the jamb extension and the drywall while creating a clean frame. A half wall, also called a pony wall, is usually capped with wood, trimmed along the sides, and finished to match the rest of the room’s millwork. When both are done well, the space feels polished, balanced, and custom.
This guide walks through tools, materials, measuring, cutting, installing casing, trimming a half wall, finishing details, and common mistakes. You do not need to be a master carpenter, but you do need a good plan, a sharp saw blade, and the emotional strength to admit when a board is 1/16 inch too long.
What Is A Cased Opening?
A cased opening is an interior wall opening finished with jamb boards and decorative casing instead of a swinging door. Think of it as a doorway that decided to retire from door duty and become trim work. The casing frames the opening, hides rough edges, and visually connects the space to the home’s other doors, windows, and baseboards.
Most cased openings include three main parts: the side jambs, the head jamb, and the casing. The jambs wrap the inside of the opening. The casing sits flat against the wall on both sides and overlaps the edge of the jamb. A small reveal, often around 1/8 inch to 3/16 inch, is left between the inside edge of the casing and the inside edge of the jamb. This reveal makes the trim look cleaner and helps hide small movement or unevenness.
What Is A Half Wall?
A half wall is a short wall that divides spaces without closing them off completely. It can define an entry, separate a kitchen from a dining area, line a stair opening, or create a visual boundary in an open floor plan. The top of the half wall is usually capped with a flat board, then dressed up with trim, molding, or returns.
Before trimming a half wall, make sure it is structurally sound. If it wobbles, squeaks, or feels like it has strong opinions about gravity, fix that first. Add blocking, tighten framing connections, or consult a contractor if the wall is tied to stairs, a guardrail, or a load-bearing area. Trim makes a wall pretty; it does not make a weak wall safe.
Tools And Materials You Will Need
Tools
- Tape measure
- Pencil
- Combination square or speed square
- Level
- Miter saw
- Table saw or circular saw for ripping jamb extensions and cap boards
- Finish nailer or hammer and finish nails
- Caulk gun
- Putty knife
- Stud finder
- Sanding block or random orbital sander
- Clamps
- Safety glasses and hearing protection
Materials
- Door casing or interior trim molding
- Jamb boards or extension jamb material
- Half-wall cap board, such as pine, poplar, oak, MDF, or hardwood
- Base cap, panel molding, or cove molding for decorative edges
- Wood glue
- Construction adhesive, if needed
- 1 1/4-inch to 2-inch finish nails
- Wood filler
- Paintable caulk
- Primer and paint or stain and clear finish
Step 1: Plan The Trim Style
Before cutting anything, decide what style you want. A simple colonial casing works well in many homes. Flat stock trim gives a clean Craftsman or modern look. Plinth blocks at the bottom of the casing can make the opening feel more substantial and help solve uneven baseboard transitions. If the home already has trim, match the profile as closely as possible. New trim does not need to shout, “I just moved in.”
For the half wall, decide whether the cap should be flush, slightly overhanging, or more decorative. A cap board that overhangs both sides by 3/4 inch to 1 inch often looks intentional and gives room for small molding underneath. If the wall connects to the cased opening, keep the proportions consistent. The goal is for the opening and half wall to look like one design decision, not two unrelated weekend adventures.
Step 2: Check The Opening And Wall For Problems
Use a level to check both sides of the cased opening. Measure the width at the top, middle, and bottom. Measure the height on both sides. If the opening is out of square, do not panic. Most houses are not perfectly square; they are more like polite suggestions of geometry.
For the half wall, check whether the top is level and flat. If drywall mud has left humps or ridges, scrape or sand them down. If the top plate is exposed, confirm that the framing is straight. A cap board will reveal every wave underneath it, so fix the surface before installation.
Step 3: Install Or Adjust The Jamb Boards
A clean cased opening starts with jamb boards that sit flush with the drywall on both sides. If the wall is standard 2×4 framing with 1/2-inch drywall, a common jamb width may be around 4 9/16 inches. Older homes, plaster walls, or unusual framing may require custom ripping.
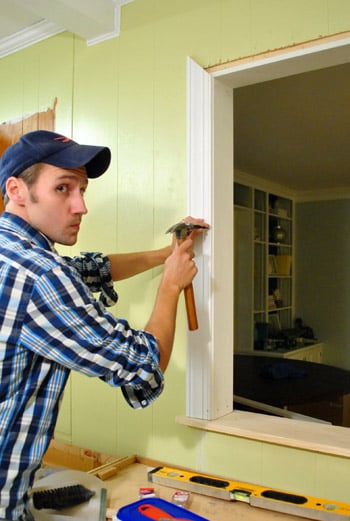
Cut the two side jambs first, then the head jamb. Dry-fit everything before nailing. The head jamb should sit level across the top, and the side jambs should be plumb. Use shims where necessary. Fasten through the jambs into framing with finish nails, keeping the nail heads slightly below the surface. If the jamb edges are proud of the drywall, the casing will rock. If they are recessed too far, the casing may tip inward. Aim for flush and boring. In trim carpentry, boring is beautiful.
Step 4: Mark The Reveal Lines
Reveal lines are the secret to professional-looking casing. Use a combination square set to about 3/16 inch and mark a light pencil line around the jamb. This line shows where the inside edge of the casing will land. Do this on both sides of the opening.
Do not install casing flush with the inside edge of the jamb. A reveal adds shadow, hides slight imperfections, and makes seasonal movement less obvious. Without a reveal, even a tiny drywall bump can make the trim look crooked.
Step 5: Cut And Install The Head Casing
Measure from the reveal mark on one side jamb to the reveal mark on the other side jamb. For mitered casing, cut both ends of the head casing at 45 degrees. For square Craftsman trim, cut the head casing straight and allow it to overhang or align according to your design.
Dry-fit the head piece before nailing. If the miters are open, check whether the jamb is square or whether your saw needs adjustment. A perfect miter requires two accurate 45-degree cuts that meet to form a clean 90-degree corner. When the fit looks good, add a small amount of wood glue to the miter area and fasten the head casing with finish nails. Nail into the jamb near the inside edge and into the framing near the outside edge.
Step 6: Cut And Install The Side Casing
Hold the first side casing against the reveal line. Mark where it meets the head casing. Cut the top at 45 degrees for mitered trim or straight for butt-joint trim. If the floor is uneven, scribe or slightly trim the bottom so the casing sits flat. Repeat for the opposite side.
Install the side casing carefully. Start by aligning the miter or butt joint at the top, then work downward. Use a few nails at first rather than fully committing. This gives you room to adjust. Once the reveal is even and the joint looks tight, finish nailing the casing in place.
Step 7: Trim Both Sides Of The Opening
A cased opening usually needs casing on both faces of the wall. Repeat the same steps on the other side: mark reveals, cut the head casing, cut the side casing, dry-fit, glue joints, and nail. Stand back often and compare both sides. The trim does not have to be mathematically identical down to the molecule, but it should look balanced to the eye.
If one room has taller baseboards or a different trim style, consider using plinth blocks. They can bridge differences in thickness and height while making the transition look deliberate.
Step 8: Measure The Half-Wall Cap
Now move to the half wall. Measure the length and width of the top. Decide how much overhang you want on the sides and ends. For example, if the drywall-covered wall is 4 1/2 inches wide and you want a 3/4-inch overhang on each side, rip the cap board to 6 inches wide.
If the half wall ends at a cased opening, think carefully about how the cap terminates. It may die into the casing, wrap around the end, or stop with a small return. A clean return makes the cap look finished instead of chopped off. Dry-fit the cap and mark all returns before cutting.
Step 9: Cut, Ease, And Test-Fit The Cap Board
Cut the cap board to length. If it wraps an outside corner, use mitered returns or a carefully fitted end cap. Ease sharp edges with sandpaper or a router roundover bit. A slightly softened edge feels better to the hand and holds paint more evenly.
Place the cap on the wall and check the overhang on both sides. If the wall bows, split the difference visually. You may not be able to make the cap perfectly centered everywhere, but you can make it look right from normal viewing angles. This is where finish carpentry becomes part craft, part diplomacy.
Step 10: Attach The Half-Wall Cap
Apply a moderate bead of construction adhesive or wood glue to the top of the wall, depending on the surface. Set the cap in place and clamp it if possible. Nail down through the cap into framing or blocking. If you are working with stain-grade hardwood, use fewer visible fasteners and consider fastening from below where possible.
Do not rely only on nails into drywall. A half-wall cap gets touched, leaned on, decorated, and occasionally used as a temporary landing zone for keys, coffee mugs, and mysterious screws. It needs solid attachment into framing or blocking.
Step 11: Add Decorative Molding Under The Cap
To make the half wall look more finished, add small molding under the cap overhang. Cove molding, base cap, panel molding, or small quarter round can all work. Cut corners carefully and use small finish nails or pin nails. If the wall cap meets the cased opening, cope or miter the molding so the transition looks clean.
This small detail can make a big difference. Without molding, the cap may look like a board sitting on drywall. With molding, it looks like built-in millwork.
Step 12: Continue Baseboard And Wall Trim
If the half wall has exposed sides, continue the baseboard along the bottom. Match the room’s existing baseboard profile when possible. On outside corners, use mitered joints. On inside corners, coping often creates a tighter fit, especially in older homes where corners are rarely perfect.
If the half wall has panels, picture-frame molding, or wainscoting, lay out the design with painter’s tape first. Keep spacing consistent. A simple design with even margins usually looks better than a complicated pattern squeezed into a small wall.
Step 13: Fill, Caulk, Sand, And Finish
Once all casing and half-wall trim are installed, fill nail holes with wood filler. Let it dry, then sand smooth. Caulk small gaps between trim and wall using paintable caulk. Do not caulk stain-grade joints unless the caulk is specifically designed for that finish and color-matched.
Prime bare wood or MDF before painting. Paint trim with a durable semi-gloss or satin finish. For stained wood, sand progressively, apply stain evenly, and protect the surface with polyurethane or another clear finish. A half-wall cap gets more handling than door casing, so durability matters.
Safety And Code Considerations
If the half wall is located near stairs, a landing, balcony, or any drop-off, it may function as a guard. In that case, local building code requirements can affect height, strength, and openings. Do not reduce the height or weaken the wall just for appearance. Check with your local building department when the wall is part of a stair or elevated area.
Also watch for electrical wiring inside half walls. Outlets are common in pony walls, especially near kitchens and living areas. Turn off power before cutting, nailing, or adding fasteners near electrical boxes. A finish nail through a hidden wire is not a “learning moment” anyone needs.
Common Mistakes To Avoid
Skipping The Reveal
Installing casing flush with the jamb edge often makes the trim look amateur. Mark reveal lines every time.
Nailing Too Close To The Edge
Thin trim can split if nails are placed too close to the edge. Adjust the nail angle and use the correct nail size.
Assuming The Opening Is Square
Measure each piece individually. Do not cut all parts based on one measurement unless you enjoy buying extra trim.
Ignoring The Half-Wall Overhang
A cap with uneven overhang is very noticeable. Dry-fit, center, and adjust before fastening.
Over-Caulking
Caulk should hide tiny gaps, not sculpt new architecture. Use a small bead and smooth it cleanly.
Best Trim Styles For A Cased Opening And Half Wall
For a traditional room, colonial casing with a rounded half-wall cap feels familiar and warm. For a Craftsman look, use flat stock casing, square edges, and plinth blocks. For a modern space, choose simple boards with minimal profiles and crisp painted lines. If the opening is wide, consider a wider head casing or a subtle architrave detail to give the opening more visual weight.
The half-wall cap should relate to the opening. If the casing is thick and bold, a thin cap may look underfed. If the casing is sleek and modern, a bulky cap may feel out of place. Good trim design is less about being expensive and more about being consistent.
Final Thoughts
Learning how to trim out a cased opening and a half wall is one of the most satisfying interior trim projects because the results are visible immediately. The room looks more finished, the transition between spaces feels intentional, and the half wall becomes part of the design instead of just a drywall divider.
The key is to slow down during layout. Mark clean reveal lines, measure each trim piece separately, dry-fit before nailing, and treat the half-wall cap like furniture rather than scrap wood with confidence issues. When the casing, cap, molding, caulk, and paint all come together, the project can make an ordinary opening look custom-built.
Real-World Experience: What You Learn When Trimming A Cased Opening And A Half Wall
The first thing most DIYers learn during this project is that walls have a sense of humor. You may begin with the innocent belief that the opening is square, the drywall is flat, and the floor is level. Then the tape measure, level, and miter saw gather around like witnesses in a courtroom and reveal the truth. One side of the opening may be 1/8 inch taller than the other. The drywall corner may have a little belly from joint compound. The half wall may be straight at one end and slightly bowed at the other. None of this means the project is doomed. It means you are working in a real house.
In practice, the best results come from measuring where the trim will actually sit, not where you wish it would sit. For casing, holding each piece in place and marking directly from the reveal line is often more reliable than doing all the math on paper. The same goes for the half-wall cap. A cap board may measure perfectly, but once it sits on the wall, the visual overhang matters more than the theoretical number. Sometimes you split the difference so the cap looks centered from the room, even if the drywall underneath is slightly inconsistent.
Another lesson is that dry-fitting saves money and mood. Before glue or nails enter the story, test every joint. Put the head casing up, hold the side casing in place, and check the miter. If the joint is open at the outside corner, the angle may need a tiny adjustment. If it is open at the inside corner, the opposite adjustment may be needed. A small correction at the saw can save a large amount of caulk later. Caulk is helpful, but it should not be promoted to project manager.
The half wall teaches a different kind of patience. Because the cap is horizontal, people touch it, lean on it, and see it from above. That means sanding, edge easing, and finish quality matter. A sharp cap edge may look crisp for five minutes, but it chips easily and feels rough. A lightly rounded edge holds paint better and feels more finished. If staining the cap, take extra time with sanding and test the stain on scrap. Stain has a magical ability to highlight sanding scratches you were absolutely sure were gone.
Finally, the project teaches that trim is about rhythm. The cased opening, baseboards, plinth blocks, half-wall cap, and small molding under the cap should all feel related. When the proportions match, the room feels calm. When they fight each other, the eye notices even if no one can explain why. The best compliment is when someone walks in and says, “This looks like it was always here.” That is the finish carpenter’s quiet victory: no drama, no weird gaps, no heroic explanation required.
Note: Before trimming any half wall near stairs, landings, balconies, or drop-offs, verify local code requirements for guard height, openings, and structural strength. For walls with outlets or switches, turn off power and confirm wiring locations before fastening trim.