
Some DIY projects are useful. Some are cute. And some pull off the rare trick of being practical and charming enough to make the neighbors slow down and stare for a second. A pallet sign and garden planter all in one belongs in that elite category. It gives you a place to show off your house number, a welcome message, a family name, or even a seasonal quote while also creating room for flowers, herbs, or trailing greenery. In other words, it works hard and looks good doing it.
If you love budget-friendly outdoor decor, this project has a lot going for it. Reclaimed pallet wood gives the finished piece rustic character without making your wallet cry. The built-in planter adds life and color, which means the sign never feels stiff or overly “craft fair.” It becomes part of the landscape. It can sit by a front porch, frame a mailbox, dress up a patio corner, or greet guests at the garden gate like a very stylish wooden butler.
The trick, of course, is building it the smart way. That means choosing safe pallet wood, creating proper drainage, using the right planter depth, and finishing the wood so your masterpiece does not fall apart after two thunderstorms and one dramatic heat wave. This guide walks you through exactly how to plan, build, style, and enjoy a pallet sign planter combo that looks custom-made without demanding custom-furniture money.
Why This DIY Project Works So Well
A pallet sign and garden planter all in one solves two decorating problems at once. First, it adds vertical interest. Outdoor spaces often have plenty happening at ground level, but not much at eye level unless you install a trellis, hanging basket, or wall feature. A sign gives the garden structure and visibility. Second, the planter softens the wood with leaves, flowers, or herbs, which keeps the overall look warm and inviting instead of hard or boxy.
It is also wildly flexible. Want farmhouse charm? Distressed white paint and black lettering will do the job. Prefer a cleaner modern look? Use a dark stain, simple block font, and a monochrome planting scheme. Going for cottage garden energy? Add pastel blooms and handwritten-style lettering. This project is like the little black dress of outdoor decor: dress it up, dress it down, and it still works.
Even better, it can be built in a range of sizes. A compact version works well on a balcony or apartment patio. A taller piece can anchor a front entry or sit beside a walkway. You can keep the planter shallow for succulents and annuals or make it deeper for herbs like basil, parsley, thyme, and chives. The bones stay the same. The personality is up to you.
Start With Safe, Usable Pallet Wood
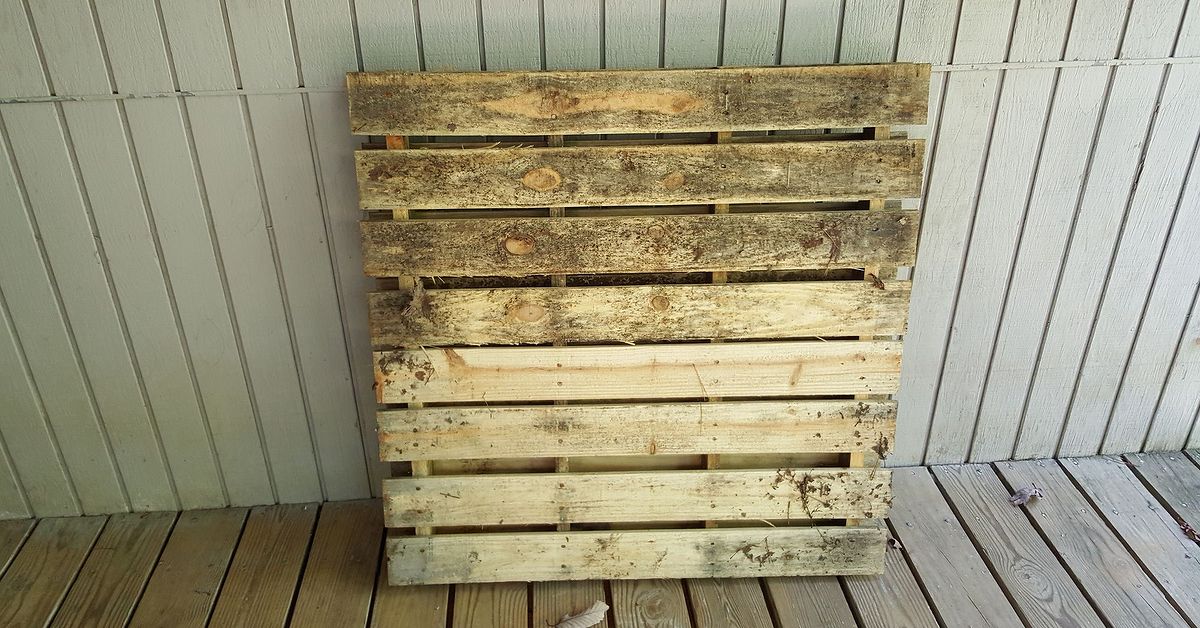
Before you start sawing, painting, or dreaming about petunias, pay attention to the pallet itself. Not every pallet is suitable for a garden project. The best pallet wood is clean, dry, sturdy, and clearly marked. Avoid boards that smell odd, have major stains, show signs of spills, or look like they survived a wrestling match with a forklift.
How to Choose the Right Pallet
Look for pallets stamped HT, which means the wood was heat-treated. That is the safest direction for a decorative outdoor build. Skip pallets marked MB, which indicates methyl bromide treatment. Also pass on unmarked pallets if you cannot verify where they came from or what they carried. The goal is curb appeal, not mystery chemistry.
Next, inspect the boards. You want wood that is not crumbling, splitting into dramatic splinters, or sagging under its own emotional baggage. Minor wear is fine; in fact, that weathered texture is part of the charm. Just make sure the boards are structurally sound enough to hold screws, a planter box, and damp soil.
Prep the Wood Before Building
Give the pallet a thorough cleaning. Brush away dirt, hose it off lightly if needed, and let it dry completely. Sand rough edges, especially anywhere hands might touch the finished project. This is not the moment to preserve every splinter for “authentic rustic appeal.” Your guests should admire the sign, not leave with a tiny piece of it in their finger.
If you are disassembling the pallet, go slowly. A pry bar, hammer, and patience will help you remove boards without cracking them. If the pallet has a nice shape already, you can also leave much of it intact and build the planter box onto the front or bottom portion. That shortcut saves time and keeps the rustic structure visible.
Tools and Materials You Will Likely Need
This project is approachable for beginners, especially if you keep the design simple. A basic materials list usually includes pallet boards, exterior screws, a drill, a saw, sandpaper, measuring tape, landscape fabric or liner material, potting mix, and exterior paint or stain. For the sign portion, you can use stencils, vinyl lettering, hand-painted text, or even a routed wood plaque attached to the pallet backing.
You may also want wood glue, corner brackets, a staple gun, and a clear exterior sealer. If your planter will sit directly on the ground, add small feet or risers so water can drain instead of pooling underneath. That little detail can make the difference between “adorable garden feature” and “why is this thing quietly rotting in June?”
How to Build a Pallet Sign and Garden Planter All In One
Step 1: Decide on the Layout
The simplest design uses a vertical pallet back as the sign and a rectangular planter box attached near the base. Sketch the shape before you cut anything. Decide where the lettering will go, how large the planter should be, and whether the finished piece will lean, hang, or stand on its own.
If it will stand alone, widen the base or add side supports. If it will sit against a wall or fence, you can keep the structure slimmer. Think about where it will live before you build it. Outdoor decor always looks smarter when it acts like it belongs there.
Step 2: Build the Planter Box
Cut pallet boards or other scrap wood to form a rectangular box. For many flowers and herbs, a planter depth of around 8 to 12 inches works well. If you want to grow larger herbs or more demanding edibles, go a little deeper. Secure the corners with exterior screws, and make sure the box feels sturdy before you fill it with soil. Wet potting mix gets heavy fast.
Drill drainage holes in the bottom. This step is not optional unless your goal is root rot with a side of disappointment. Good drainage helps excess water escape and prevents the soil from turning into a swamp. Lining the interior with landscape fabric can help hold soil in place while still letting water move through.
Step 3: Attach the Planter to the Sign Back
Once the planter box is built, attach it securely to the pallet back or sign frame. Use long exterior screws and reinforce the connection from the back side if possible. This connection matters more than people think. A lightly attached planter looks fine right until it is full of damp soil, lush greenery, and gravity’s full attention.
If you want a more polished look, trim the front edge with an extra board to hide screw heads and rough cuts. A narrow ledge along the top of the planter can also make the build look more intentional, almost like something from a boutique garden shop instead of a Saturday spent arguing with reclaimed lumber.
Step 4: Prime, Paint, or Stain the Wood
Outdoor wood needs protection from moisture, sun, and seasonal mood swings. If you want a painted sign, start with proper surface prep: sand, clean, and prime as needed. Then use exterior-grade paint suitable for wood. Acrylic exterior finishes are a solid choice for resisting cracking, peeling, and fading. If you prefer a more natural look, use an exterior stain and sealer that lets the wood grain show through.
For lettering, keep contrast in mind. Dark text on a light background is classic and readable. White lettering on a charcoal or stained background looks crisp and modern. You can use a stencil for a neat finish or freehand it if you trust your brush and your bravery. Keep the wording short enough to read from a distance. “Welcome” works. A seven-line quote about inner peace and begonias is less ideal.
Step 5: Fill and Plant
Use a quality potting mix rather than digging up random backyard soil. Potting mix drains better, stays lighter, and is better suited for containers. You can enrich it with compost if you want stronger growth. Then plant based on light conditions. If the sign planter sits in full sun, choose sun-loving herbs or flowers. If it will live near a shaded porch, select plants that tolerate less direct light.
Water thoroughly after planting, then top the soil with a thin layer of mulch if desired. Mulch helps reduce moisture loss and gives the planter a finished, tidy look. It is the gardening equivalent of putting on shoes before leaving the house.
Best Plants for a Pallet Sign Planter
Herbs That Earn Their Keep
Herbs are one of the smartest choices for this project because they look good, smell great, and give you an excuse to say things like, “This pasta has fresh thyme from the sign by the porch.” Basil, parsley, thyme, chives, oregano, and sage all work beautifully in a compact planter if the light is right. Just remember that mint likes to take over, so it is happiest in its own container instead of elbowing everyone else aside.
For a kitchen-garden style, combine upright parsley or chives with mounding basil and trailing thyme. The result is lush, useful, and attractive enough that visitors may assume you have your life together. Let them believe it.
Flowers for Color and Curb Appeal
If you want more visual drama, annual flowers are a natural fit. Try petunias, calibrachoa, pansies, geraniums, alyssum, or sweet potato vine depending on the season and sun exposure. A simple design approach is the classic thriller, filler, spiller formula: one taller focal plant, one mounding plant to fill space, and one trailing plant to soften the edges.
For example, a compact ornamental grass or salvia can serve as the thriller, geranium or coleus as the filler, and trailing calibrachoa or ivy as the spiller. That kind of layered planting makes the whole sign planter look more designed and less like you tossed in three random plants while holding a coffee in one hand.
Design Ideas That Make the Finished Piece Stand Out
The beauty of a pallet sign planter is that it can be personalized without becoming fussy. A few strong design directions include:
Front Porch Welcome Sign: Use a vertical format with “Welcome” in large letters and a flower-filled planter at the bottom.
House Number Planter: Add bold address numerals for a functional entry feature that actually looks nice.
Family Name Garden Sign: Stain the wood dark, use white script lettering, and plant soft greenery for a polished farmhouse feel.
Seasonal Display: Swap plants and sign accents through the year. Think pansies in spring, herbs in summer, mums in fall, and evergreen cuttings or faux stems in winter.
Kitchen Herb Station: Place the piece near a back door or patio and label it with something playful like “Snip Here” or “Herb Your Enthusiasm.” Yes, it is a dad joke. Yes, it still works.
Common Mistakes to Avoid
The biggest mistake is using unsafe or questionable pallet wood. The second biggest is forgetting drainage. After that, trouble usually comes from making the planter too shallow, overcrowding plants, or choosing finishes meant for indoor craft projects rather than outdoor use.
Another common issue is poor placement. A gorgeous planter full of sun-loving basil will not thrive in deep shade. Likewise, delicate flowers may fry in a blazing hot reflected-light zone near concrete or brick. Match the plant choices to the site, and the project instantly becomes easier to maintain.
Finally, do not overload the sign area with too much wording or decoration. A few clean visual elements usually feel more stylish than a sign that looks like it lost a fight with the entire craft aisle.
Why This Project Is Worth the Effort
A pallet sign and garden planter all in one is one of those rare DIY builds that punches above its weight. It is affordable, customizable, useful, and surprisingly high-impact for the amount of material involved. It lets you reuse wood, show off your style, and add living color to an entryway, patio, or garden corner without committing to a giant landscaping overhaul.
It also ages well when built properly. As the wood softens and the plants spill over the edges, the piece starts to feel settled into the landscape. It becomes less like a project and more like part of the home. That is the sweet spot in outdoor design: when something looks intentional, lived-in, and just a little bit brag-worthy.
If you want one DIY idea that blends rustic charm, practical planting space, and a sign you can personalize for years to come, this is it. Just build it with care, plant it with purpose, and do not skimp on the drainage holes. Your flowers, herbs, and future self will all be grateful.
Real-Life Experiences With a Pallet Sign and Garden Planter All In One
One of the reasons this project has become so popular is that it tends to create stories along with curb appeal. People rarely build one, set it outside, and never think about it again. Instead, it becomes part of daily life. It is where someone snips basil before dinner, swaps out flowers for the season, or notices that their front porch finally looks finished instead of vaguely abandoned.
A lot of first-time builders start this project because they want something decorative near the entry without spending a fortune on custom outdoor decor. They may have a lonely porch corner, a bland mailbox area, or a side yard that needs a focal point. Once the sign planter goes in, the space suddenly feels designed. That little transformation can be weirdly satisfying. It is hard to overstate the emotional power of a project that makes your home look more welcoming every time you pull into the driveway.
Another common experience is that the planter changes with the seasons and keeps the project feeling fresh. In spring, people often fill it with pansies, alyssum, and cheerful greenery. By summer, it becomes an herb station packed with basil, thyme, and parsley. In fall, it turns into a cozy display with mums, mini pumpkins, or ornamental kale. Even winter versions can look great with pine branches, faux berries, and a simple painted sign. Because the wood structure stays the same, changing the planting is like giving the whole piece a new outfit without rebuilding anything.
Many DIYers also discover that this project teaches practical lessons fast. For example, people who skip drainage holes tend to remember that mistake forever. So do the folks who put shade plants in six hours of afternoon sun and then act shocked when the leaves stage a full protest. On the brighter side, many builders find that once they get the basics right, the maintenance is easier than expected. Watering a compact planter is simple, deadheading flowers takes only a few minutes, and herbs reward even minimal care with fragrance and flavor.
Families often end up liking the sign portion more than they expected. Kids enjoy helping paint a seasonal message. Couples change the wording for holidays, parties, or birthdays. Some homeowners use it for address numbers so deliveries are easier to spot. Others add funny lines that make guests smile before they even ring the bell. It is a small feature, but it has personality. In a world of mass-produced outdoor decor, that personal touch matters.
There is also something satisfying about using reclaimed materials in a way that feels elevated rather than makeshift. A pallet can start out looking rough, ordinary, and destined for a back corner somewhere. But with sanding, paint, a sturdy planter box, and a little design sense, it becomes a feature piece. That transformation is part of the appeal. It proves that outdoor style does not always come from expensive furniture sets or giant landscaping budgets. Sometimes it starts with a free pallet, a can of paint, and an unreasonable amount of confidence on a Saturday morning.
Perhaps the best experience of all is that the project invites interaction. Unlike a sign that just hangs there or a planter that sits quietly in a corner, this piece does both jobs at once. It catches the eye, says something, grows something, and keeps changing over time. That makes it feel alive in more ways than one. And honestly, any project that can welcome guests, hold flowers, grow herbs, and make the porch look more expensive than it was deserves a little respect.