
A glowing roof peak can turn an ordinary house into the neighborhood’s holiday postcard. Unfortunatelips, and enough confidence to concern the neighbors.
The safer and easier approach is to complete most of the work on the ground. Measure the roofline, test the lights, attach the clips, map the electrical route, and choose a calm, dry day before climbing anything. With the right preparation, you can create a clean line of Christmas lights without puncturing shingles, overloading outlets, or performing accidental rooftop gymnastics.
This guide explains how to hang Christmas lights on a roof peak in 10 practical steps. It also covers equipment selection, ladder placement, weather-resistant connections, common mistakes, removal, storage, and experience-based lessons that can make next year’s installation even faster.
What You Need to Hang Christmas Lights on a Roof Peak
Gather all your equipment before beginning. A typical installation requires:
- Outdoor-rated LED Christmas lights
- Roof, shingle, gutter, or all-purpose light clips
- An outdoor-rated extension cord
- A GFCI-protected exterior receptacle
- A weather-resistant outdoor timer
- A sturdy extension ladder
- A measuring tape or laser measure
- Work gloves and nonslip shoes
- A tool pouch or bucket with a ladder hook
- A responsible adult helper
Use lights labeled for outdoor installation and evaluated by a nationally recognized testing laboratory. Inspect every strand for cracked sockets, exposed wires, loose plugs, or brittle insulation. A damaged string of lights is not a charming holiday antique. It is an electrical problem wearing a festive disguise.
LED Christmas lights are usually the most convenient option. They use less electricity, generate less heat, and often permit more connected strands than incandescent lights. However, connection limits vary, so always follow the instructions printed on the product or packaging.
How to Hang Christmas Lights on a Roof Peak in 10 Steps
Step 1: Inspect the Roof and Choose the Safest Route
Begin by studying the house from the ground during daylight. Identify the roof peak, eaves, gutters, valleys, tree branches, overhead wires, electrical service lines, and possible ladder positions.
Decide whether you can complete the installation from an extension ladder. Avoid walking on the roof whenever possible, especially when the roof is steep, wet, frosty, fragile, or several stories above the ground. High peaks, tile roofs, slate roofs, complicated architecture, and areas close to power lines are usually better handled by a professional installer.
Choose a dry, calm day. Even a moderate breeze can turn a loose light strand into an unhelpful holiday kite. Never work on a roof or ladder during rain, snow, frost, or icy conditions.
Step 2: Measure the Roof Peak
Measure both sloping sides of the gable, then include the distance needed to route the lead wire toward the outlet. Add approximately 10 percent to your estimate for connections, corners, and minor adjustments.
If measuring the roof directly would be unsafe, use a laser measuring tool, building plans, known fascia dimensions, or careful ground-based estimates. It is better to purchase a little extra lighting than to discover a three-foot shortage after reaching the peak.
Sketch the layout on paper. Mark the starting point, strand connections, peak position, extension-cord route, timer, and outlet. Make sure the male plug begins near the power source rather than ending on the opposite side of the house.
Step 3: Choose Clips That Match the Roof and Bulbs
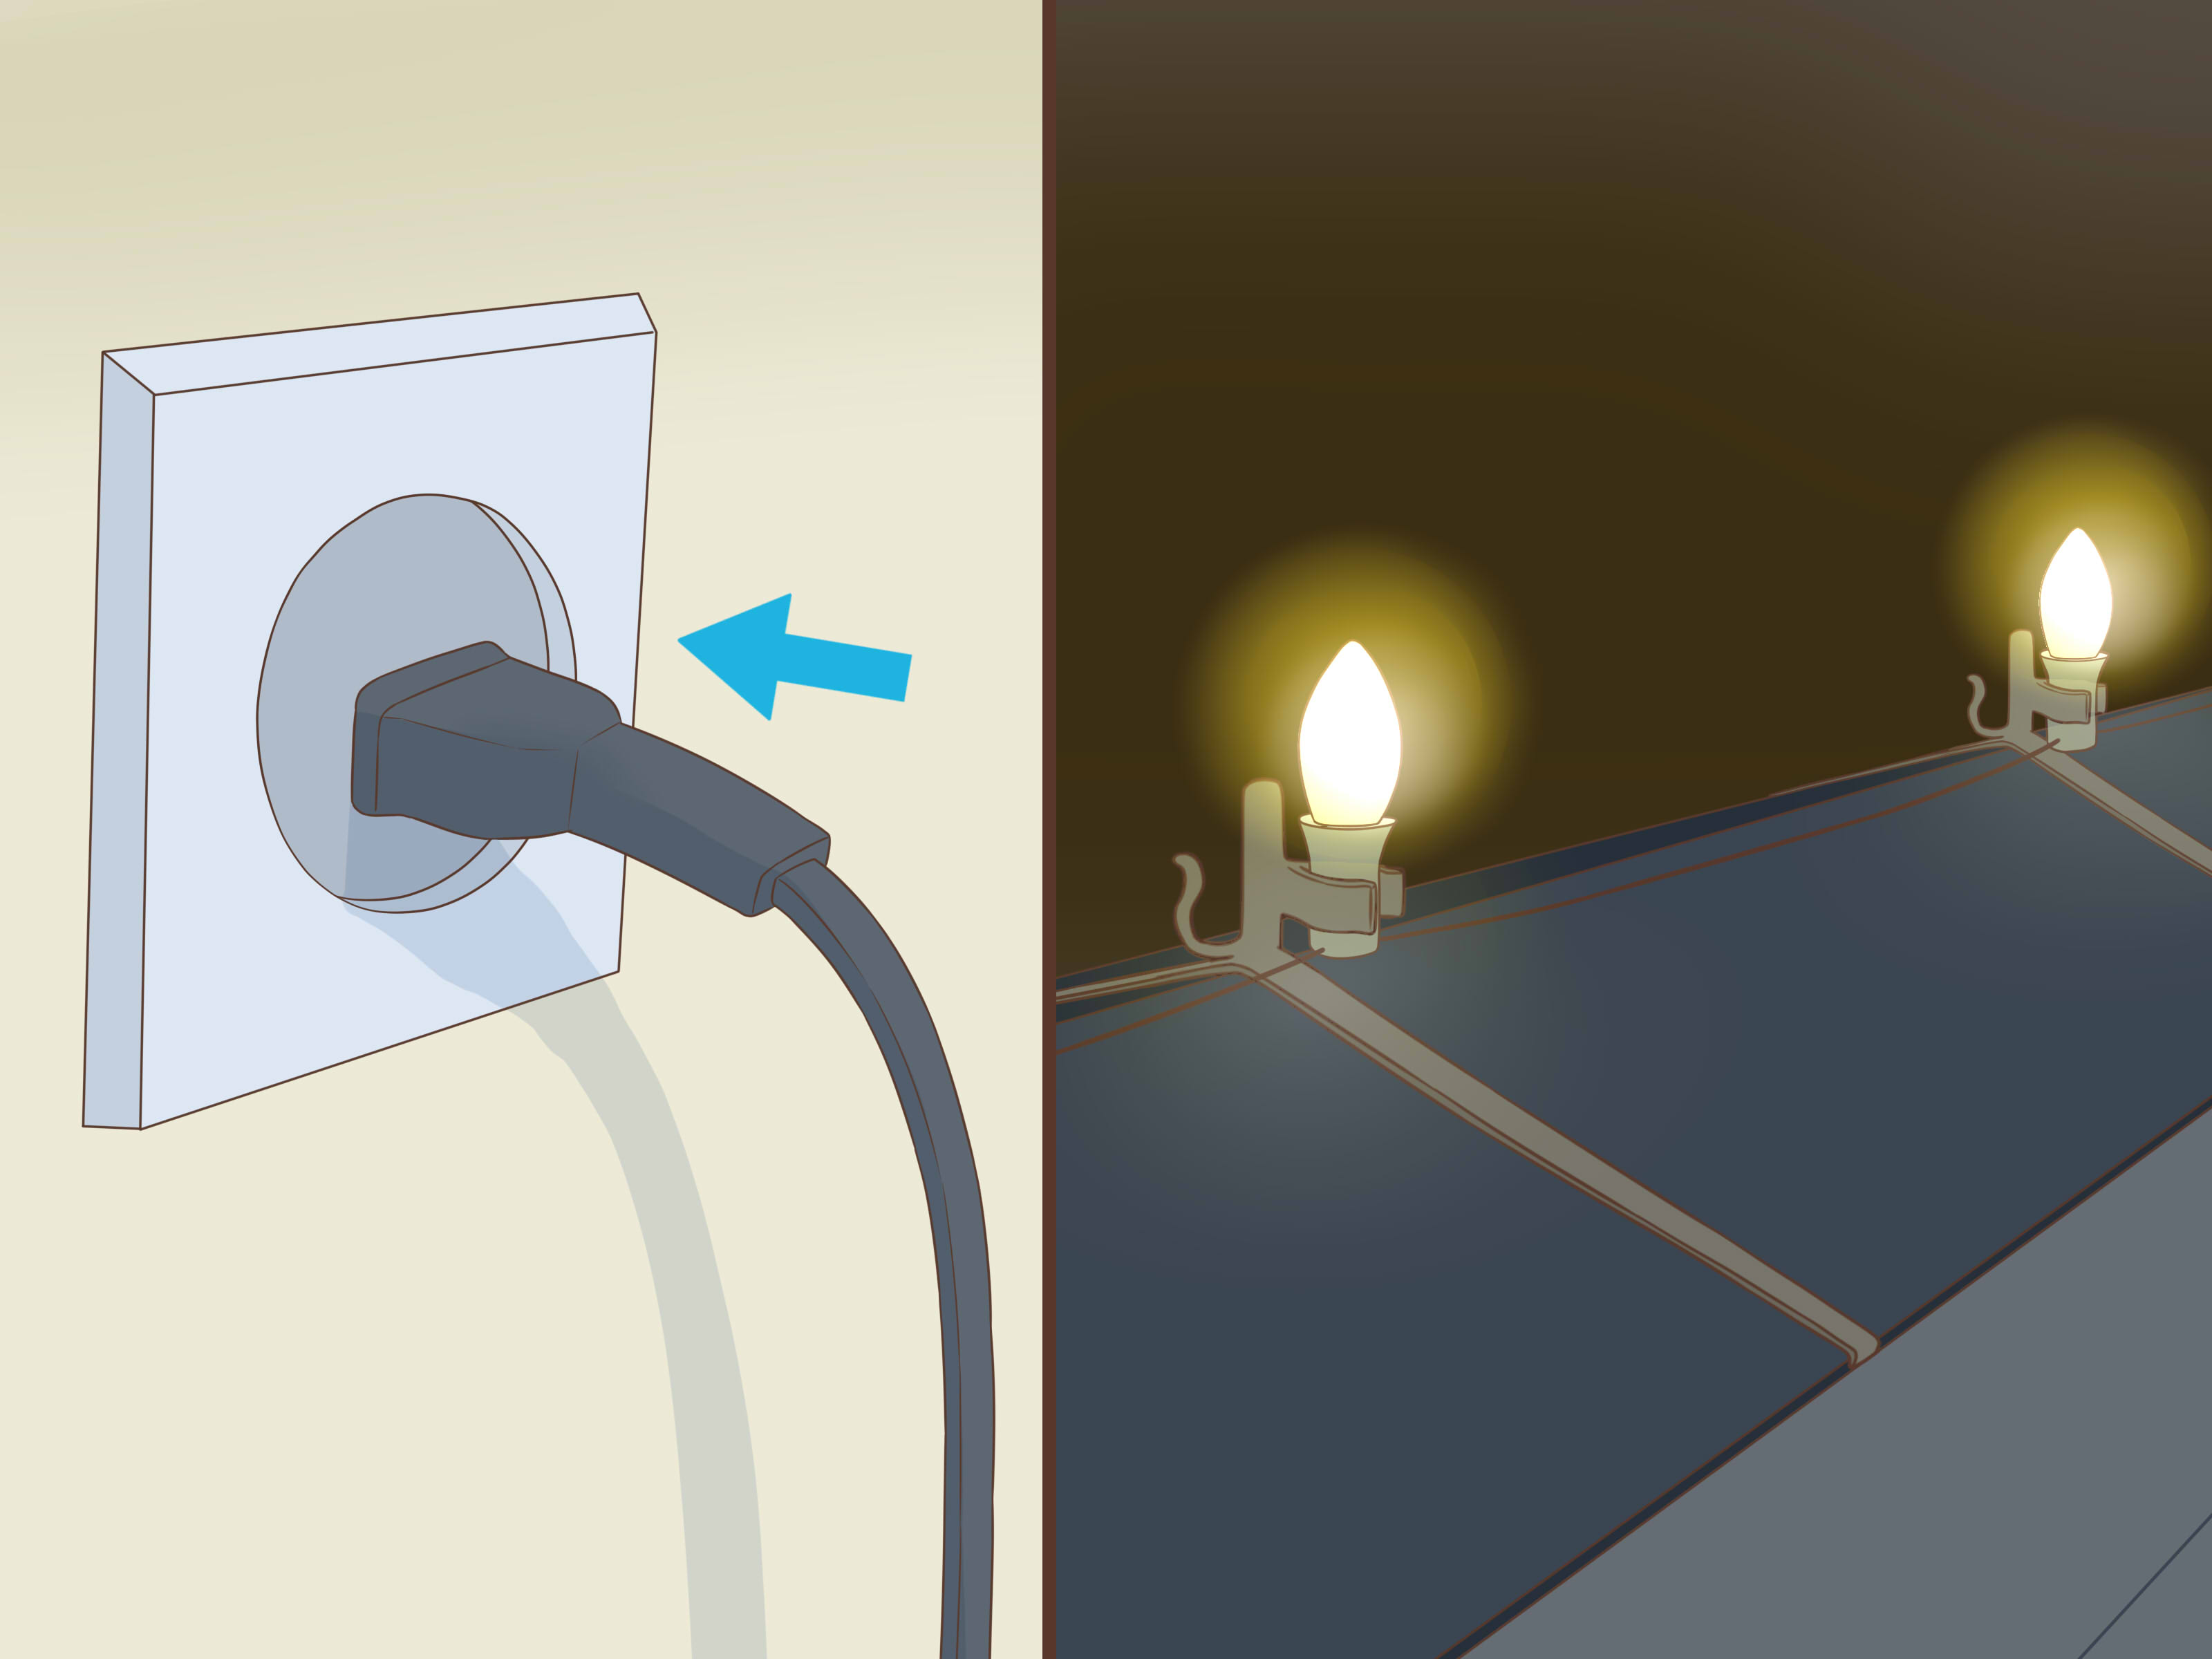
Use purpose-made Christmas light clips instead of nails, screws, or metal staples. Common choices include shingle tabs, gutter clips, all-purpose clips, tile-roof clips, and holders made specifically for C7 or C9 sockets.
For asphalt shingles, many clips slide carefully under the exposed lower edge without creating holes. Never force a clip under a brittle shingle or lift roofing material more than necessary. Cold shingles can crack more easily than warm ones.
Clip spacing affects the finished appearance. For large C7 or C9 bulbs, placing one clip at every socket creates a straight, professional-looking line. Mini-light strands may need clips every 6 to 12 inches. Closer spacing can reduce movement and sagging in windy areas.
Step 4: Test and Prepare the Lights on the Ground
Unroll every strand on the driveway, lawn, or garage floor. Plug in the lights and check for dark sections, loose bulbs, damaged sockets, and unreliable connections. Replace bulbs or fuses only with compatible parts specified by the manufacturer.
Discard any strand with frayed insulation, exposed conductors, melted plastic, or cracked plugs. Electrical tape is not a suitable long-term repair for badly damaged holiday wiring.
Attach the clips to the light strand before climbing the ladder. Orient all the sockets in the same direction and place clips at consistent intervals. This simple preparation saves time, improves spacing, and greatly reduces the number of tiny plastic objects dropped into bushes.
Step 5: Position the Ladder Correctly
Place the extension ladder on firm, level ground away from mud, loose gravel, ice, opening doors, and busy walkways. Follow the ladder manufacturer’s instructions for the correct climbing angle. A commonly used guideline is to position the base approximately one foot away from the wall for every four feet of vertical height.
Inspect the ladder before use and verify that its duty rating can support you, your clothing, and your equipment. Secure the ladder when practical and ask a helper to steady the base.
Maintain three points of contact while climbing. Keep small supplies in a tool belt or attached bucket so your hands remain available. Never stand above the ladder’s marked safe level, and never lean sideways to reach another section. Climb down and move the ladder instead. That extra six inches is not worth becoming the subject of next year’s family holiday story.
Step 6: Start at the Power End
Keep the lights unplugged during installation. Begin at the side of the roof closest to the exterior outlet. Leave enough unlighted lead wire to reach the extension cord without stretching or placing tension on the plug.
Attach the first clip near the lower corner of the roofline. Work upward toward the peak, installing one prepared clip at a time. Keep the cable supported but not pulled tight. Excessive tension can damage the sockets or insulation when temperatures change.
Pause every few feet and look along the strand. Correct irregular spacing immediately. Small errors are easy to fix while they are within reach and much more noticeable after the entire roof begins glowing.
Step 7: Create a Neat Line Across the Peak
The apex is the visual center of the display, so decide whether a bulb or a gap between bulbs should sit directly at the top. Marking the center of the strand while it is on the ground makes this easier.
Guide the wire over the peak with a gentle curve rather than a sharp bend. Use a clip that supports the strand without crushing or pinching the cable. If two strands connect near the apex, support the connector so it does not hang by the electrical contacts.
Keep plugs away from valleys or low areas where rain and melting snow may collect. On unusually sharp peaks, ending two symmetrical strands just below the apex may look cleaner and be safer than forcing a bulky connection across the top.
Step 8: Complete the Second Side
Continue down the opposite slope, moving the ladder as often as needed. Maintain the same bulb direction and clip spacing used on the first side. Check the work periodically from the ground because a line that appears straight from the ladder may look uneven from the street.
If you have extra lights near the bottom, do not bunch them into a bright knot at the eave. Instead, redistribute the spacing gradually across several bulbs or route the unused section to a discreet location permitted by the product instructions.
Never cut a factory-made light string unless it is specifically designed as a cut-to-length commercial system. Secure the final section so the clip carries its weight rather than the electrical plug.
Step 9: Connect the Lights to Outdoor-Rated Power
Use an outdoor-rated extension cord with sufficient capacity for the total load. Plug the display into a GFCI-protected exterior receptacle, which can interrupt power when an electrical fault is detected.
Keep plug connections above the ground and away from roof runoff, puddles, snow buildup, and irrigation. Position connections with the female end pointing downward when possible. Do not wrap connectors tightly inside household plastic bags because condensation may become trapped inside.
Add a weather-resistant outdoor timer or photocell. A timer prevents the lights from operating unnecessarily throughout the night and saves you from remembering at 2 a.m. that your roof is still glowing like a regional airport.
Follow the connection limits for the lights, extension cord, timer, and receptacle. Never overload outlets or create long chains of adapters. When your decorating ambitions disagree with the manufacturer’s instructions, the instructions win.
Step 10: Inspect the Finished Display
Clear away the ladder and tools before energizing the display. Turn on the lights and inspect the roofline from the sidewalk, driveway, and across the street. Look for dark bulbs, twisted sockets, sagging cable, uneven spacing, loose clips, and strained connectors.
Disconnect the power before making adjustments. Complete repairs during daylight rather than climbing a ladder after dark simply because one bulb has decided to express its individuality.
Inspect the installation again after the first period of strong wind or heavy rain. Replace cracked or displaced clips immediately. If a GFCI trips repeatedly, a breaker opens, or a connection becomes unusually warm, unplug the display and investigate the problem instead of repeatedly restoring power.
Common Christmas Light Installation Mistakes
Many roofline problems begin before the ladder is opened. Avoid these common errors:
- Installing lights without measuring the roofline
- Using indoor-only lights or extension cords outdoors
- Hanging lights during wet, icy, or windy weather
- Using nails, screws, or staples through roofing and wires
- Forcing clips underneath cold or brittle shingles
- Exceeding the manufacturer’s strand-connection limit
- Allowing plugs to hang unsupported
- Running extension cords across doors or walkways
- Leaning sideways instead of repositioning the ladder
- Leaving the display powered while making adjustments
Purpose-made clips are inexpensive, reusable, and much easier to remove than permanent fasteners. They also reduce the risk of puncturing roofing material or damaging electrical insulation.
How to Remove and Store Roof-Peak Christmas Lights
Wait for another dry, calm day. Unplug the display before touching the lights, then remove each clip carefully. Never stand on the ground and pull the strand down. Tugging can break sockets, crack shingle edges, damage gutters, and launch clips into places where a lawn mower will eventually find them.
Inspect the lights during removal and discard damaged strands. Label each string according to its location, such as “front left gable” or “garage roof peak.” Wind the lights loosely around a storage reel or sturdy piece of cardboard, and place the clips in labeled bags.
Store lights, timers, and extension cords in a dry container away from moisture, extreme heat, and pests. Organized storage can turn next year’s installation from a half-day untangling festival into a straightforward decorating project.
Experience-Based Lessons From Roof-Peak Light Installations
The most useful lesson from real-world holiday decorating is that attractive rooflines are usually created on the ground. Homeowners often imagine the job as one quick climb followed by a triumphant plug-in. In practice, most delays come from tangled wires, missing clips, lights that were never tested, or an outlet located on the opposite side of the house.
One especially common experience is the “almost long enough” strand. A 50-foot box of lights may sound generous, but the lead wire, roof slopes, apex, electrical connections, and route to the outlet consume more length than expected. Adding roughly 10 percent to the measurement provides a useful buffer. Keeping one matching spare strand also helps if a section fails during the season.
Color matching deserves more attention than it usually receives. Two packages may both be labeled “warm white,” yet one can resemble candlelight while the other has the icy enthusiasm of a dental examination lamp. Buying matching strands from the same manufacturer and product line reduces visible differences in color, brightness, and bulb spacing.
Preloading the clips is another major improvement. Attaching clips while standing on a ladder may seem easy for the first few feet. Soon, however, cold fingers and inconsistent spacing take over. Installing the clips on the ground makes the roofline straighter and allows every large bulb to face the same direction.
The roof peak should also be planned before installation. A bulb centered at the apex often creates a balanced look, but only when the spacing remains even on both slopes. Lay out the strand, find its center, and compare that point with the total roof measurement. When the bulbs do not align perfectly, distribute tiny spacing adjustments across several sockets instead of leaving one obvious gap.
Weather affects the project more than most decorating plans acknowledge. A strand that behaves politely inside the garage can become a sail in a light breeze. Plastic clips may become stiff in cold temperatures, and asphalt shingles may be more vulnerable to cracking. The best response is not to rush. Postpone the work until conditions improve.
Extension-cord routing is another practical challenge. A beautifully outlined roof can lose some of its charm when a bright orange cord wanders diagonally down pale siding. Begin close to the outlet, use an outdoor cord that blends with the exterior when possible, and route it neatly along trim. Keep it away from doorways, sidewalks, gutters, and drainage paths.
After installation, view the lights from the same location where visitors and neighbors will see them. Small inconsistencies may be invisible from beneath the eave but obvious from the street. Take a photograph as well. A photo often reveals sagging sections, uneven brightness, or a crooked peak faster than staring at the house in person.
Experienced decorators also keep replacement bulbs, fuses, and clips in a labeled container near the other holiday supplies. When a clip breaks after the first windy night, having the correct replacement available prevents a temporary repair from becoming a month-long feature.
Finally, define the stopping point before beginning. A simple outline around one front gable often looks more polished than an ambitious display that ends with overloaded cords, three shades of white, and a blinking section nobody remembers purchasing. Consistent spacing, balanced color, and safe installation matter more than the number of bulbs. The goal is to make the house sparklenot to make the emergency room staff remember your name.
Conclusion
Hanging Christmas lights on a roof peak becomes much easier when the project is treated as a planned installation rather than an improvised climb. Measure the gable, choose outdoor-rated lights, match the clips to the roofing material, prepare the strand on the ground, and use a properly positioned ladder with a helper.
Keep electrical connections supported and away from water, use GFCI-protected power, and follow every manufacturer limit. Most importantly, work only in dry, calm conditions and contact a professional when the roof is steep, fragile, unusually high, or close to electrical lines.
A neat, evenly spaced outline can create a polished holiday display without hundreds of decorations. That leaves more time for the season’s truly difficult decisions, such as whether the giant inflatable snowman is excessive or simply magnificent.
Note: This article provides general home-decorating guidance. Follow the instructions supplied with your lights, clips, ladder, timer, and extension cords. Hire a qualified professional whenever the height, roofing material, weather, or electrical conditions exceed your experience or equipment.