
Note: This article is based on real SketchUp modeling workflows, official SketchUp tool behavior, and practical residential design habits used by designers, students, and visualization professionals.
Creating a standard house in SketchUp sounds simple: draw a rectangle, pull it upward, slap on a roof, and proudly announce, “Behold, architecture!” But anyone who has opened SketchUp for more than ten minutes knows the truth. A house model can quickly become a mysterious jungle of sticky edges, accidental holes, reversed faces, floating windows, and one suspicious line that refuses to delete without destroying half the wall.
The good news is that SketchUp is one of the friendliest 3D modeling tools for beginners. Its core toolsLine, Rectangle, Push/Pull, Offset, Move, Tape Measure, Components, Tags, Materials, Scenes, and Section Planesmake it possible to create a clean, believable house model without needing to become a full-time CAD wizard. The trick is not just knowing which buttons to click, but understanding the right order of operations.
In this guide, you will learn how to create a standard house in SketchUp in 8 clear steps. We will cover everything from setting up units and drawing the floor plan to building walls, adding doors and windows, modeling a roof, applying materials, organizing the model, and preparing presentation views. Whether you are a student, DIY enthusiast, interior design beginner, or someone who simply wants to model a cozy little house instead of another lopsided cube, this tutorial will help you work smarter.
Why SketchUp Is Great for Creating a Standard House
SketchUp is popular because it feels more like digital building than traditional drafting. You draw faces, pull them into 3D forms, orbit around your work, and make design decisions visually. For a standard house, this is perfect. You can quickly test wall heights, roof forms, window placement, porch ideas, room layouts, materials, and sunlight angles without needing to produce construction-level drawings immediately.
A standard house model in SketchUp usually includes a simple floor plan, exterior walls, interior partitions, openings, roof structure, doors, windows, floors, basic furniture, materials, and a few scenes for presentation. The model does not need to be overly complex. In fact, the best beginner models are clean, organized, and easy to edit. A simple house that is accurately modeled is far more useful than a hyper-detailed house that behaves like a haunted spreadsheet.
Step 1: Set Up Your SketchUp File Correctly
Choose the Right Template and Units
Before drawing anything, start with the correct template. In SketchUp, choose an architectural template that uses the measurement system you prefer. In the United States, many residential users work in feet and inches. If you are creating a model for international use, meters or millimeters may be more appropriate.
Go to the model information settings and confirm your units. Set precision high enough for clean architectural work, but not so high that every dimension becomes a long decimal parade. For a typical house model, working in inches or feet and inches is practical. For example, you might model a small single-story house that is 30 feet wide by 40 feet long, with 9-foot walls and a simple gable roof.
Start With a Clean Workspace
Keep the default human scale figure if it helps you understand size, or delete it if you prefer a clean file. Many beginners delete the figure immediately, then accidentally create a front door fit for a family of giraffes. A scale reference is useful, especially when you are new to architectural proportions.
Save the file before you begin. Name it clearly, such as standard-house-sketchup-model.skp. Saving early is not glamorous, but neither is losing an hour of modeling because your laptop decided to take a dramatic nap.
Step 2: Draw the Basic Floor Plan
Create the House Footprint
Select the Rectangle tool and draw the main footprint of the house on the ground plane. Type exact dimensions into the measurements box. For example, enter 40′,30′ to create a 40-foot by 30-foot rectangle. This becomes the basic slab or floor area.
Use the Tape Measure tool to create guidelines for wall thickness, room divisions, doors, and windows. A standard exterior wall might be represented as 6 inches thick in a conceptual model, while interior partitions may be 4 inches thick. Even if the model is not intended for construction documentation, using realistic thicknesses makes the house feel more believable.
Lay Out Rooms With Simple Lines
Use the Line tool to sketch interior walls. Think in zones: living room, kitchen, bedrooms, bathroom, hallway, and utility areas. A simple house layout might place the living room near the front, kitchen and dining area toward the center, bedrooms on one side, and bathrooms near plumbing zones.
Do not overcomplicate the layout at this stage. Your goal is to create a clean plan, not win an award for “Most Hallways in a Small Building.” A standard house should have a logical flow: entry, public space, private space, service space. Keep circulation efficient and avoid narrow corridors unless they serve a clear purpose.
Step 3: Build the Walls With Push/Pull and Offset
Use Offset for Wall Thickness
Once the floor plan is drawn, use the Offset tool to create wall thickness. Click the outer face of the house footprint and offset inward by your chosen wall thickness, such as 6 inches. Then use Line and Offset tools to define interior walls.
The Offset tool is one of the most useful features for house modeling because it quickly creates parallel edges. For walls, trim pieces, roof overhangs, window frames, and foundation details, Offset saves time and improves accuracy.
Pull Walls Into 3D
Select the wall faces and use the Push/Pull tool to raise them. A common wall height for a standard house is 8 to 10 feet. For this example, pull the walls up to 9 feet. Type 9′ and press Enter for precision.
At this stage, your model begins to feel like a real house. It may also look like a giant empty cereal box, which is perfectly normal. Architecture has to pass through the cereal-box phase before it becomes charming.
Group Your Walls
After creating the walls, select them and make them a group. In SketchUp, raw geometry sticks to other raw geometry. This is helpful when you want connected faces, but it can create chaos when walls, floors, roofs, and furniture start merging together. Grouping keeps parts separate and easier to edit.
A good habit is to create separate groups for the slab, exterior walls, interior walls, roof, doors, windows, stairs, porch, furniture, and site elements. This keeps your model organized and prevents accidental destruction when you move or edit objects.
Step 4: Add Door and Window Openings
Mark Openings With Guidelines
Use the Tape Measure tool to mark door and window positions. A typical front door might be 3 feet wide and 6 feet 8 inches tall. Interior doors are often around 2 feet 6 inches to 3 feet wide. Standard window sizes vary, but for a simple model, you can use 3-foot by 4-foot windows as a starting point.
Draw rectangles on the wall faces where doors and windows should go. Make sure the rectangles are drawn directly on the wall surface. If they float slightly in front of the wall, Push/Pull will not cut the opening properly, and you will spend several minutes wondering whether the software is broken or just judging you.
Cut Openings With Push/Pull
Use the Push/Pull tool to push the door or window rectangle through the wall until the opening disappears through the opposite face. If the geometry is clean and the wall faces are parallel, SketchUp will create a clean cutout.
Repeat this process for all major openings. Place windows in bedrooms, living areas, kitchen spaces, and bathrooms. Consider natural light, privacy, and exterior appearance. A house with random window placement can look confused, as if the facade sneezed.
Add Door and Window Components
You can model simple doors and windows yourself using rectangles, Push/Pull, and materials. For faster results, use components. A component is reusable geometry, which is ideal for repeated elements like windows, doors, columns, cabinet pulls, lights, and furniture.
If you create one window component, you can copy it throughout the house. When you edit the original component, all copies update. This is extremely helpful when you decide that every window frame should be thicker, darker, or less “early 2000s office building.”
Step 5: Create the Roof Structure
Choose a Simple Roof Type
For a standard house, start with a gable roof or hip roof. A gable roof has two sloped sides and triangular ends. It is simple, recognizable, and beginner-friendly. A hip roof slopes on all sides and looks more finished but takes slightly more planning.
To make a basic gable roof, draw a rectangle over the top of the house footprint. Add a center ridge line along the length of the roof. Use the Move tool to lift the ridge upward, creating two sloped roof planes. Add overhangs by extending roof edges beyond the walls, often 1 to 2 feet depending on the style.
Model Roof Thickness and Fascia
A roof should not look like a paper-thin triangle. Use Push/Pull or create grouped roof geometry with visible thickness. Add fascia boards along the roof edges and simple soffits under the overhangs. These details make the house look more complete without requiring a full construction model.
For roof pitch, a common simple pitch might be 6:12, meaning the roof rises 6 inches for every 12 inches of horizontal run. You do not need to calculate every slope perfectly for a conceptual model, but using believable proportions improves the final result.
Group the Roof Separately
Make the roof its own group. This allows you to hide it when working on the interior. It also makes it easier to test different roof forms without damaging the walls. For example, you can duplicate the roof group and compare a gable roof, hip roof, and shed roof version.
Step 6: Add Floors, Interior Details, and Basic Furniture
Create Floors and Ceilings
Add a floor slab or finished floor surface inside the house. Use materials such as wood, tile, polished concrete, or carpet depending on the room. If your model includes a ceiling, create it as a separate group so it can be hidden while editing interior spaces.
Interior modeling does not need to be overly detailed at first. Add enough information to explain the space: kitchen counters, bathroom fixtures, beds, sofas, dining table, closets, and built-in storage. The goal is to show how the house works, not to model every toothbrush bristle.
Use Components for Repeated Interior Objects
Furniture, cabinets, doors, and windows should usually be components. This reduces file size and makes edits faster. For example, if you use the same dining chair six times, make it a component. If you later change the chair back height, all six update together.
Use lightweight models whenever possible. Highly detailed furniture from online libraries can slow down your SketchUp file. A 3D sofa with 90,000 tiny stitched seams might look impressive, but your computer may respond by quietly reconsidering its career.
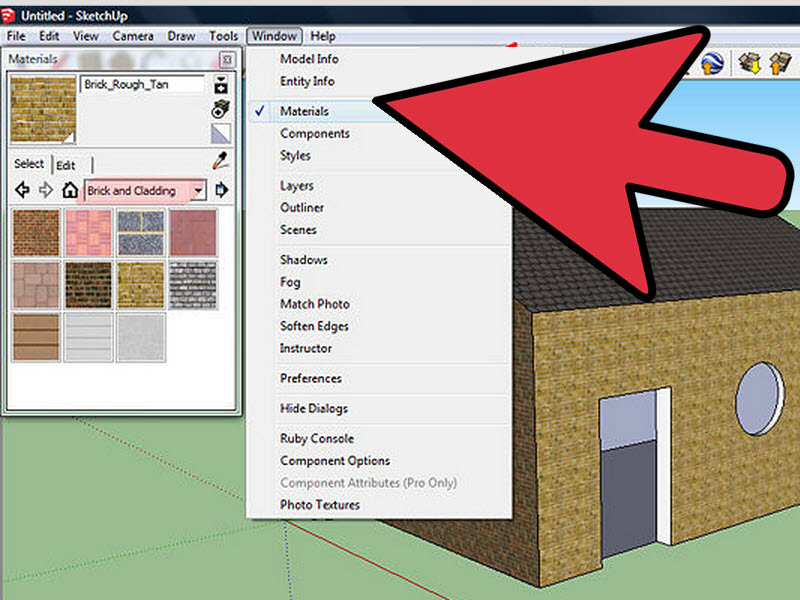
Step 7: Apply Materials, Colors, and Textures
Use Materials to Clarify the Design
Materials help your standard house model communicate style and function. Apply siding, brick, stucco, shingles, glass, wood flooring, tile, grass, concrete, and interior paint colors. Use the Paint Bucket tool to apply colors and textures to faces or groups.
Keep materials realistic and consistent. For an exterior, you might use white siding, dark gray roof shingles, black window frames, natural wood porch posts, and a concrete walkway. For interiors, use warm wood floors, light wall paint, tile in wet areas, and simple cabinet finishes.
Avoid Texture Overload
Textures should support the design, not scream over it. Avoid using too many busy materials in one small model. If every wall, floor, roof, chair, curtain, and countertop has a bold texture, the house starts to look like it lost a fight with a sample catalog.
Also check texture scale. Brick should look like brick, not giant red shipping containers. Wood planks should be proportional to the room. Adjust texture position and scale when needed to make the model more convincing.
Step 8: Organize, Create Scenes, and Prepare the Final Presentation
Use Tags for Visibility Control
Tags help control visibility in SketchUp. Use them for major grouped elements such as walls, roof, furniture, dimensions, landscape, doors, windows, and sections. Do not assign tags to loose raw edges and faces unless you know exactly what you are doing. A cleaner method is to keep raw geometry untagged and assign tags to groups or components.
This setup lets you quickly hide the roof, show only the floor plan, isolate furniture, or turn off landscape elements. For presentation and editing, that flexibility is priceless.
Create Scenes for Different Views
Scenes save camera views, visible tags, styles, shadows, and section states. Create scenes such as:
- Front exterior view
- Rear exterior view
- Top-down floor plan
- Interior living room view
- Kitchen view
- Section cut through the house
- Roof-off presentation view
Scenes make the model easier to present to clients, teachers, teammates, or your future self, who will definitely forget where the good camera angle was.
Add Dimensions and Labels
Add basic dimensions for overall width, length, wall height, door sizes, window sizes, and room names. Labels can help explain materials or design decisions. Keep annotations clean and readable. Too many labels can make the model look like a crime investigation board.
If you plan to create formal sheets, SketchUp can be paired with LayOut for scaled drawings, title blocks, viewports, and documentation. For a basic web article, school project, or design concept, exported images from well-composed scenes are often enough.
Common Mistakes to Avoid When Creating a House in SketchUp
Modeling Everything as Raw Geometry
The number one beginner mistake is failing to use groups and components. Raw SketchUp geometry sticks together. If you model walls, roof, floor, and cabinets as one giant connected blob, editing becomes painful. Group early. Group often. Your future sanity will send you a thank-you card.
Ignoring Real Dimensions
A house model should be based on realistic measurements. Door heights, wall thicknesses, ceiling heights, stair dimensions, countertop heights, and window placement all influence whether the model feels believable. Even a conceptual model benefits from basic architectural proportions.
Using Heavy Downloaded Models
Online model libraries are useful, but not every downloaded object is optimized. A decorative plant with millions of polygons can make your simple house crawl. Use simplified objects where possible, especially for early design work.
Forgetting the Human Experience
A house is not just walls and a roof. Think about how someone enters, walks, cooks, rests, looks outside, stores things, and enjoys natural light. A technically clean SketchUp model is good; a model that explains everyday living is much better.
Practical Example: A Simple One-Story House Model
Imagine you are modeling a 1,200-square-foot single-story house. Start with a 40-foot by 30-foot rectangle. Offset the outer walls by 6 inches. Add a living room near the front entry, an open kitchen and dining area at the back, two bedrooms on the left side, one bathroom near the hallway, and a small laundry area near the kitchen.
Raise the walls to 9 feet. Add a 3-foot-wide front door, several 3-foot by 4-foot windows, and a sliding glass door to the backyard. Create a gable roof with a 1-foot overhang. Apply white siding, dark asphalt shingles, wood floors, painted drywall, and simple kitchen cabinets. Add furniture components to show scale.
Finally, create scenes: front view, floor plan, roof-off view, interior view, and section view. In just a few hours, you can produce a clean model that communicates the house clearly. It may not be ready for a building permit, but it will be strong enough for concept design, visualization, planning conversations, and early presentation.
Extra Experience: Lessons Learned From Creating Standard Houses in SketchUp
After working through several house models in SketchUp, one lesson becomes obvious: the software rewards clean thinking. If you rush into modeling without a plan, the model becomes messy fast. If you pause for a few minutes to define the footprint, wall heights, roof type, component strategy, and scene list, the entire process becomes smoother.
A helpful habit is to model from large to small. Start with the site, footprint, walls, roof, and major openings. Then add floors, ceilings, doors, windows, and stairs. After that, move into cabinets, furniture, trim, lighting, and materials. Beginners often do the opposite. They spend 45 minutes perfecting a doorknob before the house even has a roof. That is fun, but it is not efficient.
Another experience-based tip is to save versions. Use file names like house-model-v01, house-model-v02, and house-model-v03. Before making major changes, save a new version. This gives you freedom to experiment. Want to try a modern flat roof instead of a gable roof? Save a version. Want to move the kitchen to the other side of the house? Save a version. Want to test black siding and discover it makes the house look like a very stylish toaster? Save a version.
Working with groups and components also becomes more important as the model grows. A beginner can get away with messy geometry in a tiny practice model, but a full house quickly exposes bad habits. Walls should be grouped. Roofs should be grouped. Windows and doors should be components. Furniture should be components. Landscape objects should be separate. This approach makes it easier to edit, hide, copy, replace, and present the model.
Scene creation is another underrated skill. A good SketchUp model is not only built well; it is also shown well. Set up scenes that tell a story. Start with the exterior, then show the floor plan, then move into key rooms, then show a section cut. This sequence helps viewers understand the house naturally. It is the difference between handing someone a pile of puzzle pieces and showing them the finished picture on the box.
Materials should be applied near the end of the process, not at the beginning. Early material decisions can distract from the form and layout. First, make sure the house works. Then make it beautiful. Neutral colors are useful during modeling because they help you see shadows, edges, and proportions. Once the design is stable, bring in textures and colors to express the final style.
One of the best experiences in SketchUp is discovering how quickly a rough idea becomes visible. A floor plan that feels flat on paper suddenly turns into a space you can orbit around. You can see whether the porch feels welcoming, whether the living room gets enough light, whether the roof looks too heavy, and whether the windows align nicely. This visual feedback is why SketchUp remains such a practical tool for house modeling.
At the same time, it is important to remember that a SketchUp model is not automatically a construction-ready house. Real buildings require structural design, code compliance, mechanical systems, waterproofing details, energy performance, permits, and professional review. SketchUp is excellent for design exploration and visualization, but a real house needs real-world expertise. In other words, SketchUp can help you dream in 3D, but it should not be the only adult in the room.
The final practical lesson is simple: keep your model useful. A useful SketchUp house model is accurate enough to explain the design, organized enough to edit, light enough to navigate, and clear enough to present. Fancy details are nice, but clarity wins. A clean model with good proportions, organized components, thoughtful scenes, and realistic materials will always beat a cluttered model that looks impressive for five seconds and then freezes your computer.
Conclusion
Learning how to create a standard house in SketchUp is really about learning a reliable workflow. Start with the right units, draw a clean floor plan, build accurate walls, cut openings, create a believable roof, add interior elements, apply realistic materials, and organize everything with groups, components, tags, and scenes.
SketchUp is beginner-friendly, but it is also powerful enough for serious design exploration. The more organized your model is, the easier it becomes to revise, present, and improve. Whether you are designing a small home, practicing architectural modeling, preparing a school project, or visualizing a renovation idea, these 8 steps give you a strong foundation.
And remember: every great SketchUp house begins as a rectangle. The difference between a plain box and a polished model is patience, precision, and the wisdom to group your geometry before it starts plotting against you.