
Note: This guide is for educational DIY maintenance. Car A/C systems are pressurized, refrigerant-specific, and environmentally regulated. If your system is empty, leaking badly, using an unknown refrigerant, or not cooling after a careful top-off, stop and have it serviced by a qualified technician.
Introduction: When Your Car A/C Starts Acting Like a Hair Dryer
A working car air conditioner is one of those modern luxuries you only truly appreciate when it quits. One day, your vents are blowing crisp, frosty air. The next day, your dashboard is politely roasting you like a rotisserie chicken. If your car A/C is weak, warm, or slow to cool the cabin, low refrigerant may be the problemand learning how to recharge the air conditioner in a car can help you understand what is happening under the hood.
That said, an A/C recharge is not magic in a can. Your vehicle’s air conditioning system is sealed, which means refrigerant should not simply “run out” like windshield washer fluid. If the system is low, there is usually a leak, even if it is tiny. A DIY car A/C recharge can sometimes restore cooling temporarily, especially if the system is only slightly low, but it does not permanently repair leaks, damaged hoses, a failing compressor, a bad condenser, or electrical issues.
This in-depth guide explains how to recharge car A/C safely, what tools you need, how to identify the correct refrigerant, how to use the low-pressure service port, and when to hand the job to a professional before your weekend project becomes a very expensive science experiment.
Before You Recharge: Understand What a Car A/C System Does
Your car’s air conditioner cools the cabin by circulating refrigerant through a closed system. The compressor pressurizes the refrigerant, the condenser releases heat, the expansion valve or orifice tube lowers pressure, and the evaporator absorbs heat from the air entering your cabin. In simpler terms, the system moves heat from inside your car to outside your car. It is less “creating cold” and more “evicting heat.”
When refrigerant is low, the system may not absorb and move heat properly. You may notice warm air from the vents, cooling that fades at idle, short compressor cycling, oily residue near A/C fittings, or hissing sounds. However, these symptoms can overlap with other problems, such as a clogged cabin air filter, dirty condenser, faulty cooling fan, bad compressor clutch, blend door issue, or electrical fault.
Step 1: Confirm That a Recharge Is Actually Needed
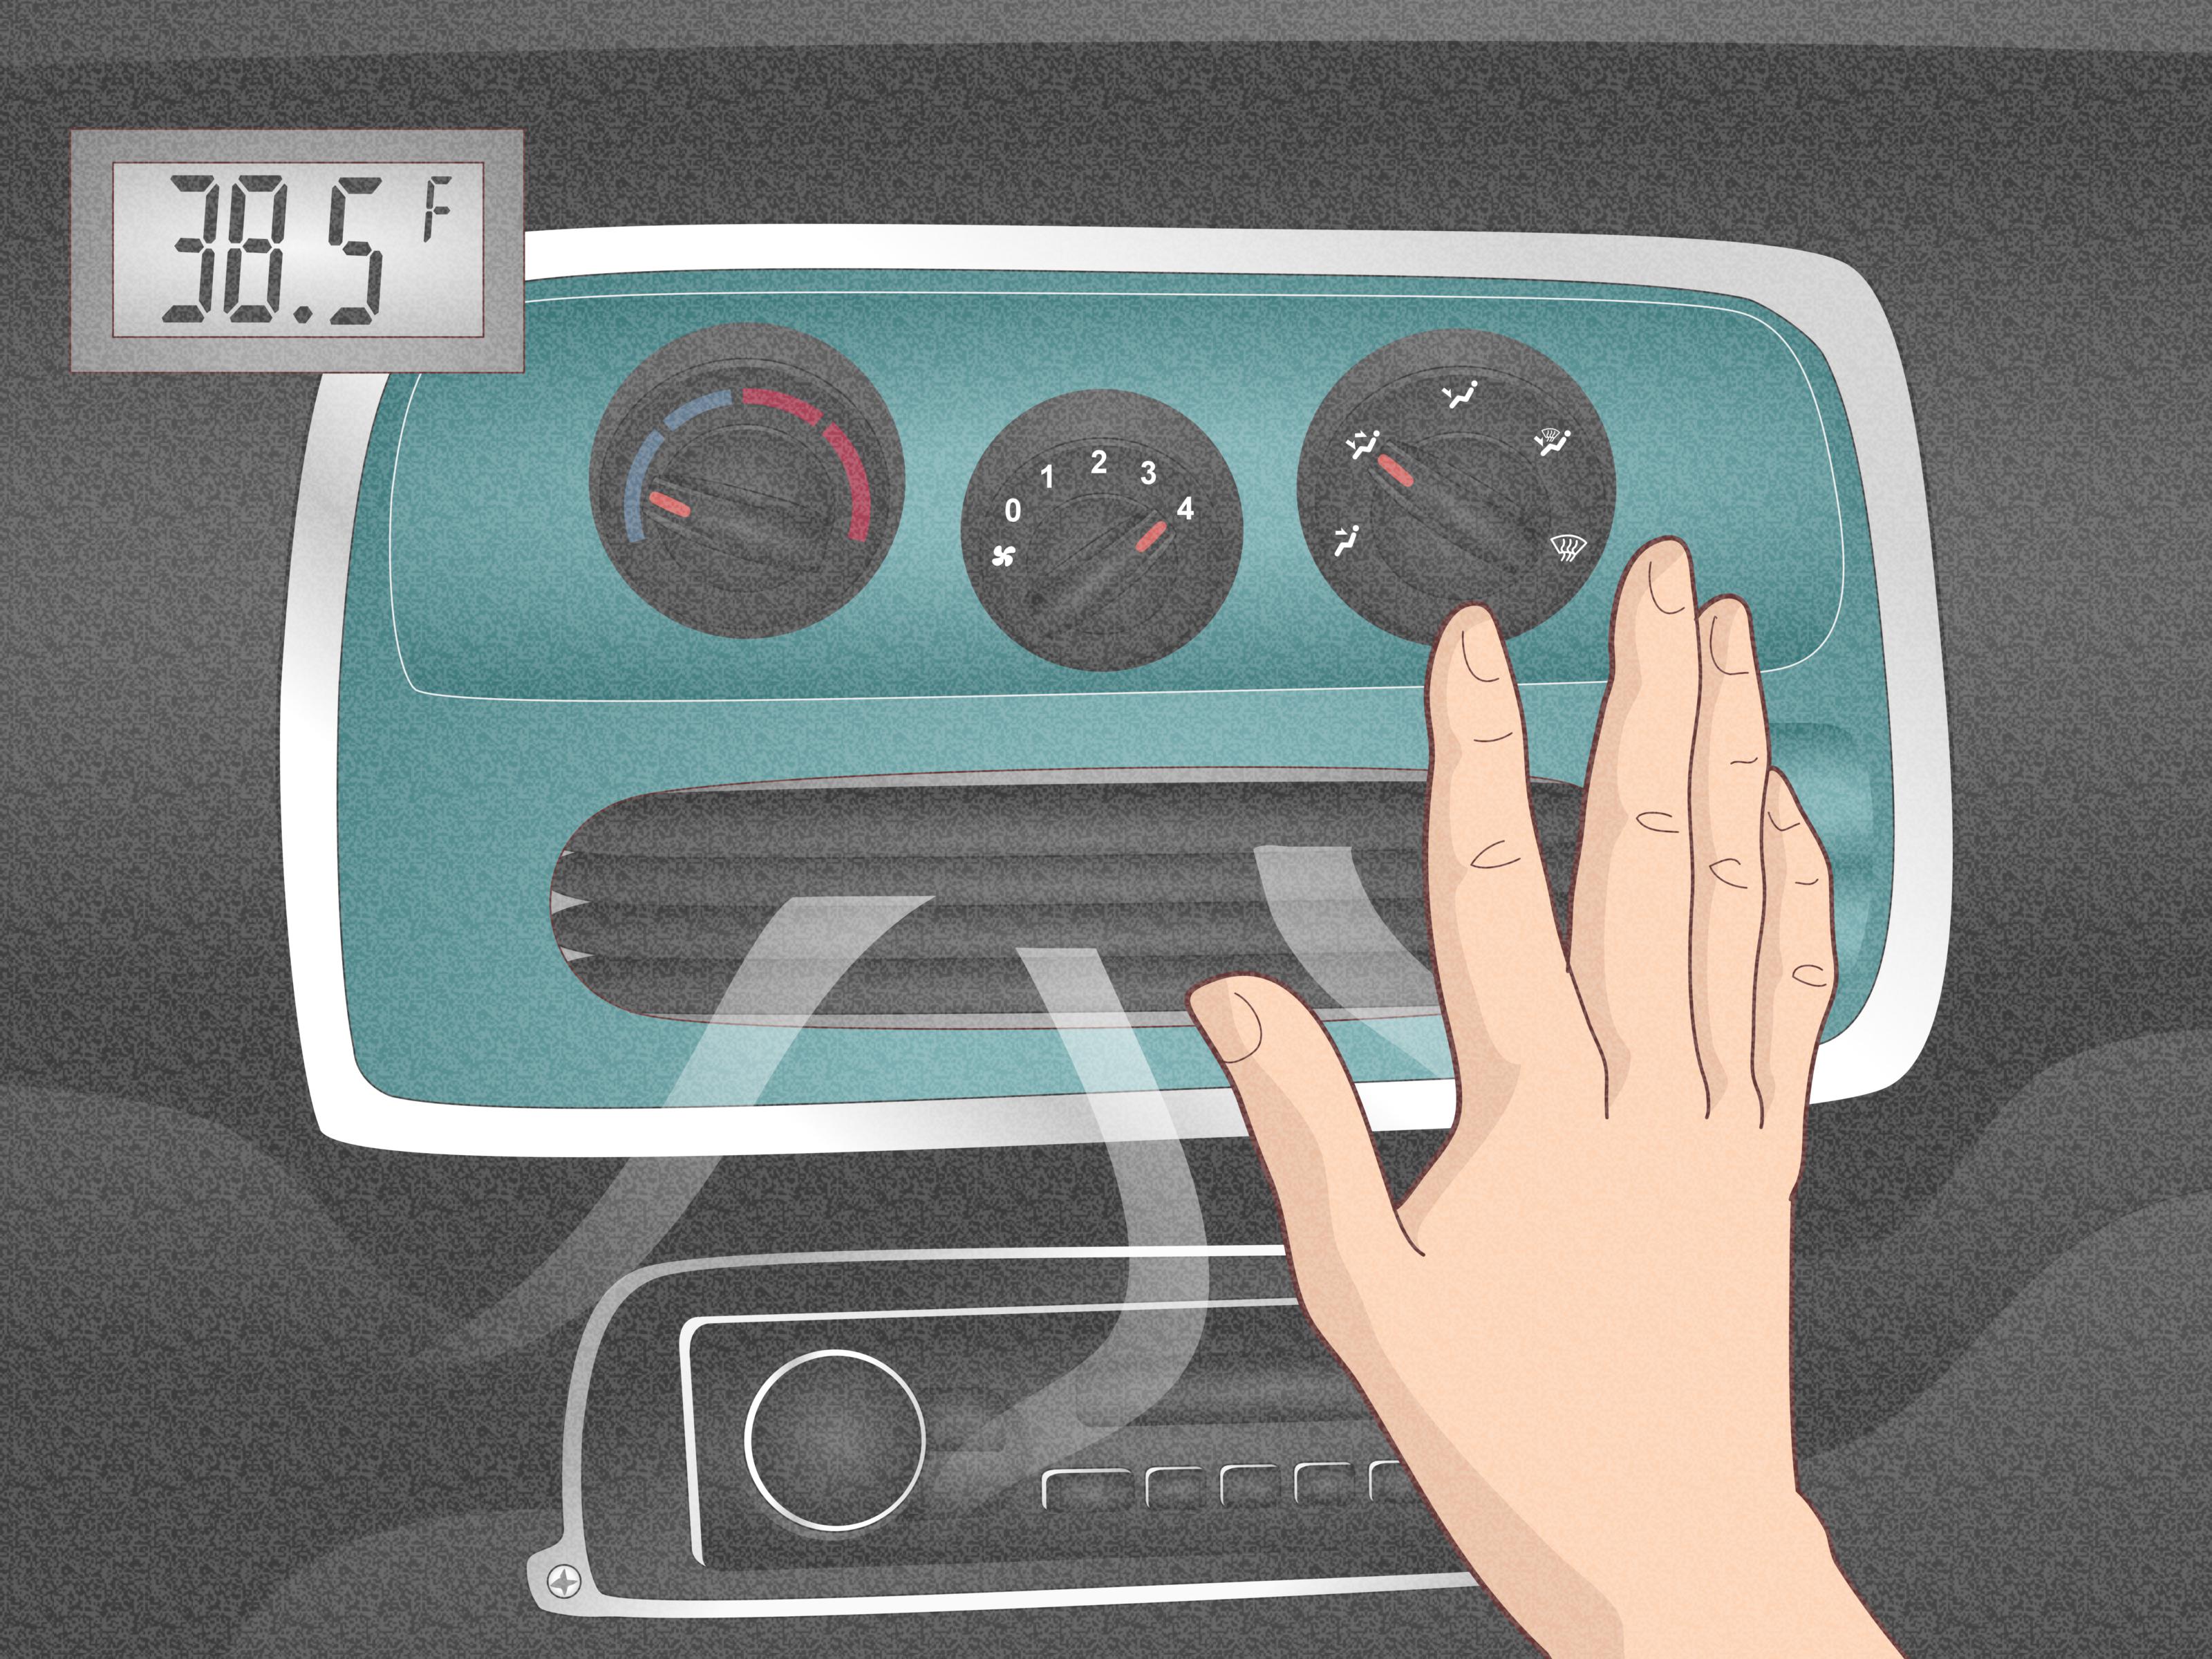
Before buying an A/C recharge kit, do a few simple checks. Start the engine, turn the air conditioning to maximum cooling, set the fan to high, open the doors or windows, and select recirculation if your system allows it. Let the car run for several minutes.
Check the vent temperature
Place a thermometer in the center vent. On a warm day, a healthy system usually blows noticeably cooler than the outside air. Exact temperatures vary depending on humidity, vehicle design, and ambient temperature, but if the vent air stays warm or only slightly cool, the system needs diagnosis.
Look at the compressor
With the A/C on, look carefully at the compressor pulley area. In many older systems, you can see or hear the compressor clutch engage and cycle. If the clutch never engages, the system may be too low on refrigerant, but it could also have a blown fuse, bad relay, failed pressure switch, wiring issue, or compressor problem.
Inspect for obvious leaks
Look for oily residue around A/C hoses, fittings, the condenser, and service ports. Refrigerant itself is a gas, but A/C oil circulates with it. If you see greasy dirt collecting around a fitting, that spot may be leaking. A small leak can sometimes allow a temporary recharge; a large leak means you are mostly donating refrigerant to the atmosphere, which is bad for your wallet and worse for the planet.
Step 2: Identify the Correct Refrigerant
This is the step where guessing is not allowed. Your car was designed for a specific refrigerant, and using the wrong type can damage the system, reduce cooling, contaminate service equipment, and create safety hazards.
Open the hood and look for the A/C information label. It is often located on the radiator support, underside of the hood, engine bay frame, or near the front of the vehicle. The label should list the refrigerant type and capacity. Common refrigerants include:
- R-134a: Common in many vehicles from the mid-1990s through the 2010s.
- R-1234yf: Common in many newer vehicles and designed with lower global warming potential.
- R-12: Found in some older vehicles and generally not a DIY recharge candidate.
Never mix R-134a and R-1234yf. They are not interchangeable, and the service fittings are designed differently to help prevent mistakes. If your car uses R-1234yf, buy a kit specifically made for R-1234yf. If your car uses R-134a, use R-134a. If the label is missing or unreadable, check the owner’s manual or a reliable service database.
Step 3: Gather the Right Tools and Safety Gear
A basic DIY recharge usually requires a refrigerant can, a charging hose with a pressure gauge, gloves, safety glasses, and a thermometer. For more accurate work, professionals use manifold gauges, a recovery machine, vacuum pump, refrigerant scale, leak detector, and factory specifications. A small DIY kit is convenient, but it is not a full diagnostic station.
Recommended items
- Correct refrigerant for your vehicle
- Recharge hose and gauge compatible with that refrigerant
- Eye protection
- Nitrile or mechanic’s gloves
- Vent thermometer
- Clean rag
- Owner’s manual or underhood A/C label information
Refrigerant can cause frostbite if it contacts skin. It is stored under pressure, and the engine bay contains belts, fans, and hot surfaces. Dress like you are doing car work, not like you are making iced coffee on the patio.
Step 4: Find the Low-Pressure Service Port
Car A/C systems have a low-pressure side and a high-pressure side. A DIY recharge kit connects only to the low-pressure service port. Do not attempt to connect refrigerant to the high-pressure side. That is a shortcut to danger, not colder air.
The low-pressure service port is usually located on the larger-diameter aluminum line between the evaporator and compressor. It often has a plastic cap marked with an “L,” although markings are not guaranteed. The high-pressure port is usually on a smaller-diameter line and may be marked with an “H.” Recharge hose couplers are typically designed to fit only the correct low-side port, but you should still verify before connecting.
Remove the cap and set it somewhere safe. That little cap matters because it helps keep dirt out and can provide a secondary seal. Losing it is not catastrophic, but it is annoying in the very specific way only small car parts can be.
Step 5: Read the Pressure Before Adding Refrigerant
Connect the charging hose to the low-pressure service port, making sure it clicks or locks into place. Start the vehicle if it is not already running, turn the A/C to maximum, set the fan to high, and open the doors. Read the gauge according to the recharge kit instructions.
Many DIY recharge gauges include color zones, but pressure readings depend on ambient temperature. A pressure that looks low on a cool morning may look different on a hot afternoon. Follow the chart included with your kit and compare it with the outside temperature. If the gauge shows normal or high pressure but the air is still warm, do not add refrigerant. The issue may be airflow, compressor operation, a stuck expansion device, overcharge, or another fault.
Step 6: Add Refrigerant Slowly
If the low-side pressure is below the recommended range and all signs point to a slightly undercharged system, you can begin adding refrigerant. Hold the can as instructed by the kit manufacturer. Some products tell you to keep the can upright; others may have different directions. Follow the label exactly.
Squeeze the trigger or open the valve briefly, then stop and let the gauge stabilize. Gently move or rotate the can if the instructions recommend it. Add refrigerant in short bursts rather than dumping the whole can into the system. Think of it like seasoning soup: you can add more, but removing too much is a whole different project.
Keep watching the gauge. Your goal is not “as much as possible.” Your goal is the correct pressure range for the current outside temperature. Overcharging can reduce cooling, raise system pressure, strain the compressor, and lead to expensive repairs.
Step 7: Monitor Cooling Performance
As refrigerant enters the system, the compressor may begin cycling more normally, and vent temperature may drop. Use your thermometer to check the center vent. Give the system time to stabilize between additions. If cooling improves and the low-side pressure is within the recommended range, stop.
Disconnect the hose carefully from the low-pressure port. Some refrigerant may hiss briefly as the coupler comes off, but do not intentionally release refrigerant. Replace the service port cap snugly. Then let the A/C run for several minutes and confirm that cold air continues to flow.
Step 8: Know When to Stop and Call a Professional
A DIY recharge is not appropriate for every situation. Call a professional technician if:
- The system is completely empty.
- The refrigerant leaks out again within days or weeks.
- The gauge shows high pressure before adding refrigerant.
- The compressor will not engage.
- The vehicle uses R-1234yf and you are uncomfortable with the process.
- You suspect the system has been contaminated with the wrong refrigerant.
- You see visible damage to the condenser, hoses, or compressor.
- You hear grinding, squealing, or other unhappy mechanical noises.
A professional shop can recover existing refrigerant, repair leaks, evacuate air and moisture with a vacuum pump, and recharge the exact factory-specified amount by weight. That precision matters. Too little refrigerant reduces cooling; too much can be just as bad.
Common Mistakes to Avoid When Recharging Car A/C
Using the wrong refrigerant
This is the big one. Do not rely on the color of the can, a random internet comment, or what your neighbor used in his truck in 2009. Read the vehicle label and use the exact refrigerant type specified.
Adding refrigerant to the high-pressure side
Only use the low-pressure service port. The high-pressure side is not for DIY charging. If you cannot confidently identify the low-side port, pause the project.
Ignoring leaks
If your car needs refrigerant every summer, something is leaking. A recharge may buy time, but it is not a repair. Repeatedly topping off a leaking system wastes money and can allow moisture into the system, which may damage internal components.
Overcharging the system
More refrigerant does not mean colder air. An overcharged system may cool poorly and operate at unsafe pressures. If the gauge enters the warning zone, stop immediately.
Using sealers without understanding the risk
Some DIY products contain leak sealer. These may help with very small leaks in some cases, but they can also create problems for service equipment or clog components. Many repair shops dislike sealers for good reason. If your system has a real leak, finding and fixing the leak is the better solution.
How Much Does It Cost to Recharge a Car A/C?
A DIY A/C recharge kit is usually cheaper than professional service, especially for R-134a systems. R-1234yf refrigerant is typically more expensive. Professional A/C service costs more because the shop is not just adding refrigerant; it may include leak testing, recovery, evacuation, oil balancing, and an exact recharge by weight.
If your system only needs a small top-off, a DIY kit may feel like a win. If the system has a leak, failed compressor, bad condenser, or electrical issue, professional diagnosis can save money by preventing guesswork. The most expensive repair is often the one you do three times incorrectly before finally doing it once correctly.
How Often Should You Recharge a Car Air Conditioner?
In a properly sealed system, you should not need to recharge the A/C regularly. Some systems may lose a very small amount of refrigerant over many years, but frequent recharging points to a leak. If the air conditioner blows warm every season, do not make “annual refrigerant day” part of your maintenance calendar. Have the system inspected.
To keep the system healthy, run the A/C periodically even during cooler months, replace the cabin air filter as recommended, keep the front condenser area clear of leaves and debris, and pay attention to changes in cooling performance. A clean cabin filter will not fix low refrigerant, but it can improve airflow and prevent you from blaming the refrigerant for a clogged filter’s bad behavior.
DIY Recharge vs. Professional A/C Service
A DIY recharge can be reasonable when the system is slightly low, the correct refrigerant is known, the compressor operates, the pressure reading is low, and you understand the instructions. It is not ideal when the system is empty, contaminated, leaking quickly, or mechanically damaged.
Professional service is the better choice when accuracy matters. A shop can remove refrigerant legally, measure what came out, test for leaks, vacuum the system to remove moisture and air, and recharge the exact factory amount. That is especially important after replacing parts such as the condenser, compressor, evaporator, hose assembly, or expansion valve.
Practical Example: A Slightly Low A/C System
Imagine a 2014 sedan using R-134a. The A/C still works, but it takes too long to cool the cabin on hot days. The compressor engages, the condenser fan runs, the cabin filter is clean, and the low-side pressure reads below the recommended range for the outside temperature. In this situation, adding refrigerant slowly while monitoring the gauge and vent temperature may improve performance.
Now imagine the same car has no compressor engagement, oily residue on a damaged condenser, and zero pressure on the gauge. That is not a “just add a can” situation. The system likely has a significant leak and may contain air and moisture. It needs repair, evacuation, and a proper recharge.
Experience-Based Tips for Recharging a Car A/C
Anyone who has recharged a car air conditioner knows the job looks easier on the package than it feels the first time you are leaning over a hot engine bay with a gauge in one hand and doubt in the other. The most useful experience-based advice is simple: slow down. Most DIY mistakes happen because someone rushes to add refrigerant before checking the basics.
One common real-world scenario is a driver assuming warm air always means low refrigerant. In practice, a clogged cabin air filter can make the airflow so weak that the A/C seems broken. Before touching refrigerant, check whether the fan blows strongly. If the air barely moves, changing a dirty cabin filter may make the system feel dramatically better. It is not glamorous, but neither is sweating through your shirt while holding a refrigerant can.
Another lesson: gauges need context. A low-side gauge is helpful, but it does not tell the entire story. Ambient temperature, humidity, compressor cycling, condenser airflow, and engine speed all influence readings. That is why adding refrigerant in short bursts is safer than emptying a can because the needle “looked a little low.” Many people discover the hard way that an overcharged system can blow warmer than before. The compressor does not reward enthusiasm.
It also helps to inspect the condenser before recharging. The condenser sits at the front of the vehicle, where it bravely catches bugs, leaves, road grit, and the occasional pebble with a grudge. If airflow through the condenser is blocked, the A/C may struggle even with the correct refrigerant charge. A gentle cleaning can improve performance, but avoid bending fins or blasting the condenser with aggressive pressure.
When connecting the hose to the low-pressure service port, listen and feel for a secure click. A loose connection can give a false reading or release refrigerant. Keep your hands away from belts and fans, because electric fans can switch on unexpectedly. This is one of those moments when safety glasses feel less like overkill and more like a very good life choice.
Finally, treat a recharge as information, not just a repair. If the system cools well after charging but turns warm again in a week, you have learned something important: there is a leak that needs attention. If pressure is normal but the vents are warm, the problem is probably not low refrigerant. If the system accepts refrigerant and cooling improves for a year or more, you may have handled a minor loss successfully. The best DIYers are not the ones who force every repair to work; they are the ones who know when the car is politely asking for professional equipment.
Conclusion
Learning how to recharge the air conditioner in a car can help you restore cooling, understand your vehicle better, and avoid unnecessary panic when the vents start blowing warm air. The key is to approach the job carefully: confirm the symptoms, use the correct refrigerant, connect only to the low-pressure service port, monitor pressure, add refrigerant slowly, and stop when the system reaches the proper range.
A recharge can improve cooling, but it does not fix leaks or mechanical failures. If your A/C keeps losing refrigerant, shows high pressure, uses an unfamiliar refrigerant, or refuses to cool after a careful top-off, professional service is the smarter move. Cold air is wonderful. Cold air without compressor damage, legal headaches, or refrigerant chaos is even better.