
A patio furniture makeover is one of the fastest ways to make your outdoor space feel fresh, expensive, and ready for lemonade season without actually spending “new outdoor sectional” money. You know the scene: the chairs are sun-faded, the table has mystery stains, the cushions look like they survived a minor weather event, and the once-charming metal frame now has rust spots trying to start their own homeowners association.
The good news? Most patio furniture is not doomed. Metal can be cleaned, sanded, primed, and painted. Wood can be washed, refinished, sealed, or stained. Wicker can be revived with patient cleaning and a carefully chosen spray finish. Cushions can often be scrubbed, recovered, replaced, or upgraded with outdoor fabric. With the right plan, your backyard furniture can go from “yard sale at 6 a.m.” to “boutique hotel courtyard” in a weekend.
This guide walks through how to plan a patio furniture makeover, choose the right materials, refresh different furniture types, style your outdoor space, and avoid common mistakes that make DIY projects look like DIY regrets. Grab your gloves, your drop cloth, and your optimistic playlist. We are about to rescue the patio.
Why a Patio Furniture Makeover Is Worth It
Outdoor furniture takes a beating. Sun fades finishes, rain encourages rust, pollen coats everything, and wind somehow manages to deposit leaves in places leaves should not fit. Even high-quality patio sets eventually need attention. A makeover extends the life of your furniture, reduces waste, saves money, and lets you customize the look instead of accepting whatever color the store decided was trendy this year.
There is also a design benefit. Your patio should feel like an outdoor room, not a random furniture parking lot. A refreshed table, coordinated cushions, an outdoor rug, planters, and warm lighting can turn a basic slab of concrete into a real gathering space. A small balcony can become a morning coffee corner. A tired deck can become the place everyone mysteriously drifts toward during family cookouts.
Step 1: Inspect Before You Invest
Before buying paint, fabric, or seventeen decorative pillows, inspect every piece. A patio furniture makeover should begin with a brutally honest furniture audit. Is the frame sturdy? Are screws missing? Does the chair wobble? Is the wood cracked or soft? Is rust only on the surface, or has it eaten into the metal? Are cushions just dirty, or are they flattened beyond emotional recovery?
Light wear is usually worth fixing. Loose bolts, peeling paint, faded cushions, dull wood, and surface rust are all makeover-friendly problems. Structural damage is different. If a chair frame bends under pressure, a tabletop is rotting, or welds are failing, replacement may be safer than restoration. A makeover should improve comfort and style, not create a surprise trampoline experience during dinner.
Quick Patio Furniture Audit Checklist
- Check frames for wobbling, cracks, rust, and loose hardware.
- Look under seats and tabletops for hidden corrosion or rot.
- Test chairs by sitting carefully and listening for suspicious creaks.
- Inspect cushions for mildew, odors, broken zippers, and collapsed foam.
- Decide whether each piece needs cleaning, repair, repainting, refinishing, or replacement.
Step 2: Clean Everything Like You Mean It
Paint and stain do not stick well to dirt, mildew, grease, pollen, sunscreen residue, or last summer’s barbecue memories. Cleaning is the unglamorous foundation of a successful patio furniture makeover. Skip it, and even the best paint may peel like a bad sunburn.
For most outdoor furniture, start with a dry brush or vacuum to remove loose dust and debris. Then wash surfaces with mild dish soap and warm water using a sponge, soft cloth, or soft-bristle brush. Rinse thoroughly and allow every piece to dry completely. “Mostly dry” is not dry. Moisture trapped under paint or sealer can cause bubbling, poor adhesion, or mildew.
Avoid harsh cleaners unless the material specifically allows them. Abrasive pads can scratch plastic and coated metal. Pressure washers can damage wood grain, loosen wicker, and drive water deep into cushions. Use gentle pressure first. Your furniture needs a spa day, not an interrogation.
Step 3: Refresh Metal Patio Furniture
Metal patio furniture is a makeover favorite because a fresh coat of paint can dramatically change its personality. A black wrought iron set can become crisp white, deep green, terracotta, navy, or cheerful yellow. Aluminum frames can look modern again with a clean finish. Steel and iron pieces need extra rust control, but they can still be saved if the damage is not severe.
How to Make Over Metal Furniture
Start by removing loose paint and rust with a wire brush, scraper, sanding block, or flexible sanding pad. Focus on rough spots, edges, joints, and any place where water collects. Wipe away dust with a clean rag. For stubborn grime, use a suitable cleaner and let the metal dry fully.
Next, apply a rust-inhibiting primer if the furniture is steel, iron, or visibly rusty. Primer helps paint bond and slows future corrosion. Use light, even coats rather than one thick, drippy layer. Spray paint works well for curved frames, decorative details, and hard-to-reach areas. Hold the can at a steady distance and use smooth overlapping passes. If you are painting in direct sun, heavy wind, high humidity, or extreme heat, the finish may not cure correctly. In other words, choose a calm day, not a dramatic weather moment.
After the paint cures, consider a clear outdoor sealer for added protection, especially on high-touch areas like chair arms and table edges. A UV-resistant clear coat can help reduce fading and protect your color investment. Let each coat dry according to product directions before using the furniture. Sitting too soon is how people accidentally tattoo their shorts with semi-cured paint.
Step 4: Revive Wood Patio Furniture
Wood furniture brings warmth and natural beauty to a patio, but it needs protection from moisture, sunlight, and temperature changes. Teak, cedar, eucalyptus, and acacia are popular outdoor woods, but even durable species benefit from cleaning and periodic finishing.
If your wood furniture looks gray but feels solid, it may simply need cleaning and refinishing. Wash it gently, let it dry, then sand rough areas. Use progressively finer sandpaper if the surface is uneven. For a natural look, apply an exterior wood oil, water-repellent sealer, or UV-resistant outdoor finish. For a bolder makeover, use exterior paint or an outdoor-rated stain.
Paint, Stain, or Seal?
Paint gives the biggest visual transformation and can hide mismatched repairs. It is ideal when you want a coastal white bench, a green garden table, or a dramatic black dining set. Stain enhances wood grain while adding color, making it a strong choice for furniture that still has attractive natural texture. Clear sealers and spar urethane protect while keeping the wood look visible.
For outdoor wood, always choose products designed for exterior exposure. Outdoor finishes typically handle moisture, UV rays, and seasonal expansion better than interior finishes. Apply thin coats, allow proper drying time, and sand lightly between coats when recommended. The goal is a smooth, protective surface, not a sticky wooden pancake.
Step 5: Rescue Wicker and Rattan Furniture
Wicker is not a material; it is a weaving technique. Outdoor wicker may be natural rattan, bamboo, reed, willow, or synthetic resin. That matters because natural wicker is more sensitive to moisture, while resin wicker is generally easier to clean and more weather-resistant.
Begin by vacuuming or brushing dirt from the weave. Use a toothbrush, small detailing brush, or compressed air to reach tight crevices. Wash gently with mild soapy water and avoid soaking natural wicker. Let it dry completely in a shaded, airy place. For synthetic wicker, rinsing with a hose is often fine, but always check the furniture’s care instructions.
If the color is faded, spray paint can create a beautiful update. Use light coats from multiple angles so paint reaches the woven texture without clogging the pattern. A primer may improve adhesion, especially on slick surfaces. Finish with an outdoor sealer if the paint product requires it. Antique or valuable wicker should be treated carefully; painting may reduce its value. For everyday patio wicker, though, a good refresh can make it look charming again instead of “forgotten porch ghost.”
Step 6: Upgrade Cushions Without Replacing Everything
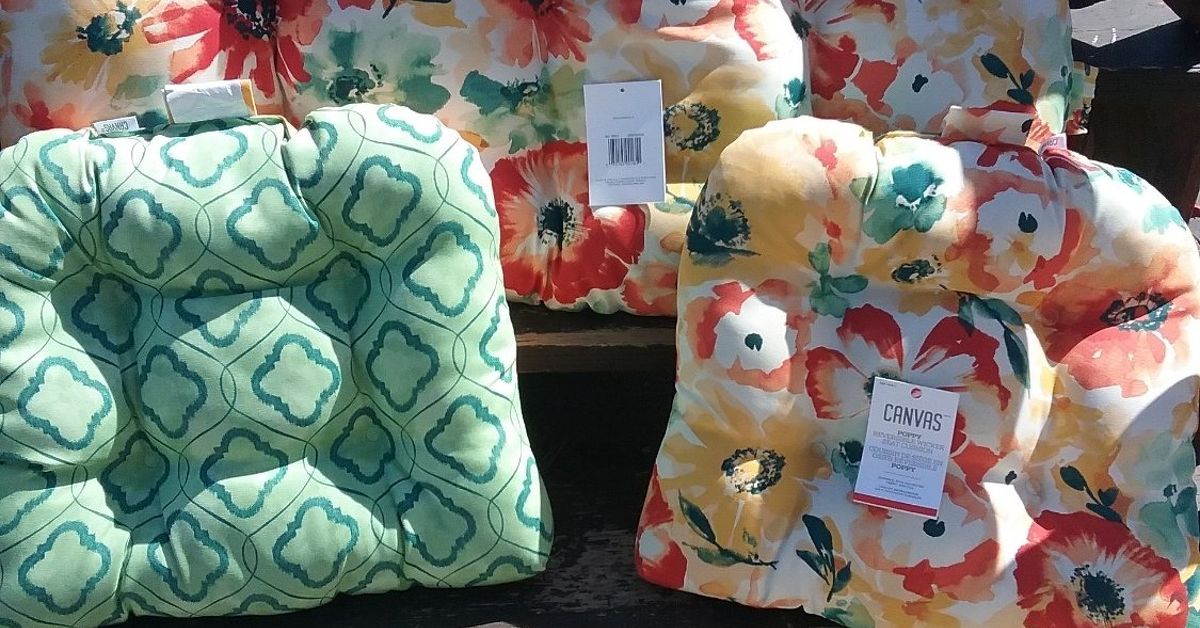
Cushions can make or break a patio furniture makeover. A newly painted chair with sad cushions still looks sad, just with better posture. Start by cleaning cushions thoroughly. Brush off loose debris, vacuum seams, and spot-clean stains with mild soap and water. Removable covers may be machine washable, but always follow the care label. Air-dry cushions completely before putting them back. Damp cushions are basically a welcome mat for mildew.
If cushions are structurally fine but faded, consider outdoor slipcovers, fabric paint, or new covers made from weather-resistant fabric. Solution-dyed acrylic, olefin, polyester blends, and other outdoor-rated fabrics are common choices because they resist fading, moisture, and mildew better than indoor fabrics. For cushions that have lost support, replacement foam or new inserts can be more cost-effective than buying a whole new patio set.
How to Choose Outdoor Cushion Colors
For a timeless look, pair neutral frames with cushions in navy, beige, charcoal, sage, rust, or deep green. For a cheerful patio, try striped pillows, patterned seat cushions, or a bright accent color. If your furniture is already bold, keep cushions calmer. If your frames are neutral, cushions can do the flirting.
Step 7: Add Style With Small Details
A patio furniture makeover is not only about paint. Styling turns restored furniture into a finished outdoor space. Add an outdoor rug to define the seating area. Use side tables so guests have somewhere to put drinks. Add planters for height and color. String lights, lanterns, or solar path lights create a soft evening glow. A market umbrella or shade sail makes the space more comfortable in hot weather.
Think in layers: furniture, textiles, lighting, plants, shade, and accessories. You do not need to buy everything at once. Even one rug, two pillows, and a potted plant can make the area feel intentional. The patio should look like you meant to design it, not like furniture gathered there during a storm.
Budget-Friendly Patio Furniture Makeover Ideas
You can refresh a patio on almost any budget. A basic clean-and-style project may cost very little if you already own soap, brushes, and a few accessories. Spray paint, primer, and sandpaper are affordable compared with replacing furniture. New cushions cost more, but they can still be cheaper than a full set. For the biggest savings, replace only what is truly worn out.
Low-Cost Ideas That Make a Big Difference
- Spray paint metal chairs in a modern matte or satin finish.
- Sand and seal a wood table instead of replacing it.
- Add outdoor pillow covers in a coordinated color palette.
- Use an outdoor rug to hide a dull patio floor and unify the furniture.
- Replace rusty screws, bolts, and foot caps for a cleaner look.
- Paint mismatched chairs the same color to create a collected-but-cohesive set.
- Use planters, lanterns, and side tables to make the space feel complete.
Common Patio Furniture Makeover Mistakes
The biggest mistake is painting too quickly. If the furniture is dirty, damp, rusty, glossy, or poorly sanded, the finish may fail. Another common mistake is using indoor paint or fabric outdoors. Indoor products are not designed for rain, sun, temperature swings, and humidity. They may fade, peel, crack, or mildew faster than outdoor-rated options.
Do not ignore climate. A covered patio in Arizona has different needs than an uncovered deck in Florida or a coastal balcony in Maine. Humid areas need mildew-resistant fabrics and good airflow. Coastal areas need rust-resistant materials. Hot sunny patios need UV-resistant finishes and shade. Snowy regions need seasonal storage or durable covers.
Finally, avoid overdecorating. Outdoor spaces should feel relaxed. Too many pillows, too many colors, and too many tiny accessories can make a patio look cluttered. Choose a simple color scheme and repeat it. Your patio does not need to look like a showroom exploded.
Seasonal Maintenance After the Makeover
Once your patio furniture looks great, protect your work. Clean furniture regularly with mild soap and water. Touch up chips before rust spreads. Store or cover cushions during heavy rain, long wet periods, and off-season months. Use breathable covers when possible so moisture does not get trapped underneath. Tighten screws and bolts at the start of each season.
Deep clean your outdoor furniture at least twice a year: once when bringing it out for the season and again before storing or covering it. This removes dirt, pollen, mildew spores, and grime that can damage finishes over time. A few minutes of maintenance can save you from another full makeover next year. Future you will be grateful, and future you is usually very hard to impress.
of Real-Life Patio Furniture Makeover Experience
The best patio furniture makeovers usually begin with one honest thought: “This looks terrible, but maybe not terrible enough to throw away.” That is the sweet spot. One of the most practical experiences with outdoor furniture restoration is learning that preparation matters more than the fun part. Everyone wants to jump straight to the beautiful paint color. Nobody dreams about scrubbing chair legs with soapy water. But the cleaning, sanding, drying, and priming are what separate a makeover that lasts from one that starts peeling before the first burger hits the grill.
A common experience is underestimating how much grime outdoor furniture collects. Metal chairs may look only slightly dusty until you wipe them and discover a full season of pollen, sunscreen, smoke, and rain residue. Wood tables often hide dirt in cracks and around screw holes. Wicker furniture can hold debris deep in the weave, so a quick wipe is not enough. A small detailing brush can become the hero of the entire project. It is not glamorous, but neither is watching paint stick to dirt instead of furniture.
Another lesson is that color looks different outside. A shade that seems subtle in the store can become extremely loud in direct sunlight. A safe gray may look cold on a shaded patio. Black can look elegant, but it may get hot in full sun. White feels fresh but shows dirt more quickly. Earthy greens, warm taupes, muted blues, terracotta, and charcoal often work well because they connect with plants, stone, decking, and exterior siding. Testing a small area first is worth the effort. It prevents the classic “I accidentally painted my chairs traffic-cone orange” situation.
Cushions are another makeover reality check. Sometimes they clean up beautifully. Other times they look clean but still smell like a damp basement wearing perfume. If foam stays musty after cleaning and drying, replacement is often the better choice. New cushion covers can transform a furniture set faster than paint, especially when the frames are still in good condition. Measuring carefully is essential. Seat depth, back height, cushion thickness, and tie placement all matter. Guessing cushion sizes online is a bold sport, but not one that usually ends well.
One of the most satisfying makeover strategies is mixing old and new. Keep the sturdy frames, repaint the table, replace the cushions, add a rug, and bring in two planters. Suddenly the whole patio looks designed. It is also helpful to work in zones. Finish the dining set first, then the lounge chairs, then accessories. Trying to redo every outdoor item at once can turn the backyard into a furniture hospital.
The final experience worth remembering is patience. Let paint cure. Let wood finishes dry. Let cushions air out completely. Outdoor furniture lives in rough conditions, so it needs a strong start. A patio furniture makeover is not just a cosmetic project; it is a small act of home improvement optimism. You are saying, “Yes, this rusty chair still has dinner parties left in it.” And when the space is finished, cleaned, styled, and ready for a quiet morning coffee or a loud family cookout, the work feels absolutely worth it.
Conclusion
A patio furniture makeover is one of the smartest ways to refresh an outdoor space without replacing everything. With a careful inspection, deep cleaning, smart repairs, outdoor-rated paint or finish, fresh cushions, and a few styling details, old patio furniture can look new, personal, and ready for years of use. The key is matching your makeover method to the material: metal needs rust control, wood needs moisture and UV protection, wicker needs gentle cleaning, and cushions need proper fabric care and storage.
Whether you are reviving a rusty bistro set, modernizing a wood table, refreshing wicker chairs, or simply replacing faded cushions, the goal is the same: create an outdoor space that feels comfortable, stylish, and genuinely usable. Your patio does not have to be perfect. It just has to invite people to sit down, relax, and maybe compliment your excellent taste while you pretend the makeover was effortless.